Taking the ZimaCube Apart
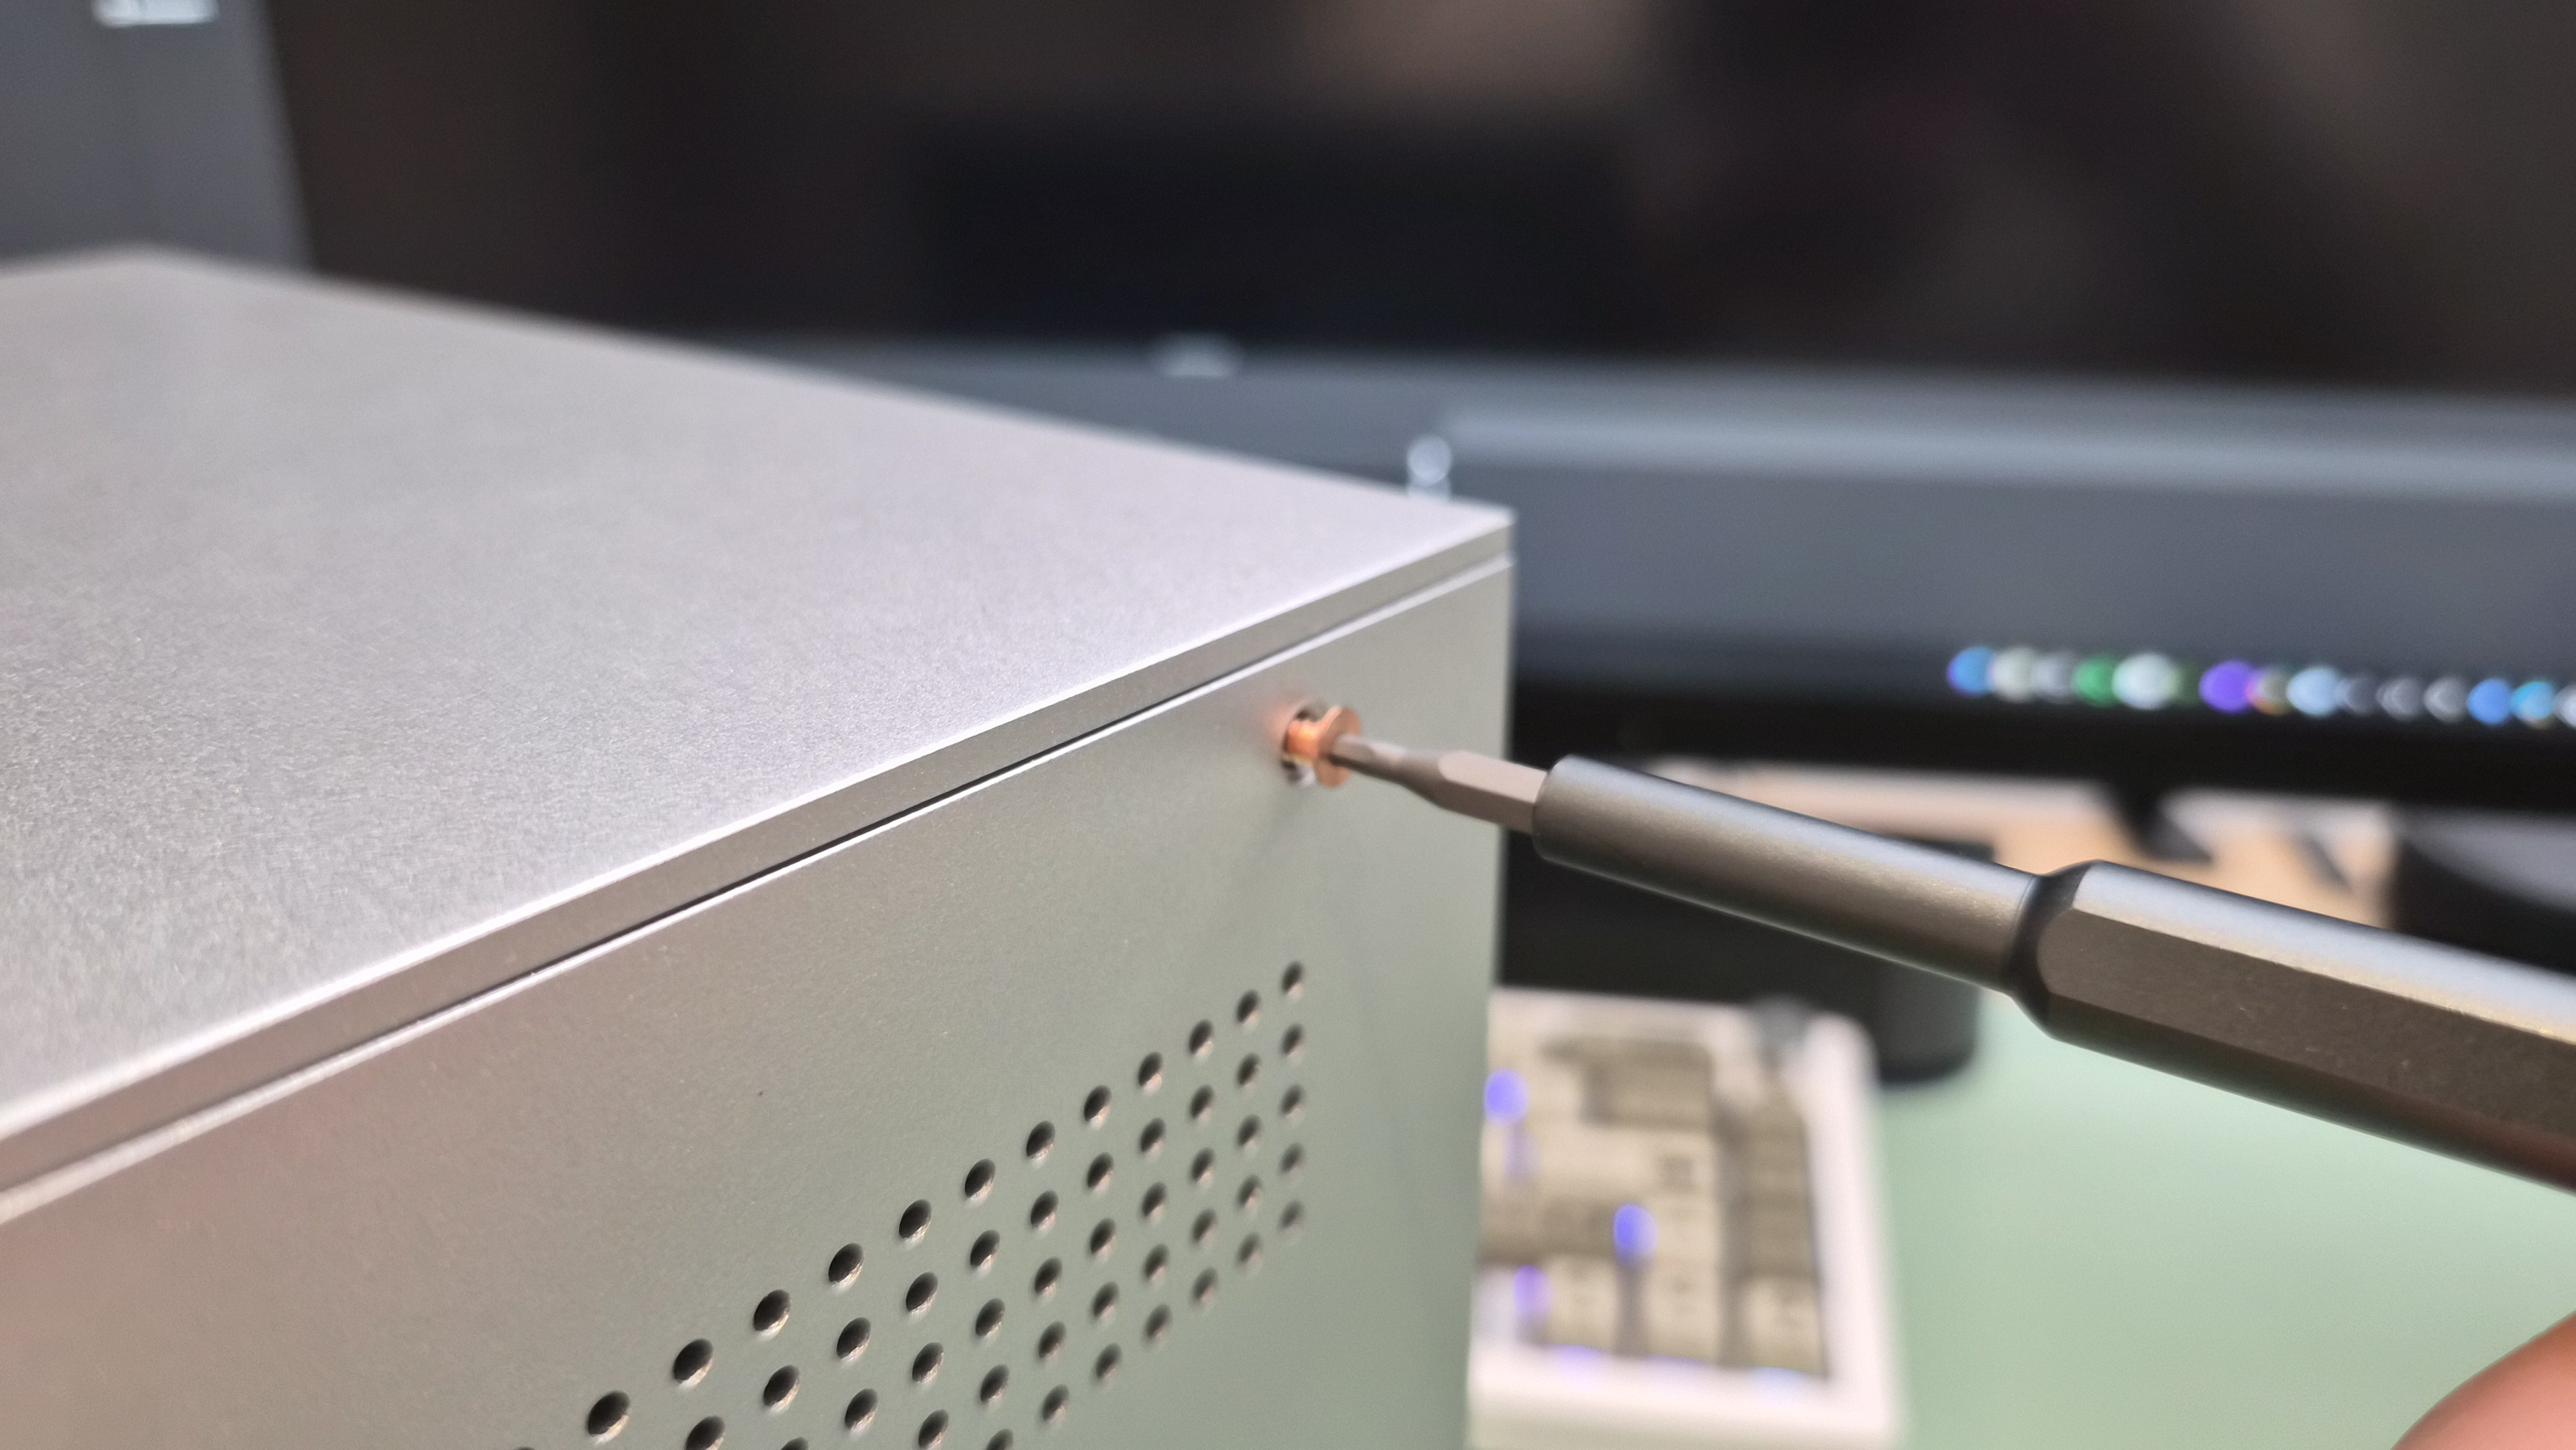
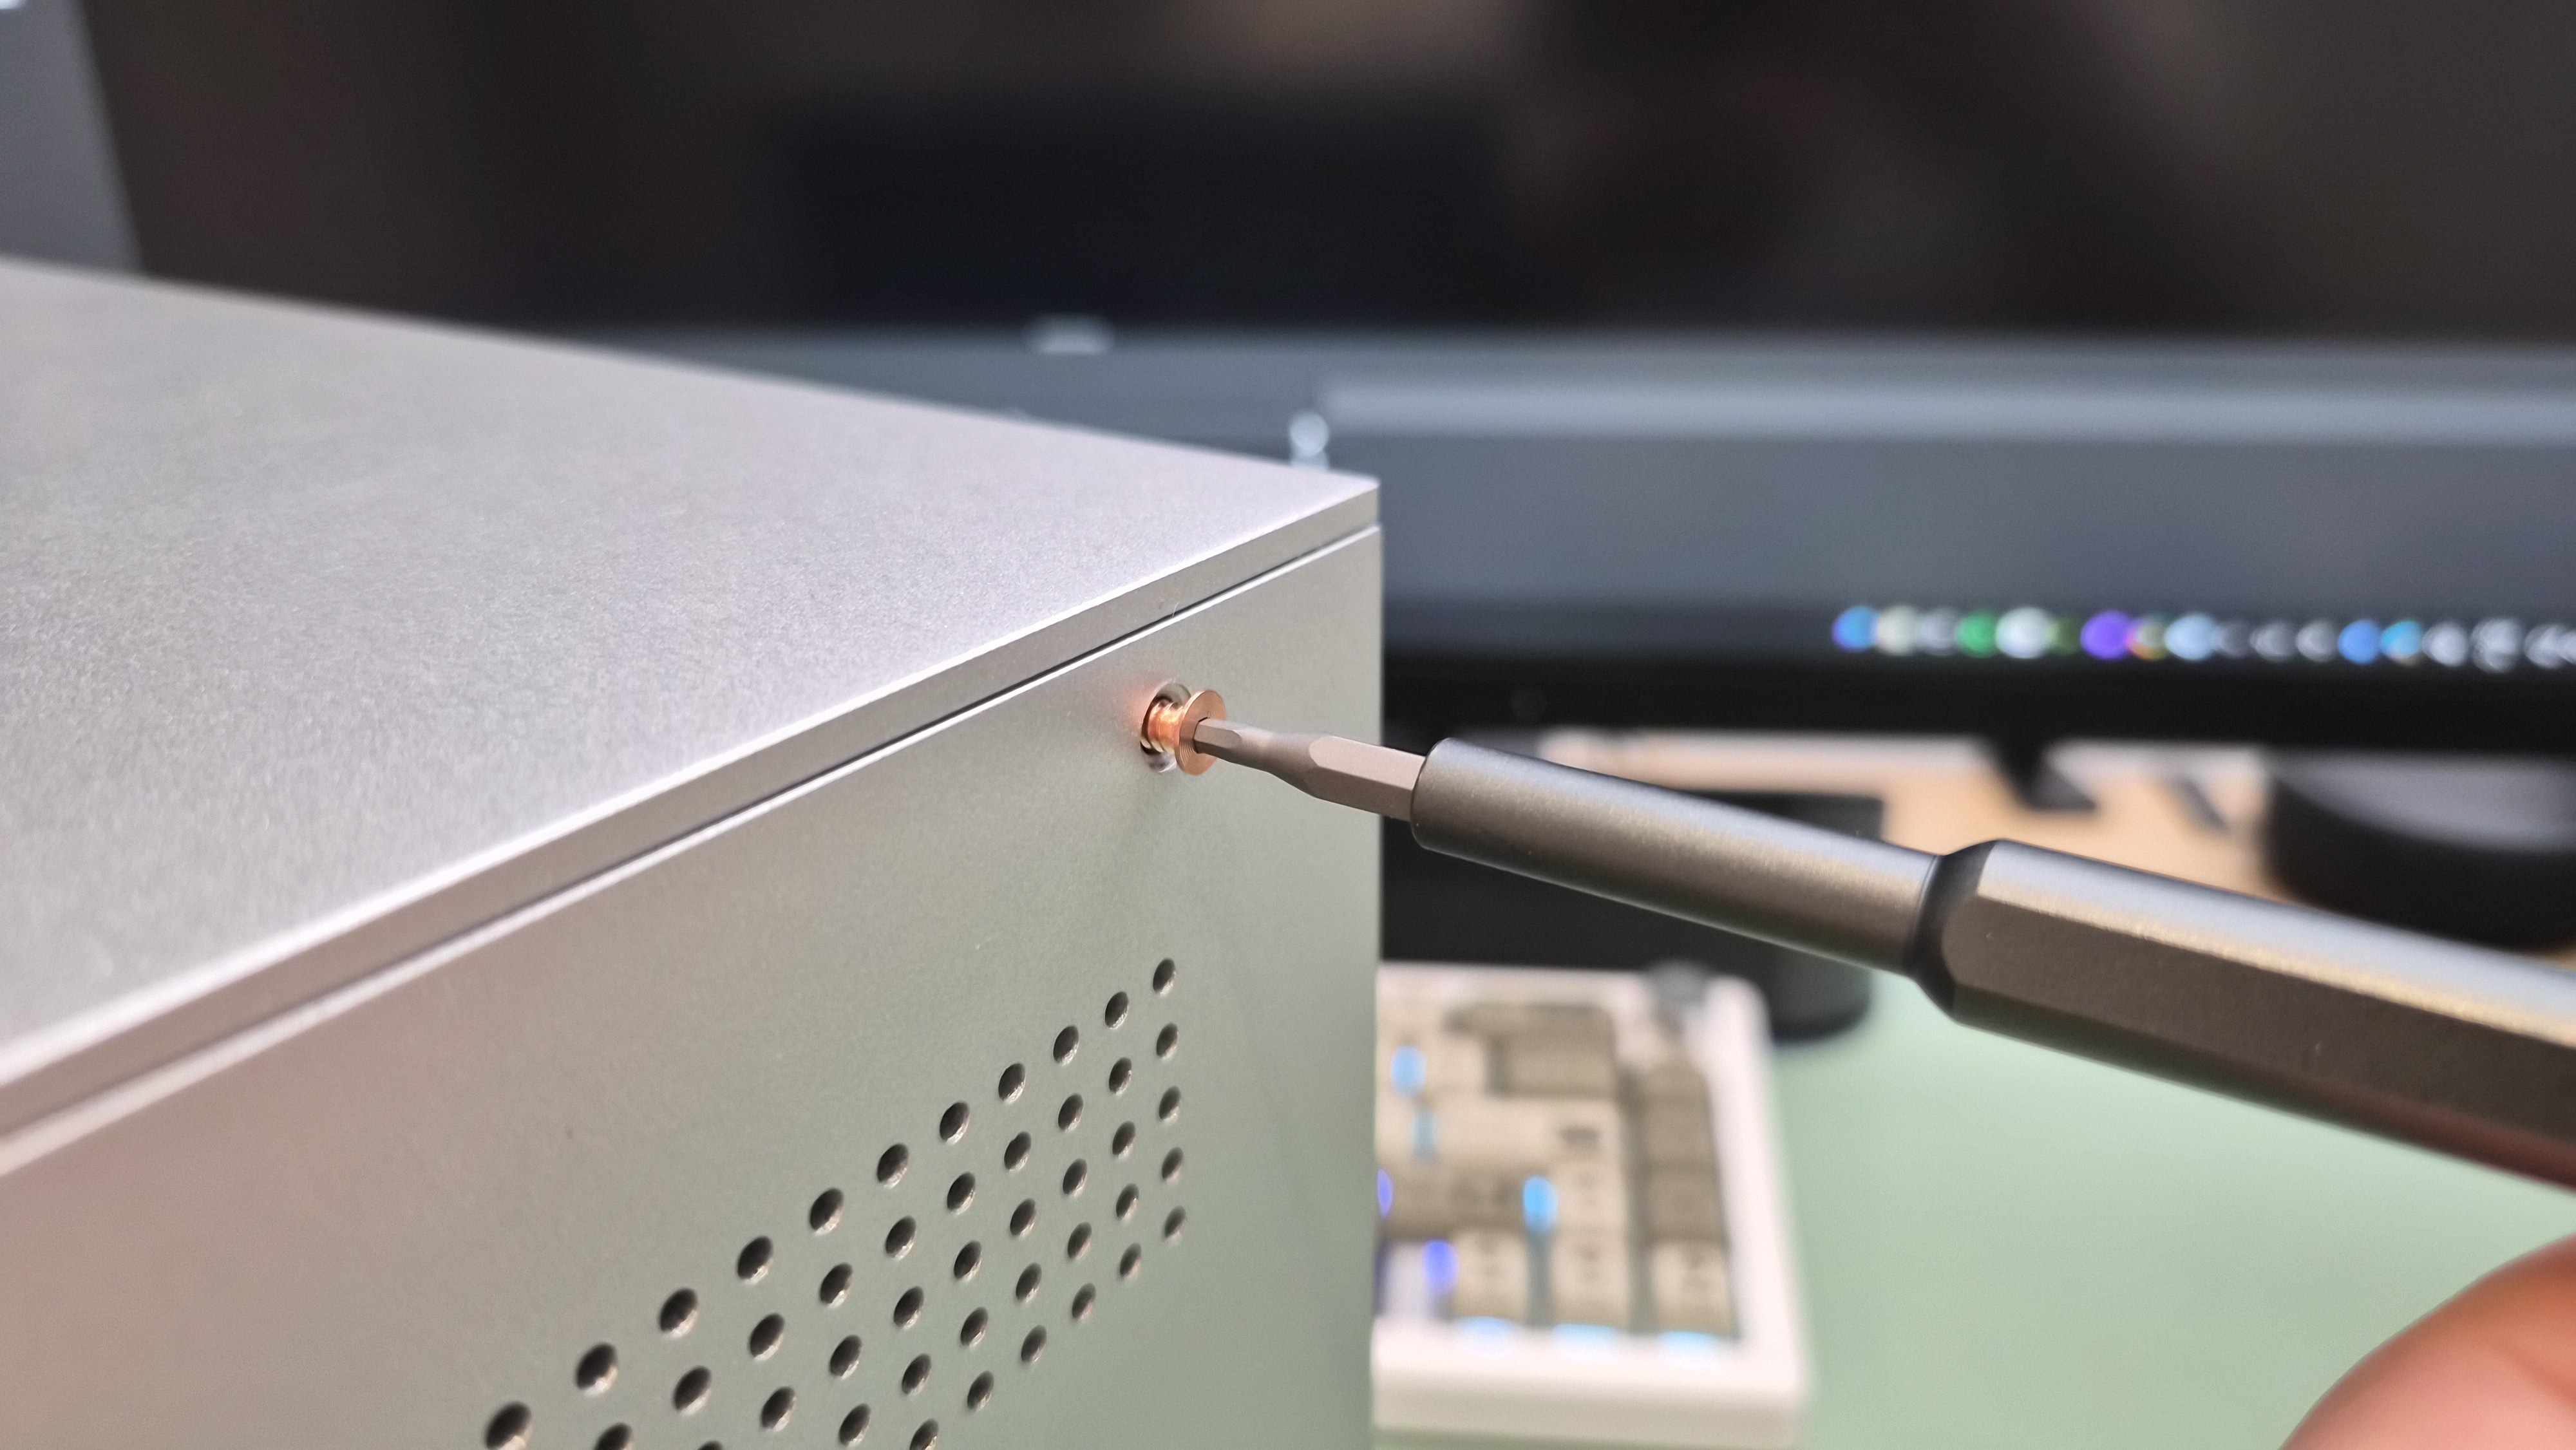
The first screw I removed was copper-coloured. That's the kind of detail that makes me pay attention. When a company bothers to anodise the screws, someone cared. Someone on the design team fought for that. I love it.
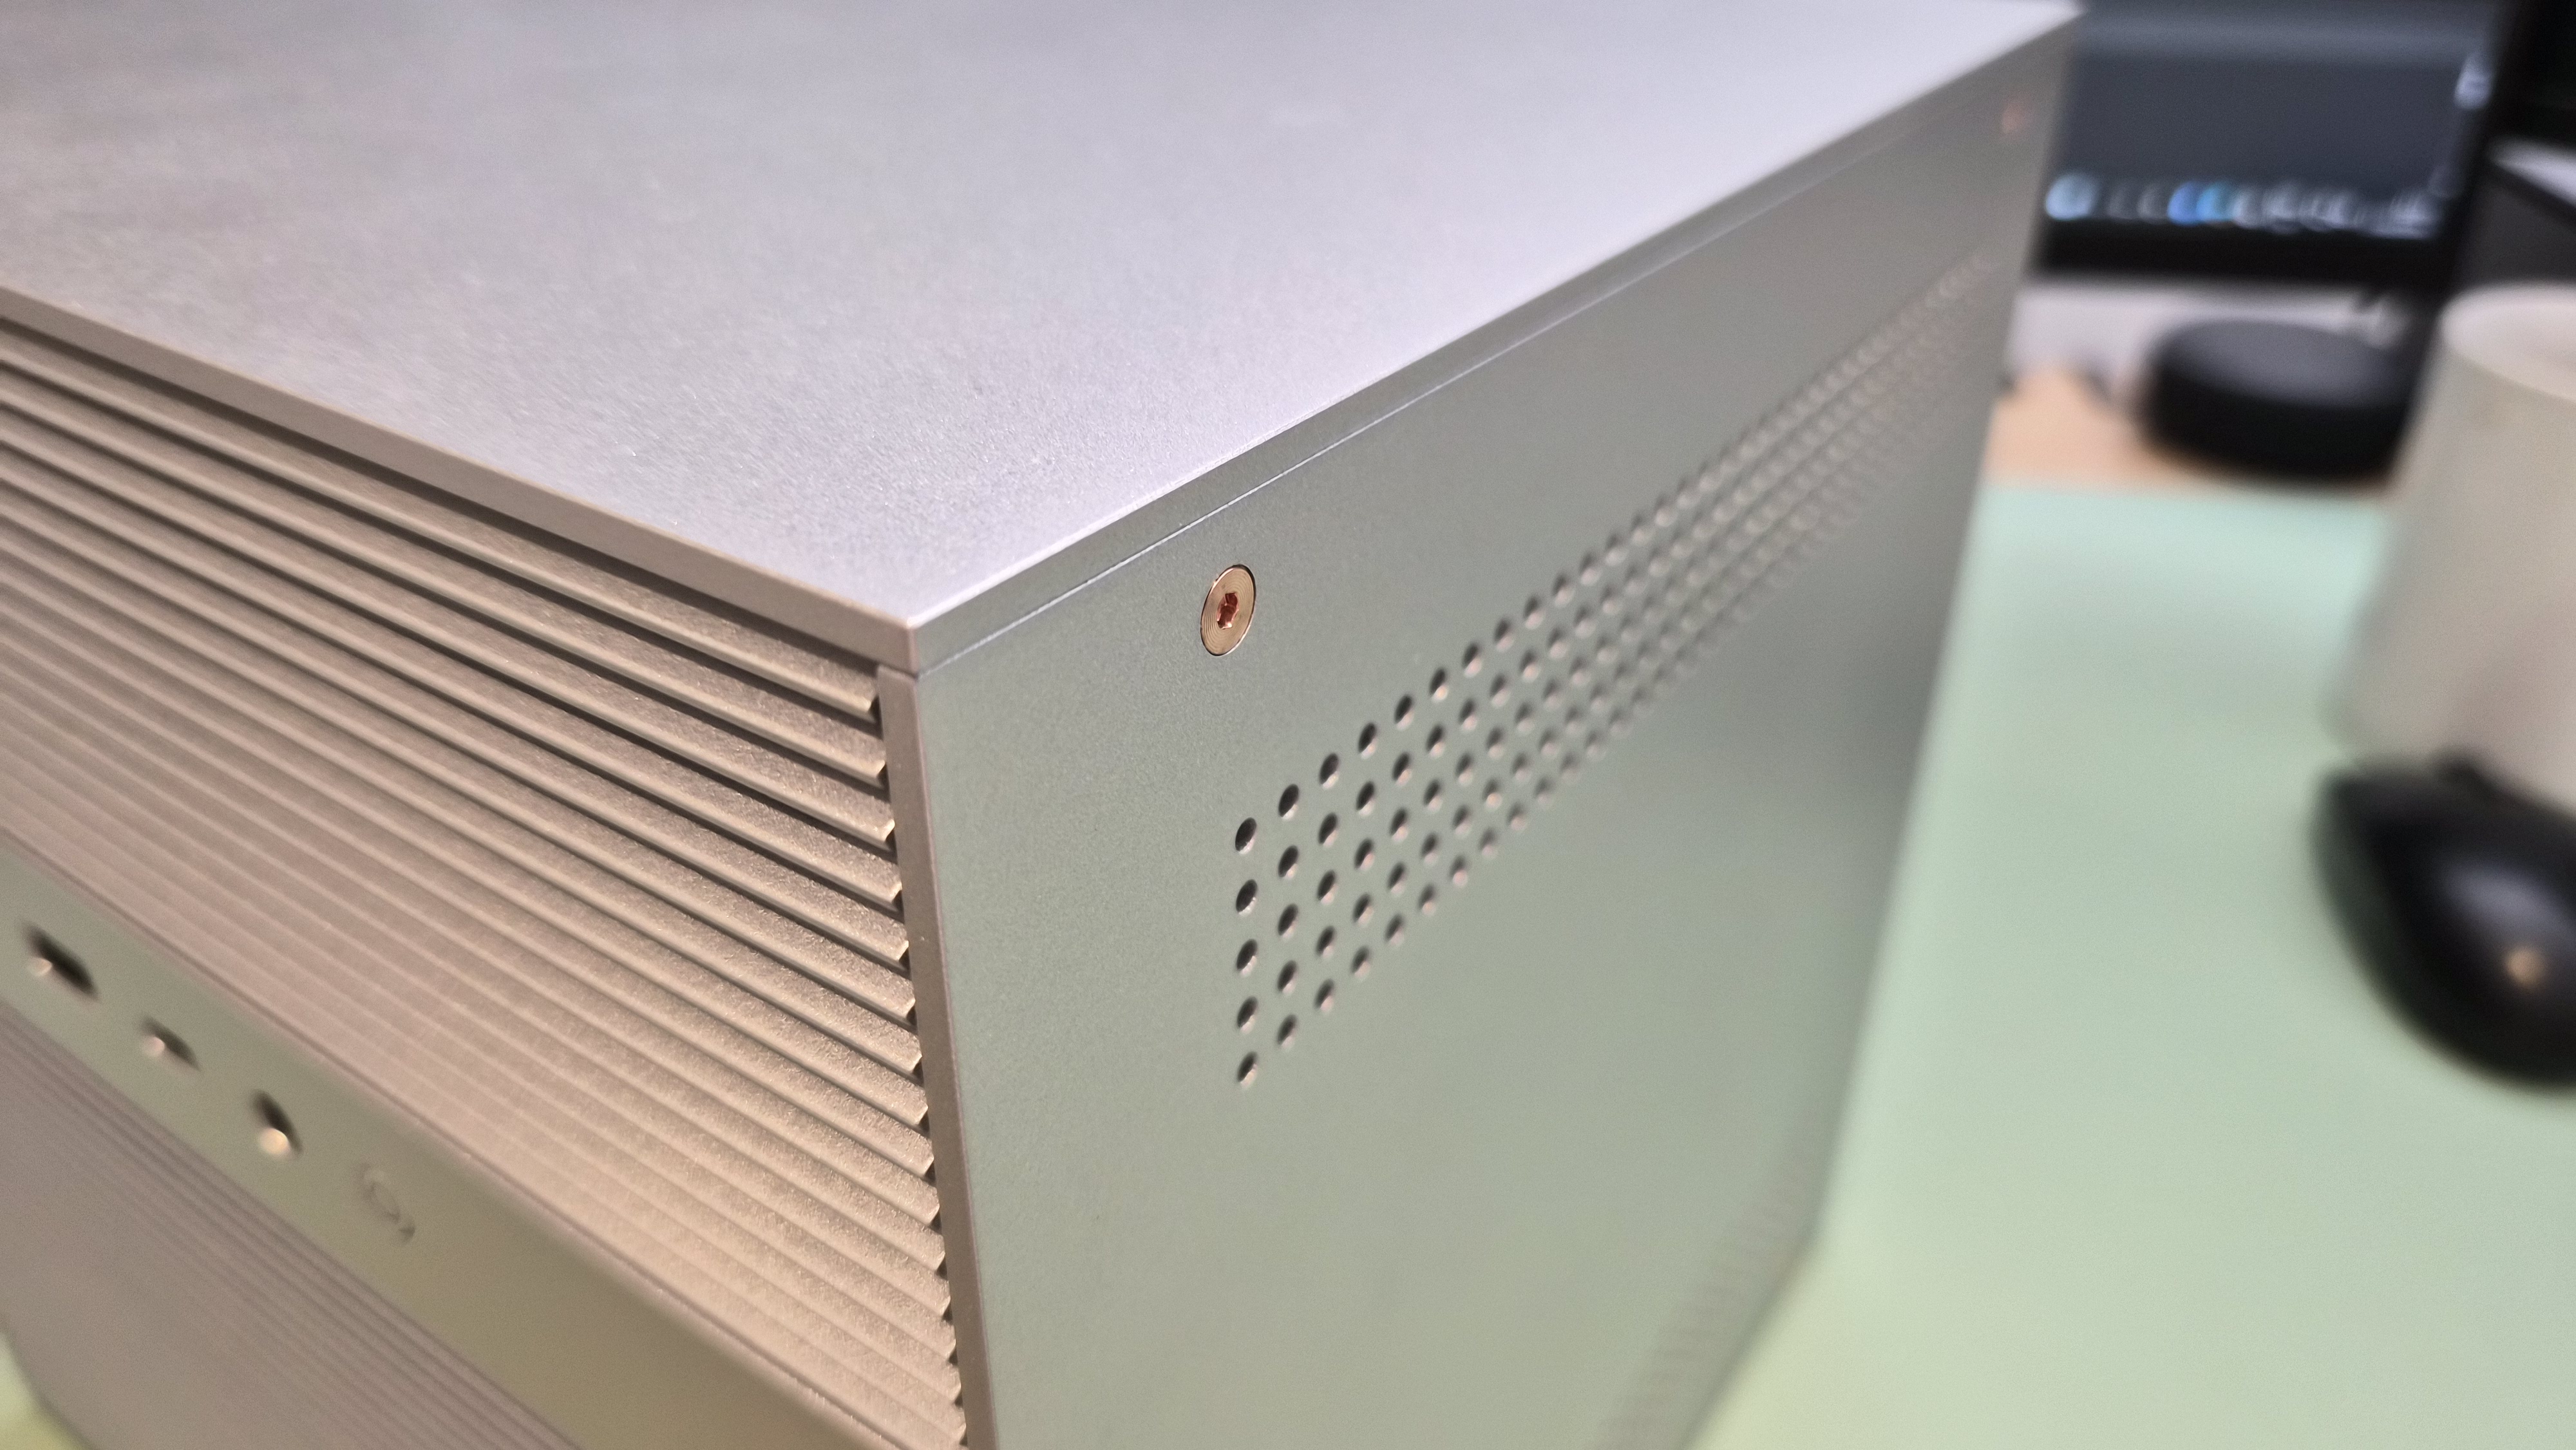
Copper screws — a small detail that says a lot about the build quality.
I opened it up because I wanted to see what I actually owned. Spec sheets are fine, but there's no substitute for getting your hands in there. What I found was a mix of thoughtful design, a few genuine surprises, and one thing that made absolutely no sense until it did.
Getting Inside
The front panel is magnetic. You pull it off with your fingers — no screws, no clips to snap, no plastic tabs that might break. It just comes away, revealing the drive bays and a clean aluminium frame underneath.
The magnetic front panel — no tools required.
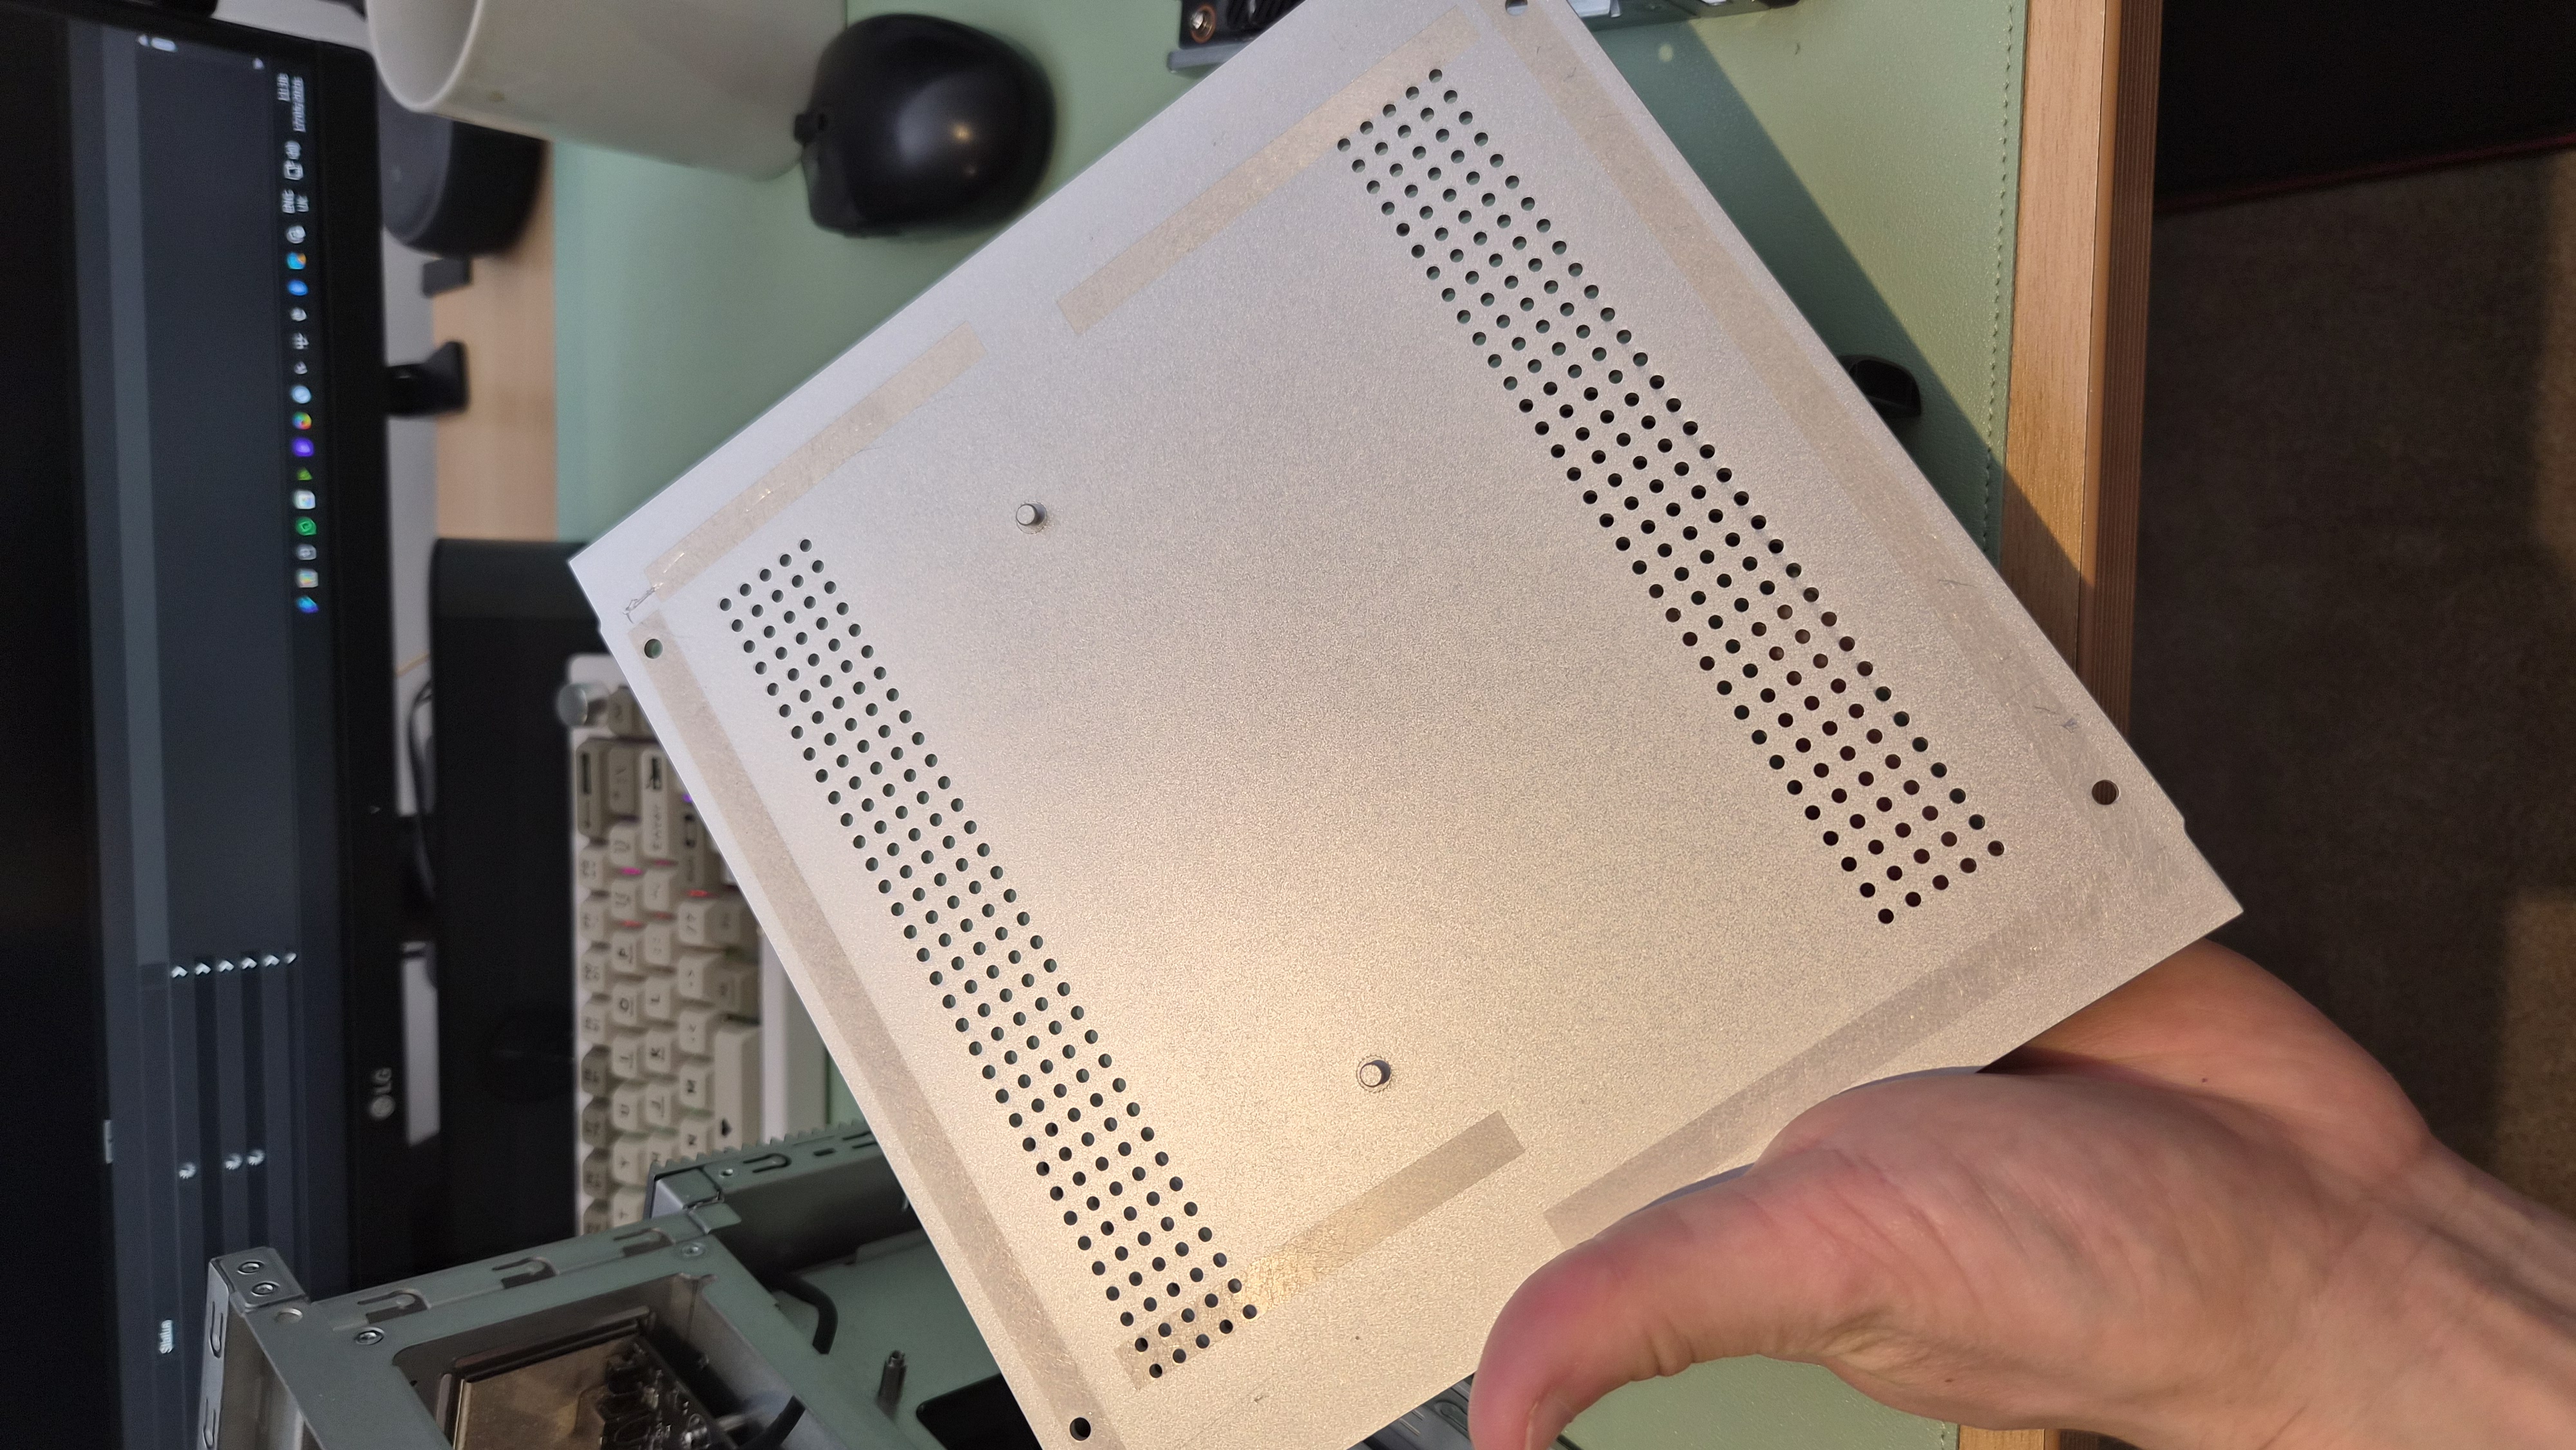
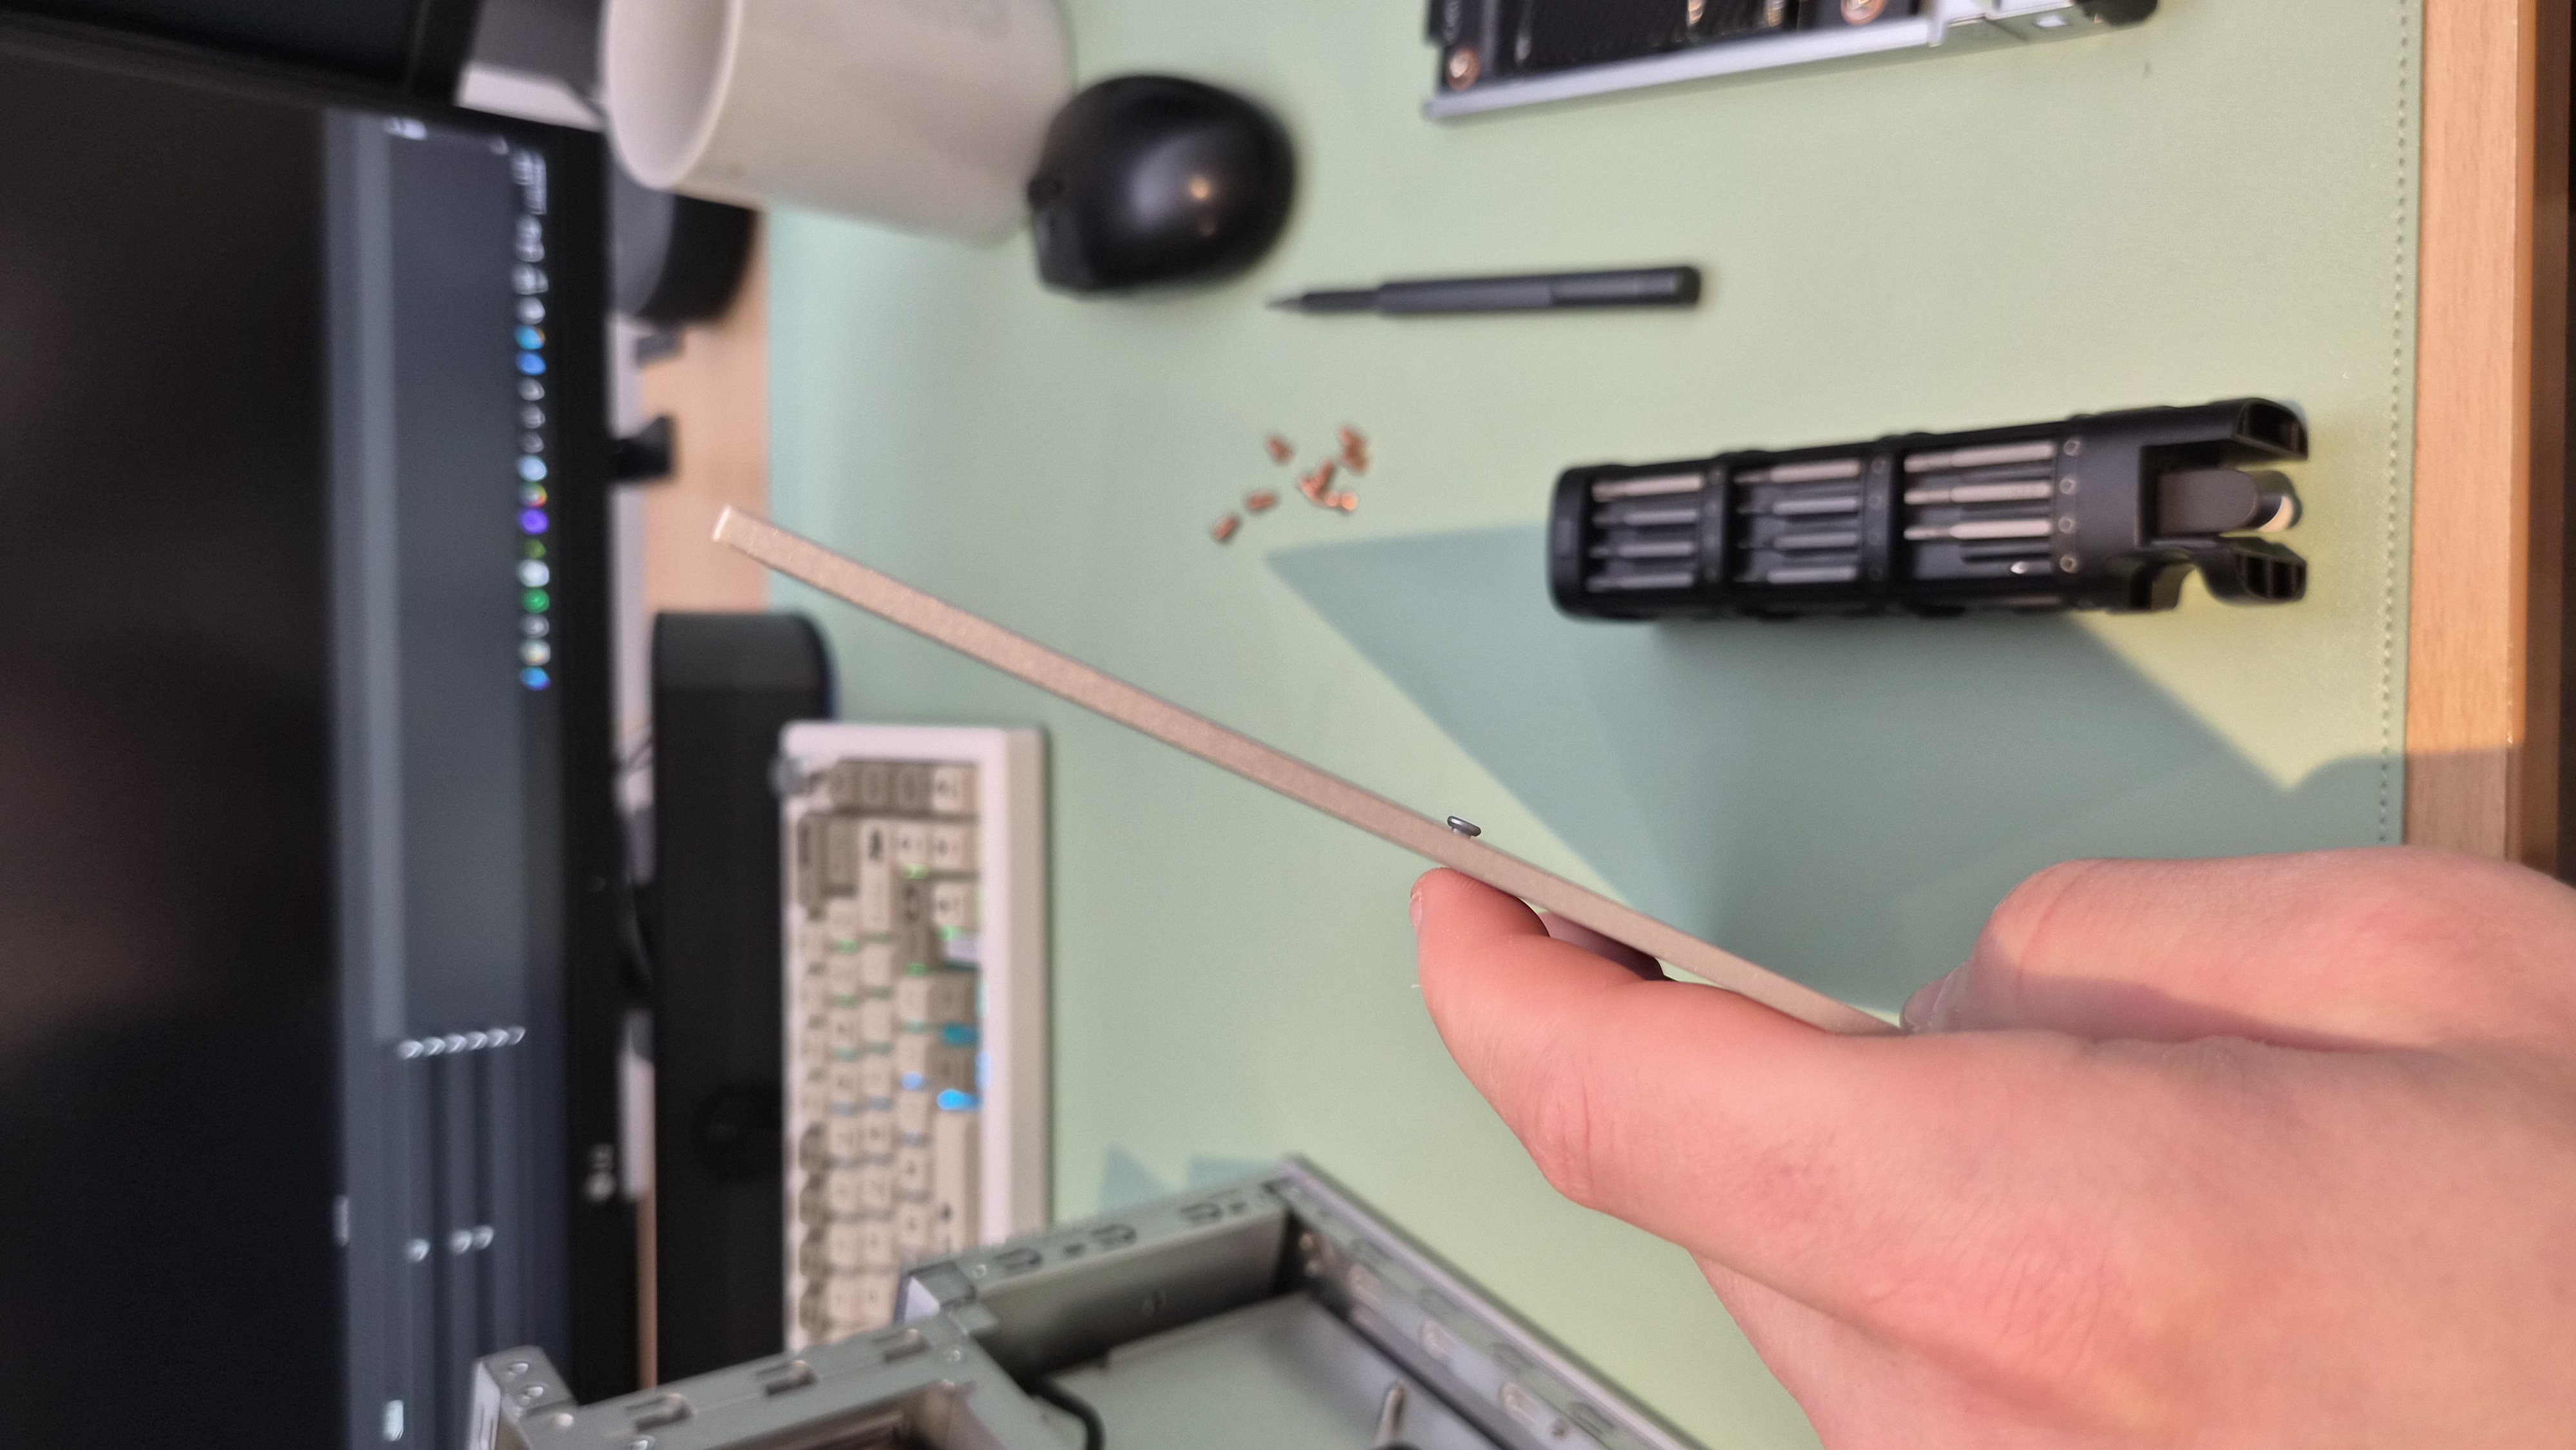
The side panels slide off too, and here's a neat trick: left and right are interchangeable. I don't know if that was intentional or just efficient manufacturing, but it means you can't put the wrong panel on the wrong side. The whole thing comes apart in under two minutes with no tools except for the copper screws holding the internal brackets.
Side panel removed. Clean access to everything.
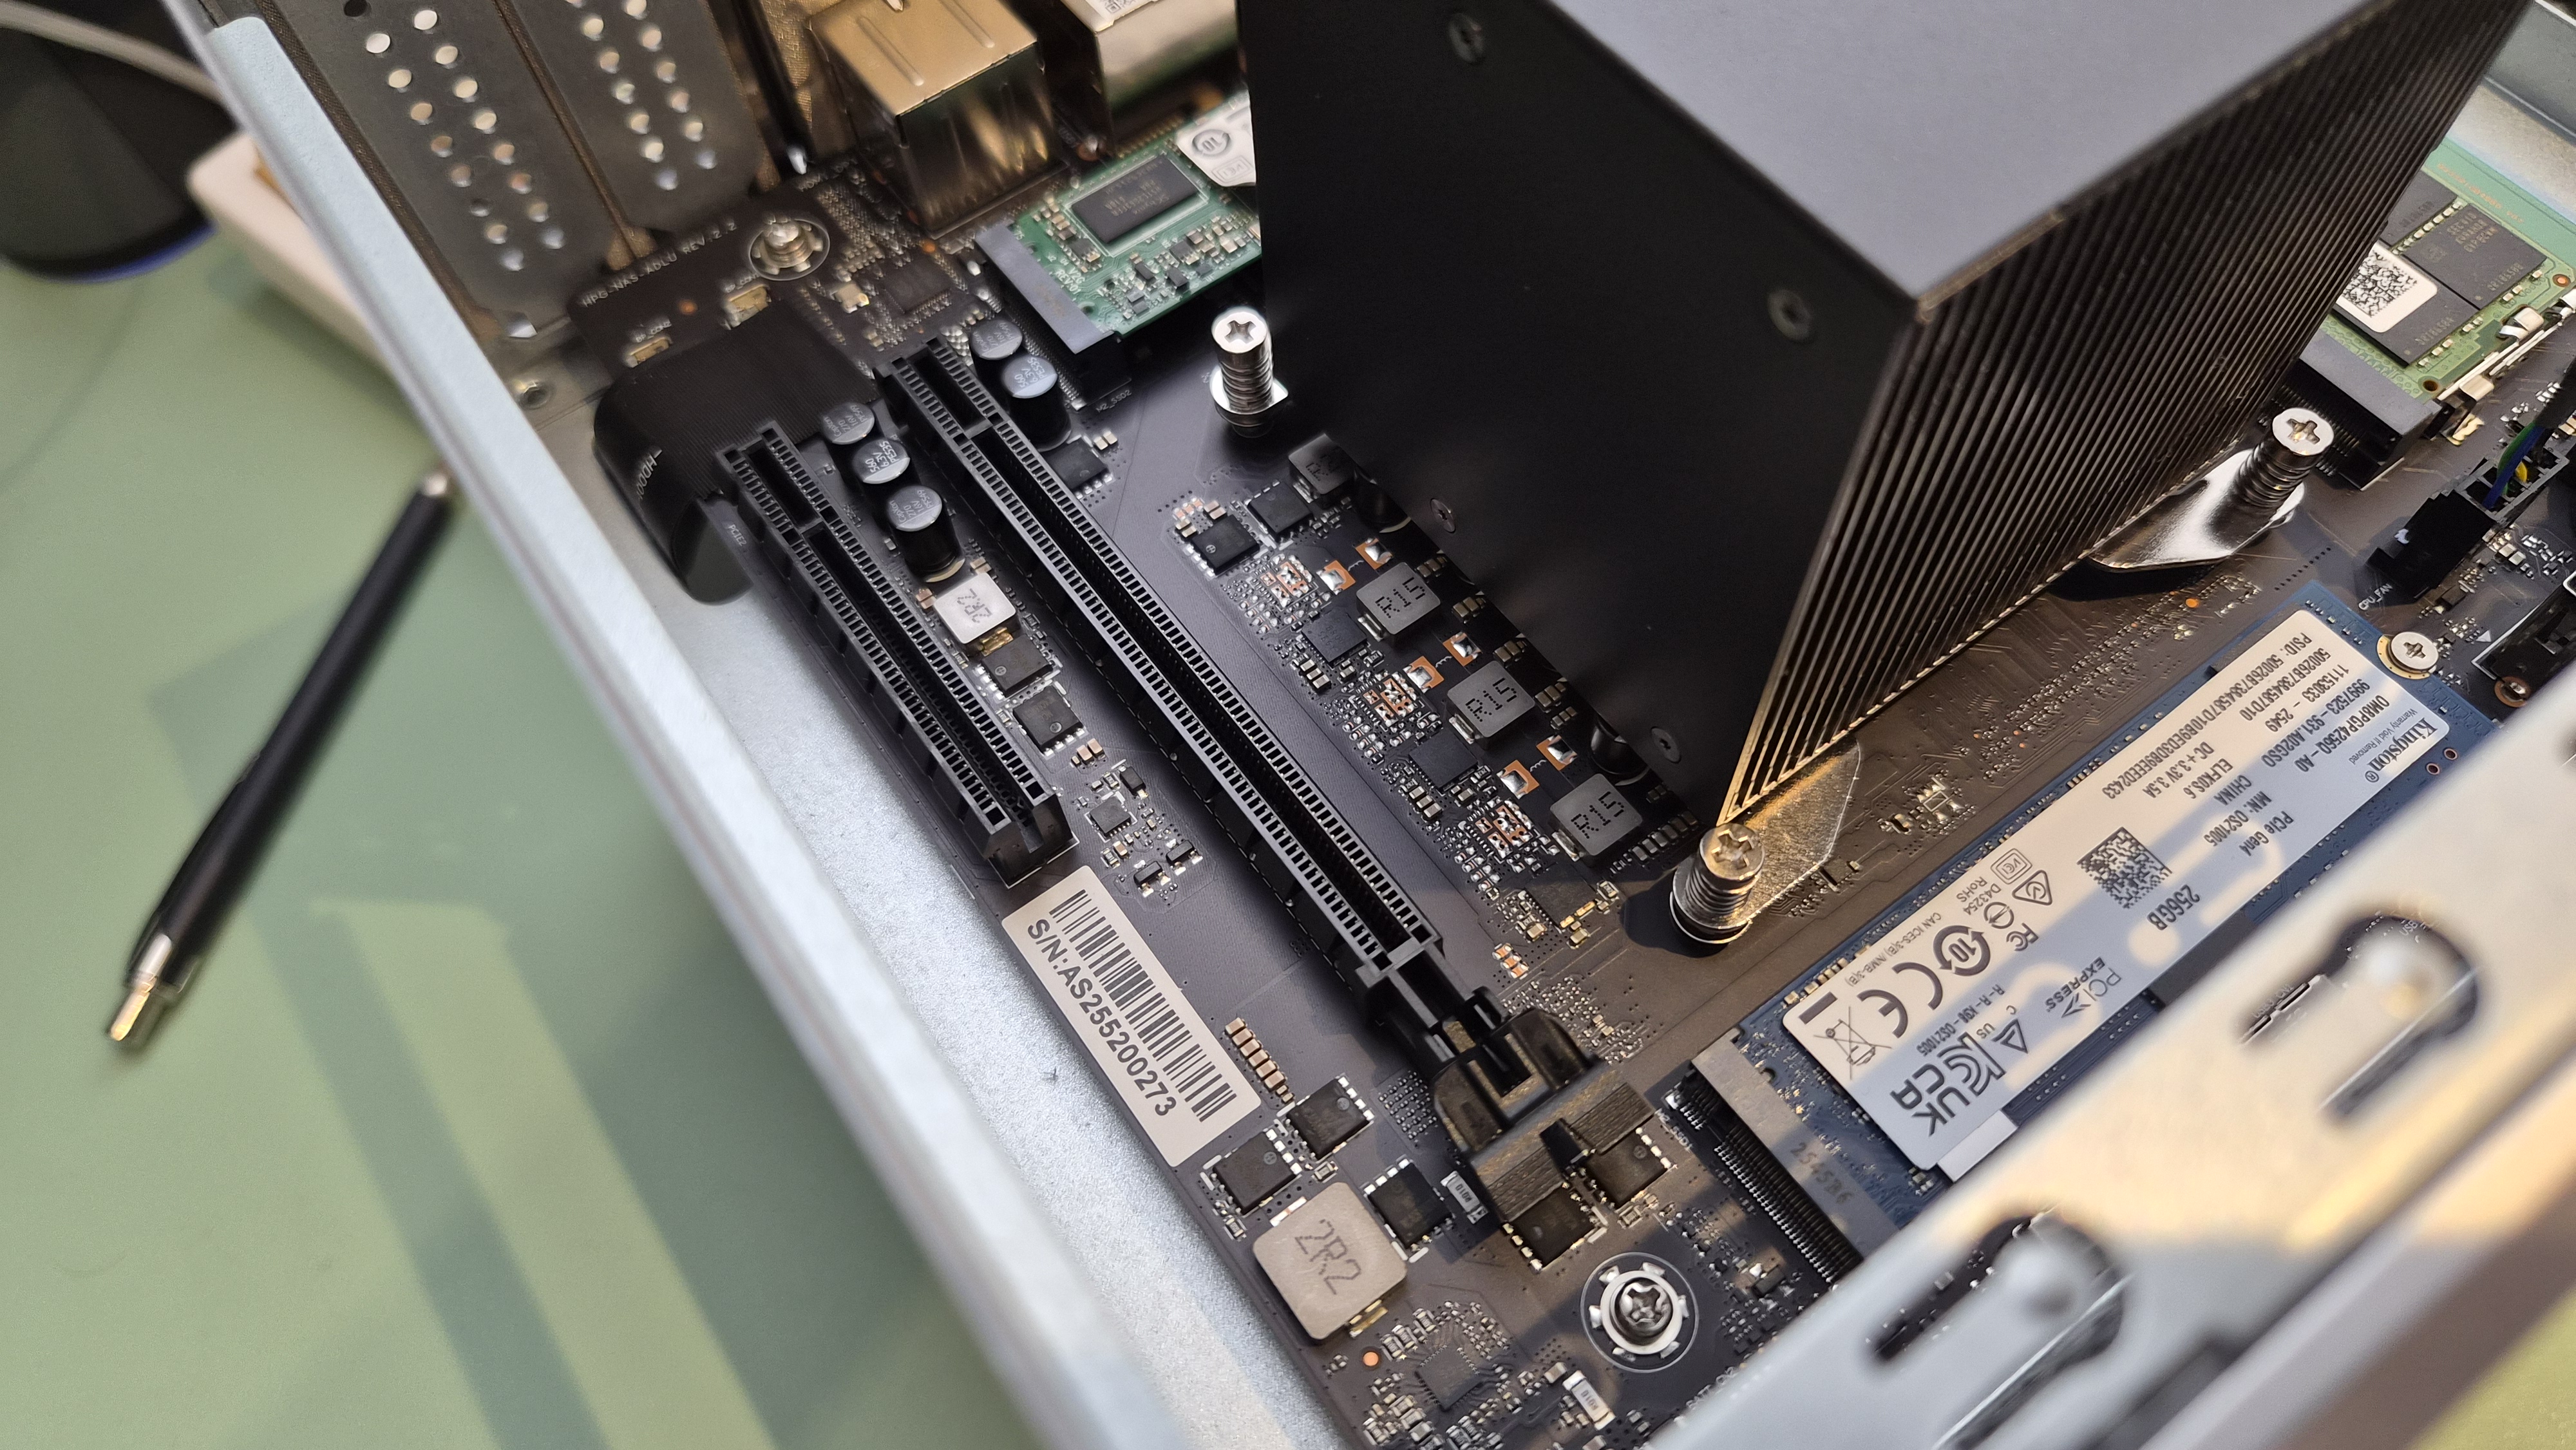
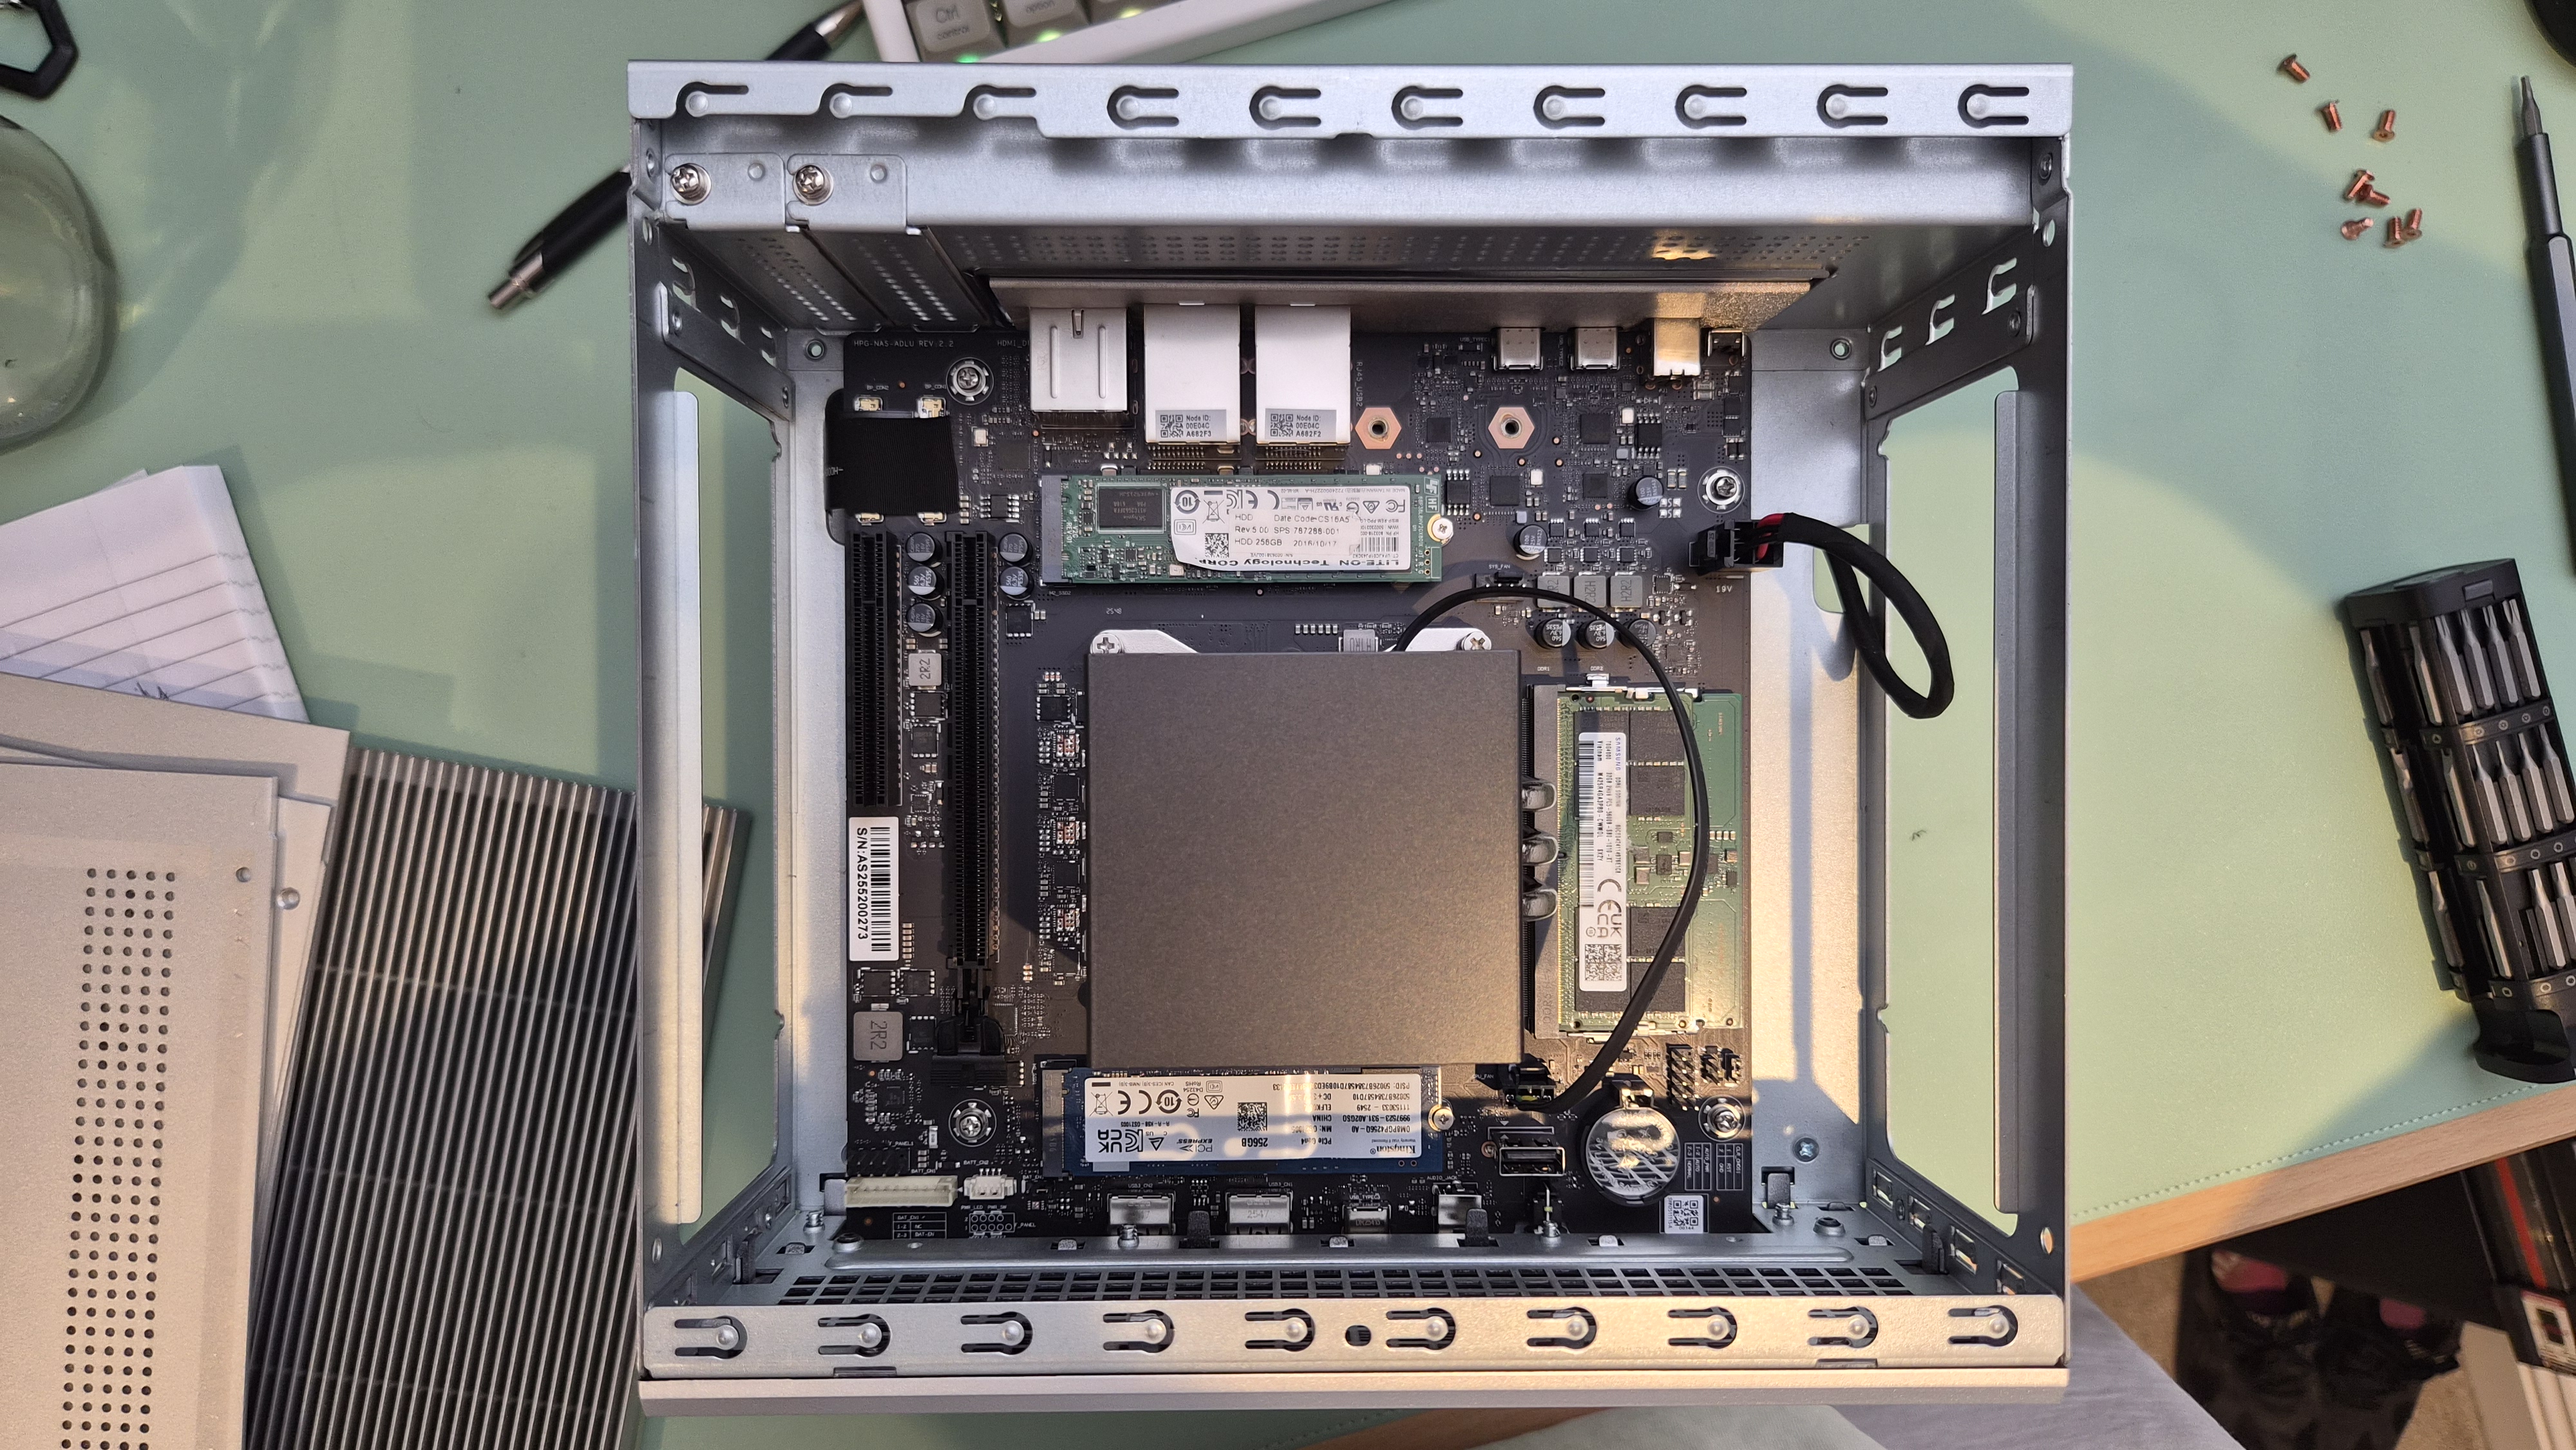
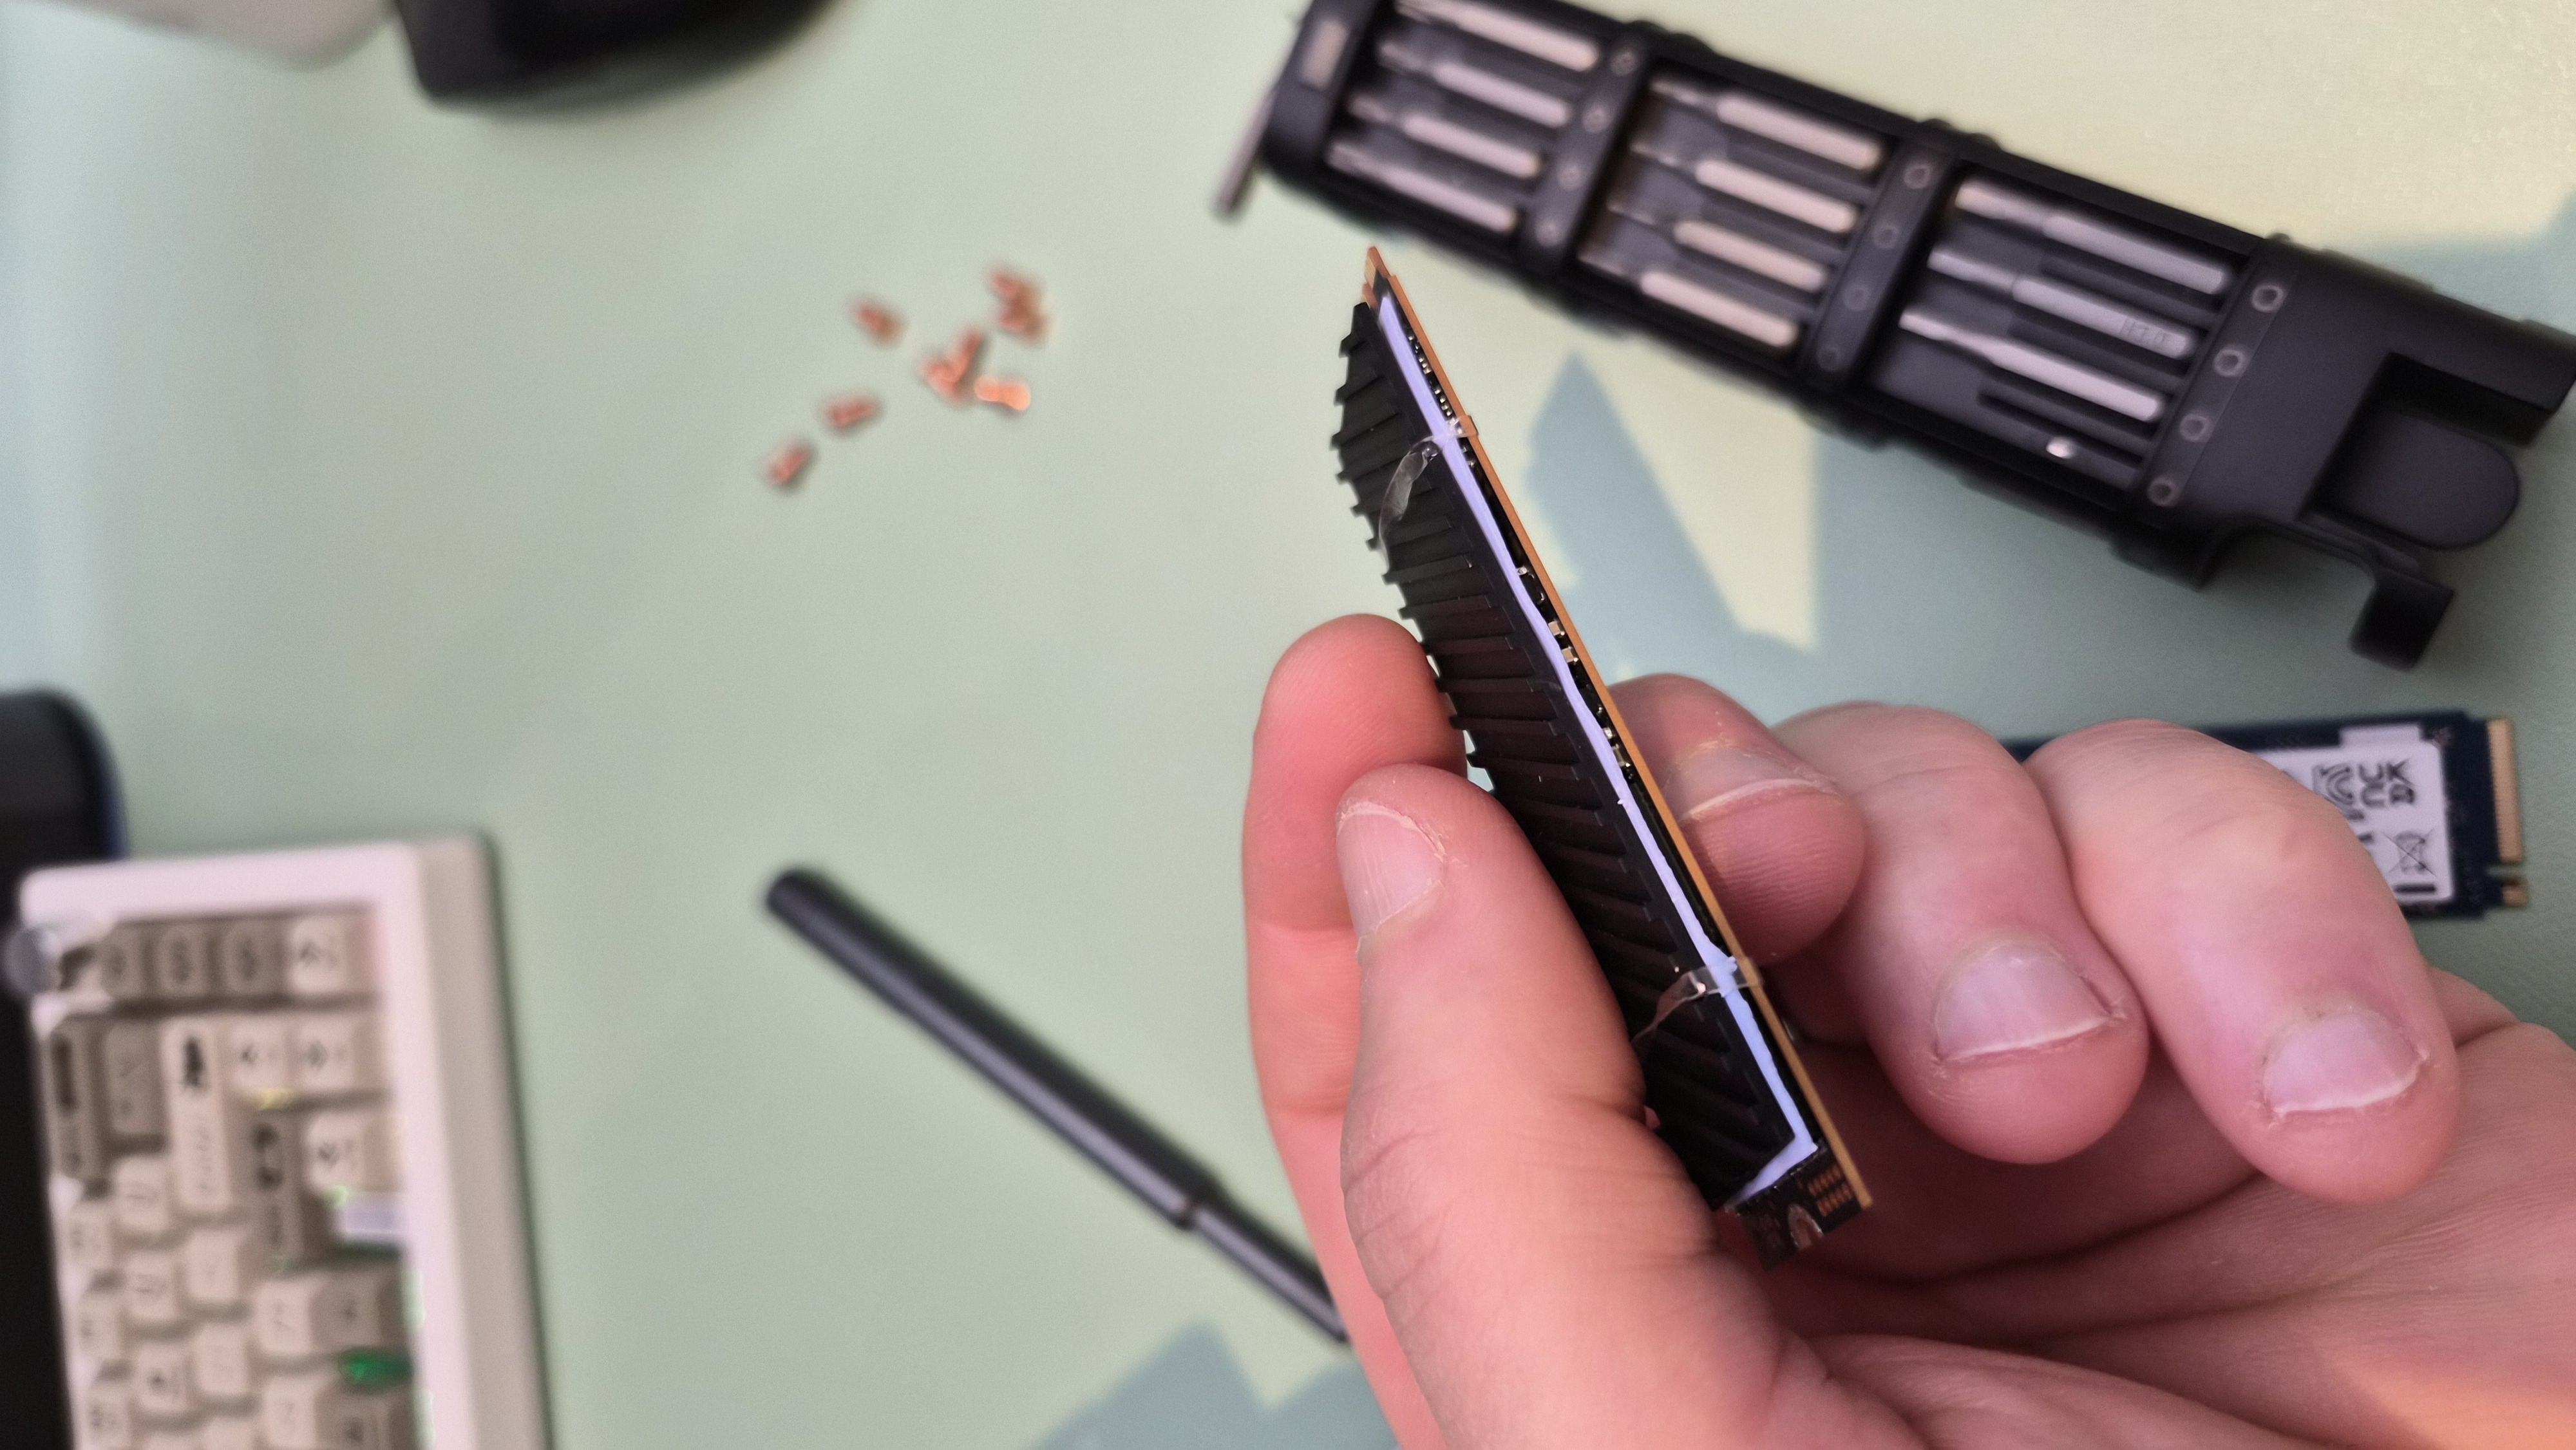
Once you're inside, access is genuinely good. The drive bay cage doesn't block anything critical. The RAM slots are right there, the PCIe slots are unobstructed, and the motherboard NVMe slots sit under a small heatsink that comes off with two screws. I've worked on machines where a RAM swap requires removing six other components first. This isn't one of them.
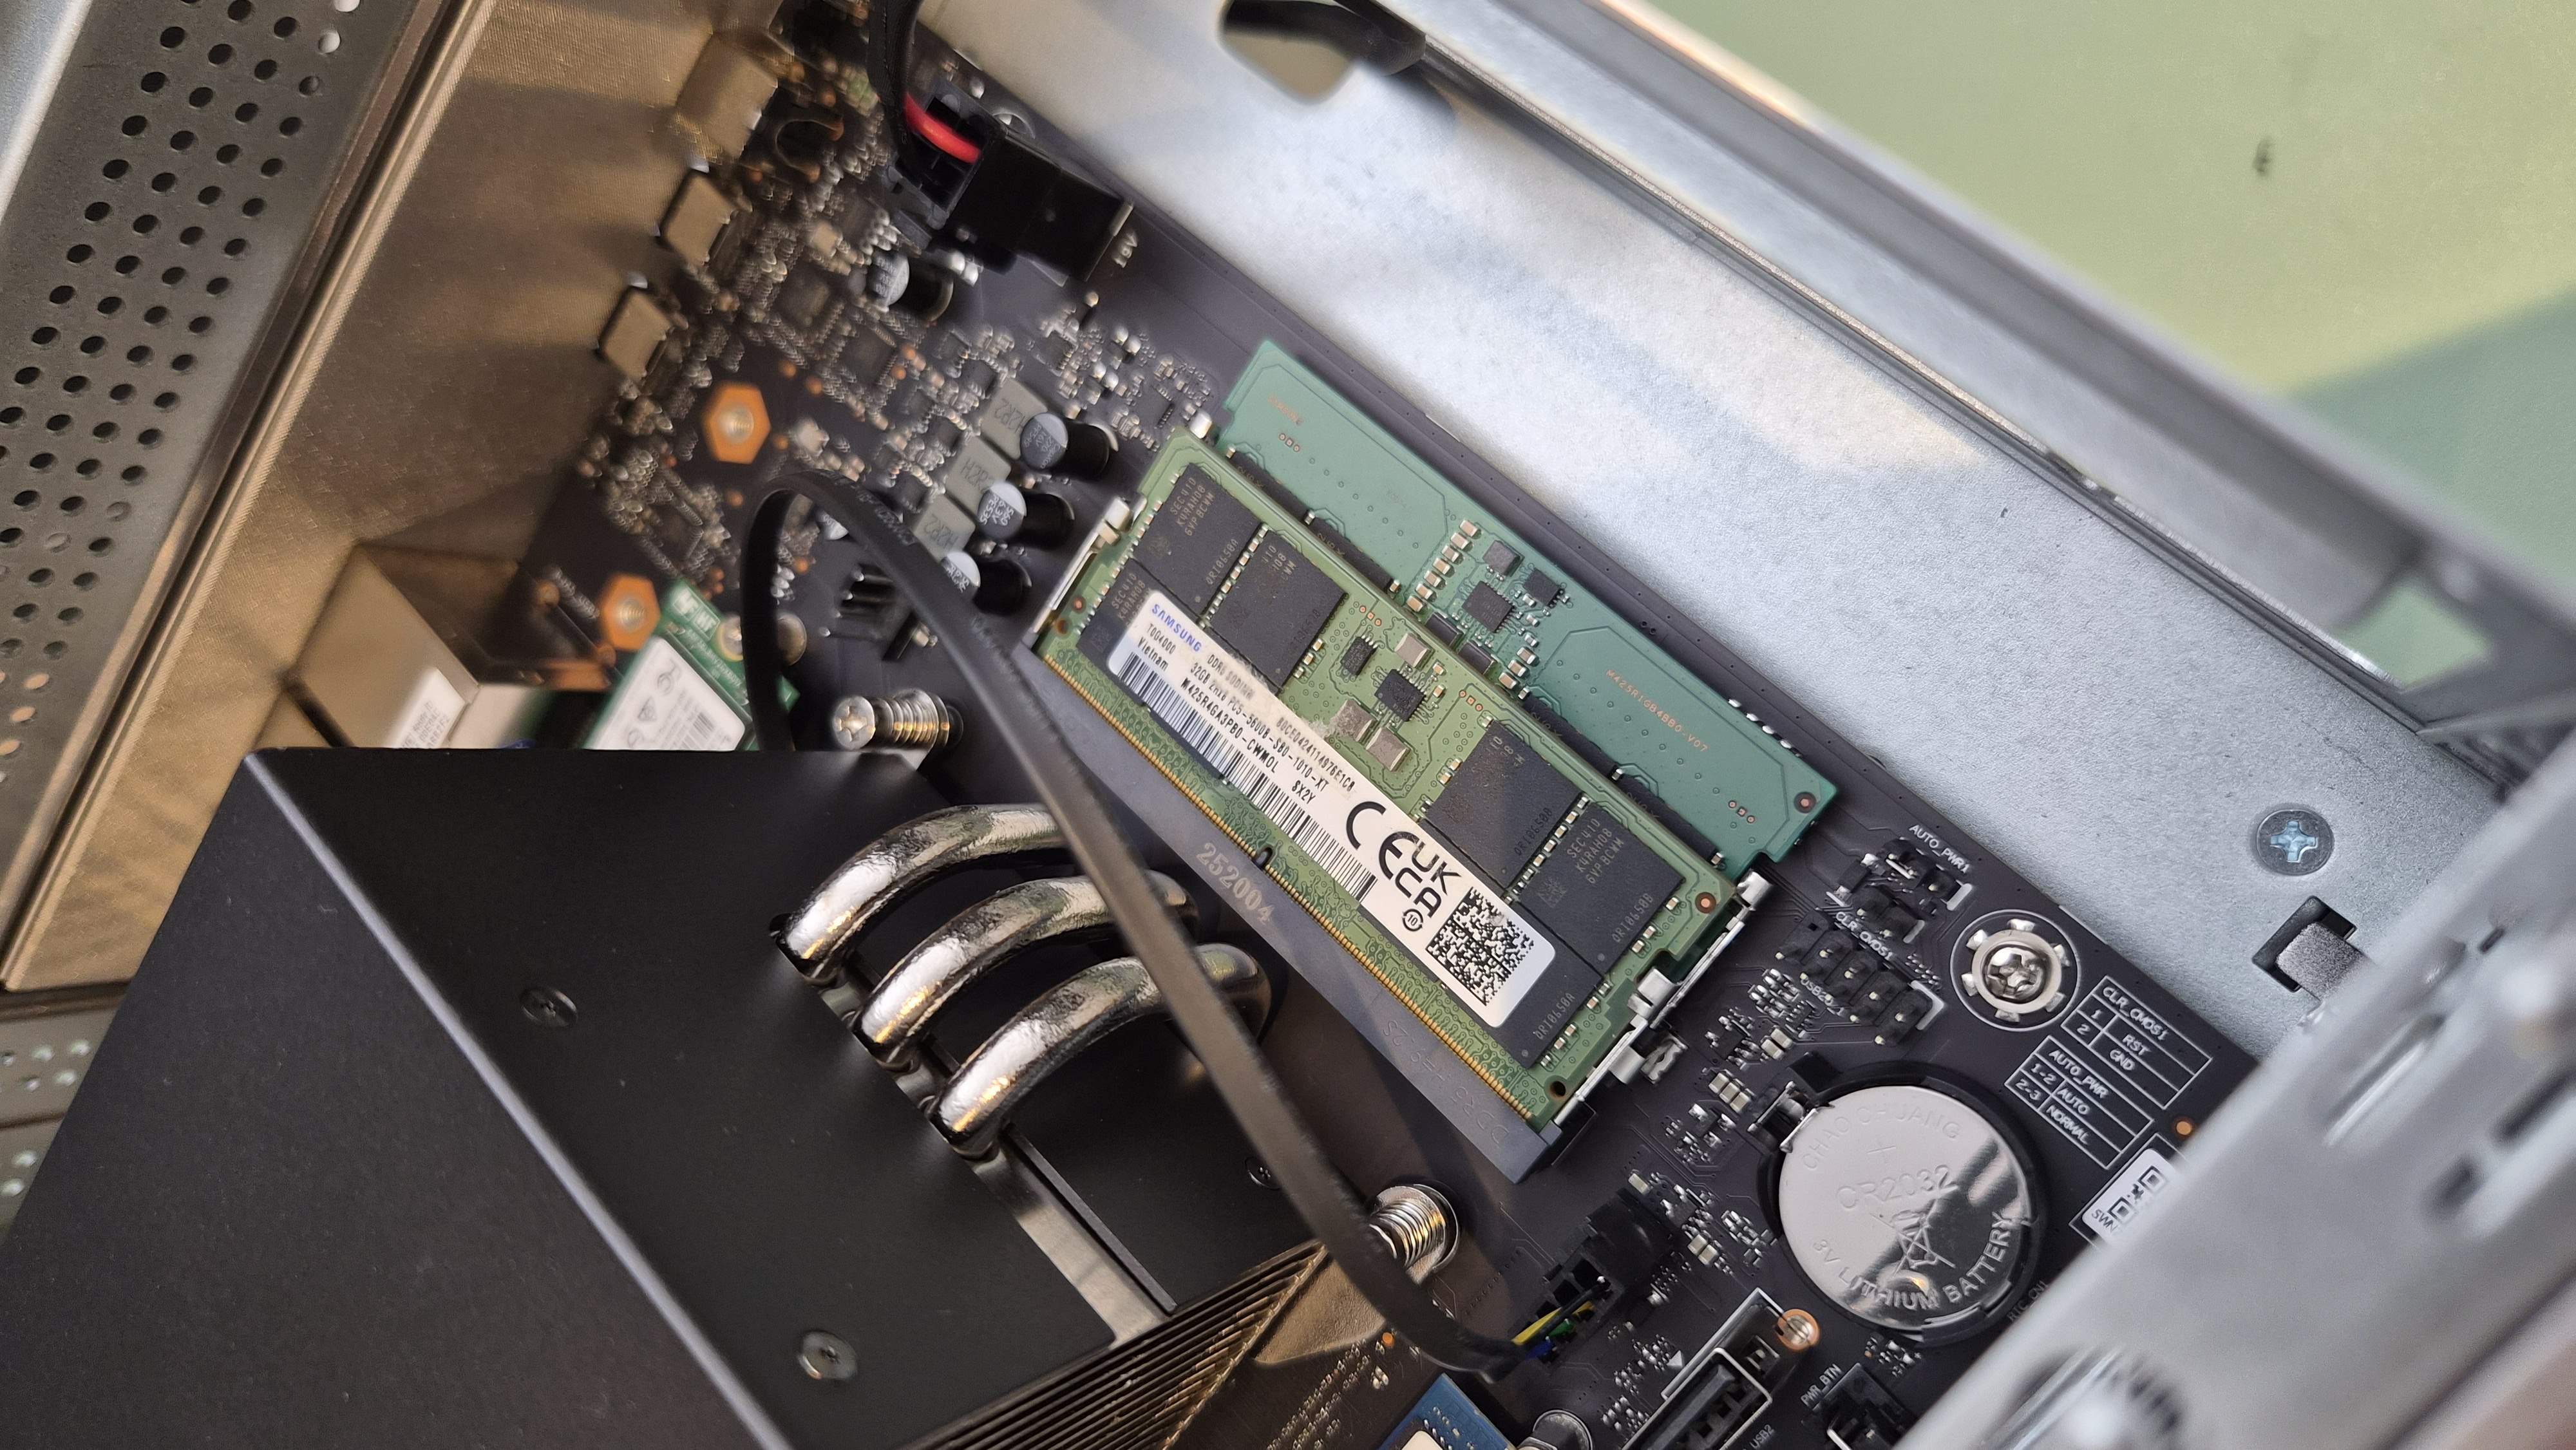
RAM slots — easy to reach without disassembling anything else.
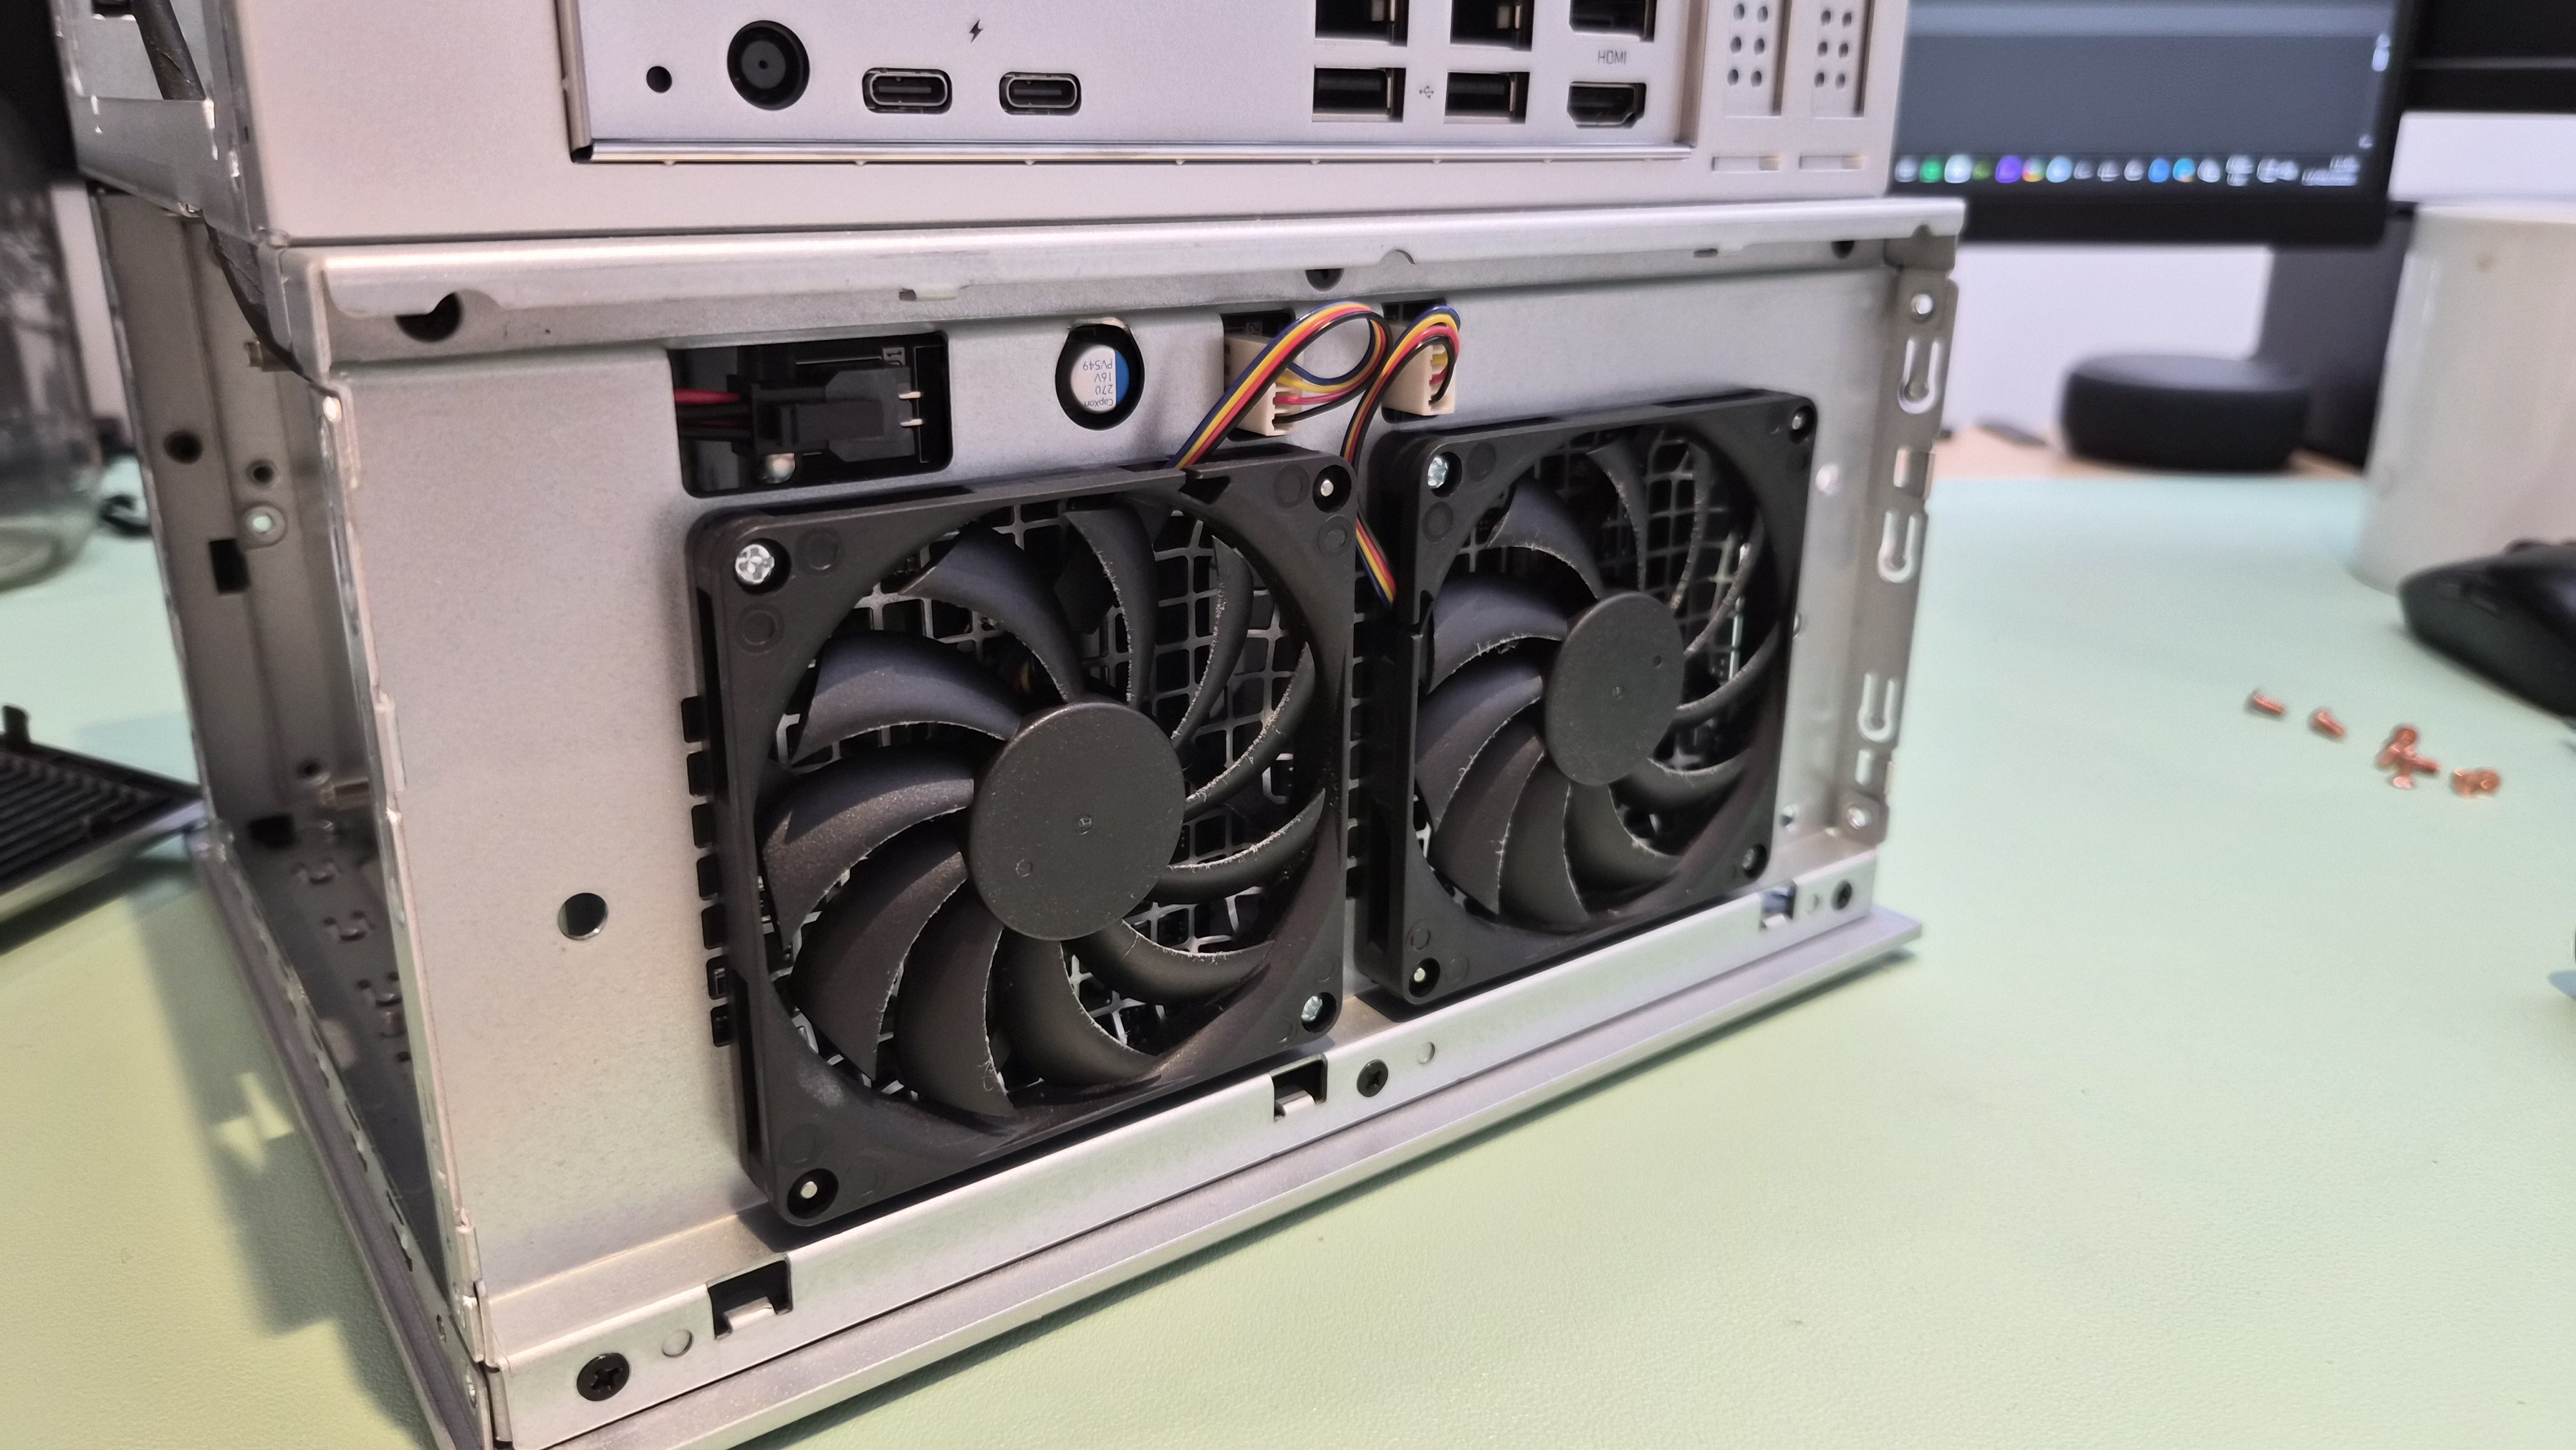
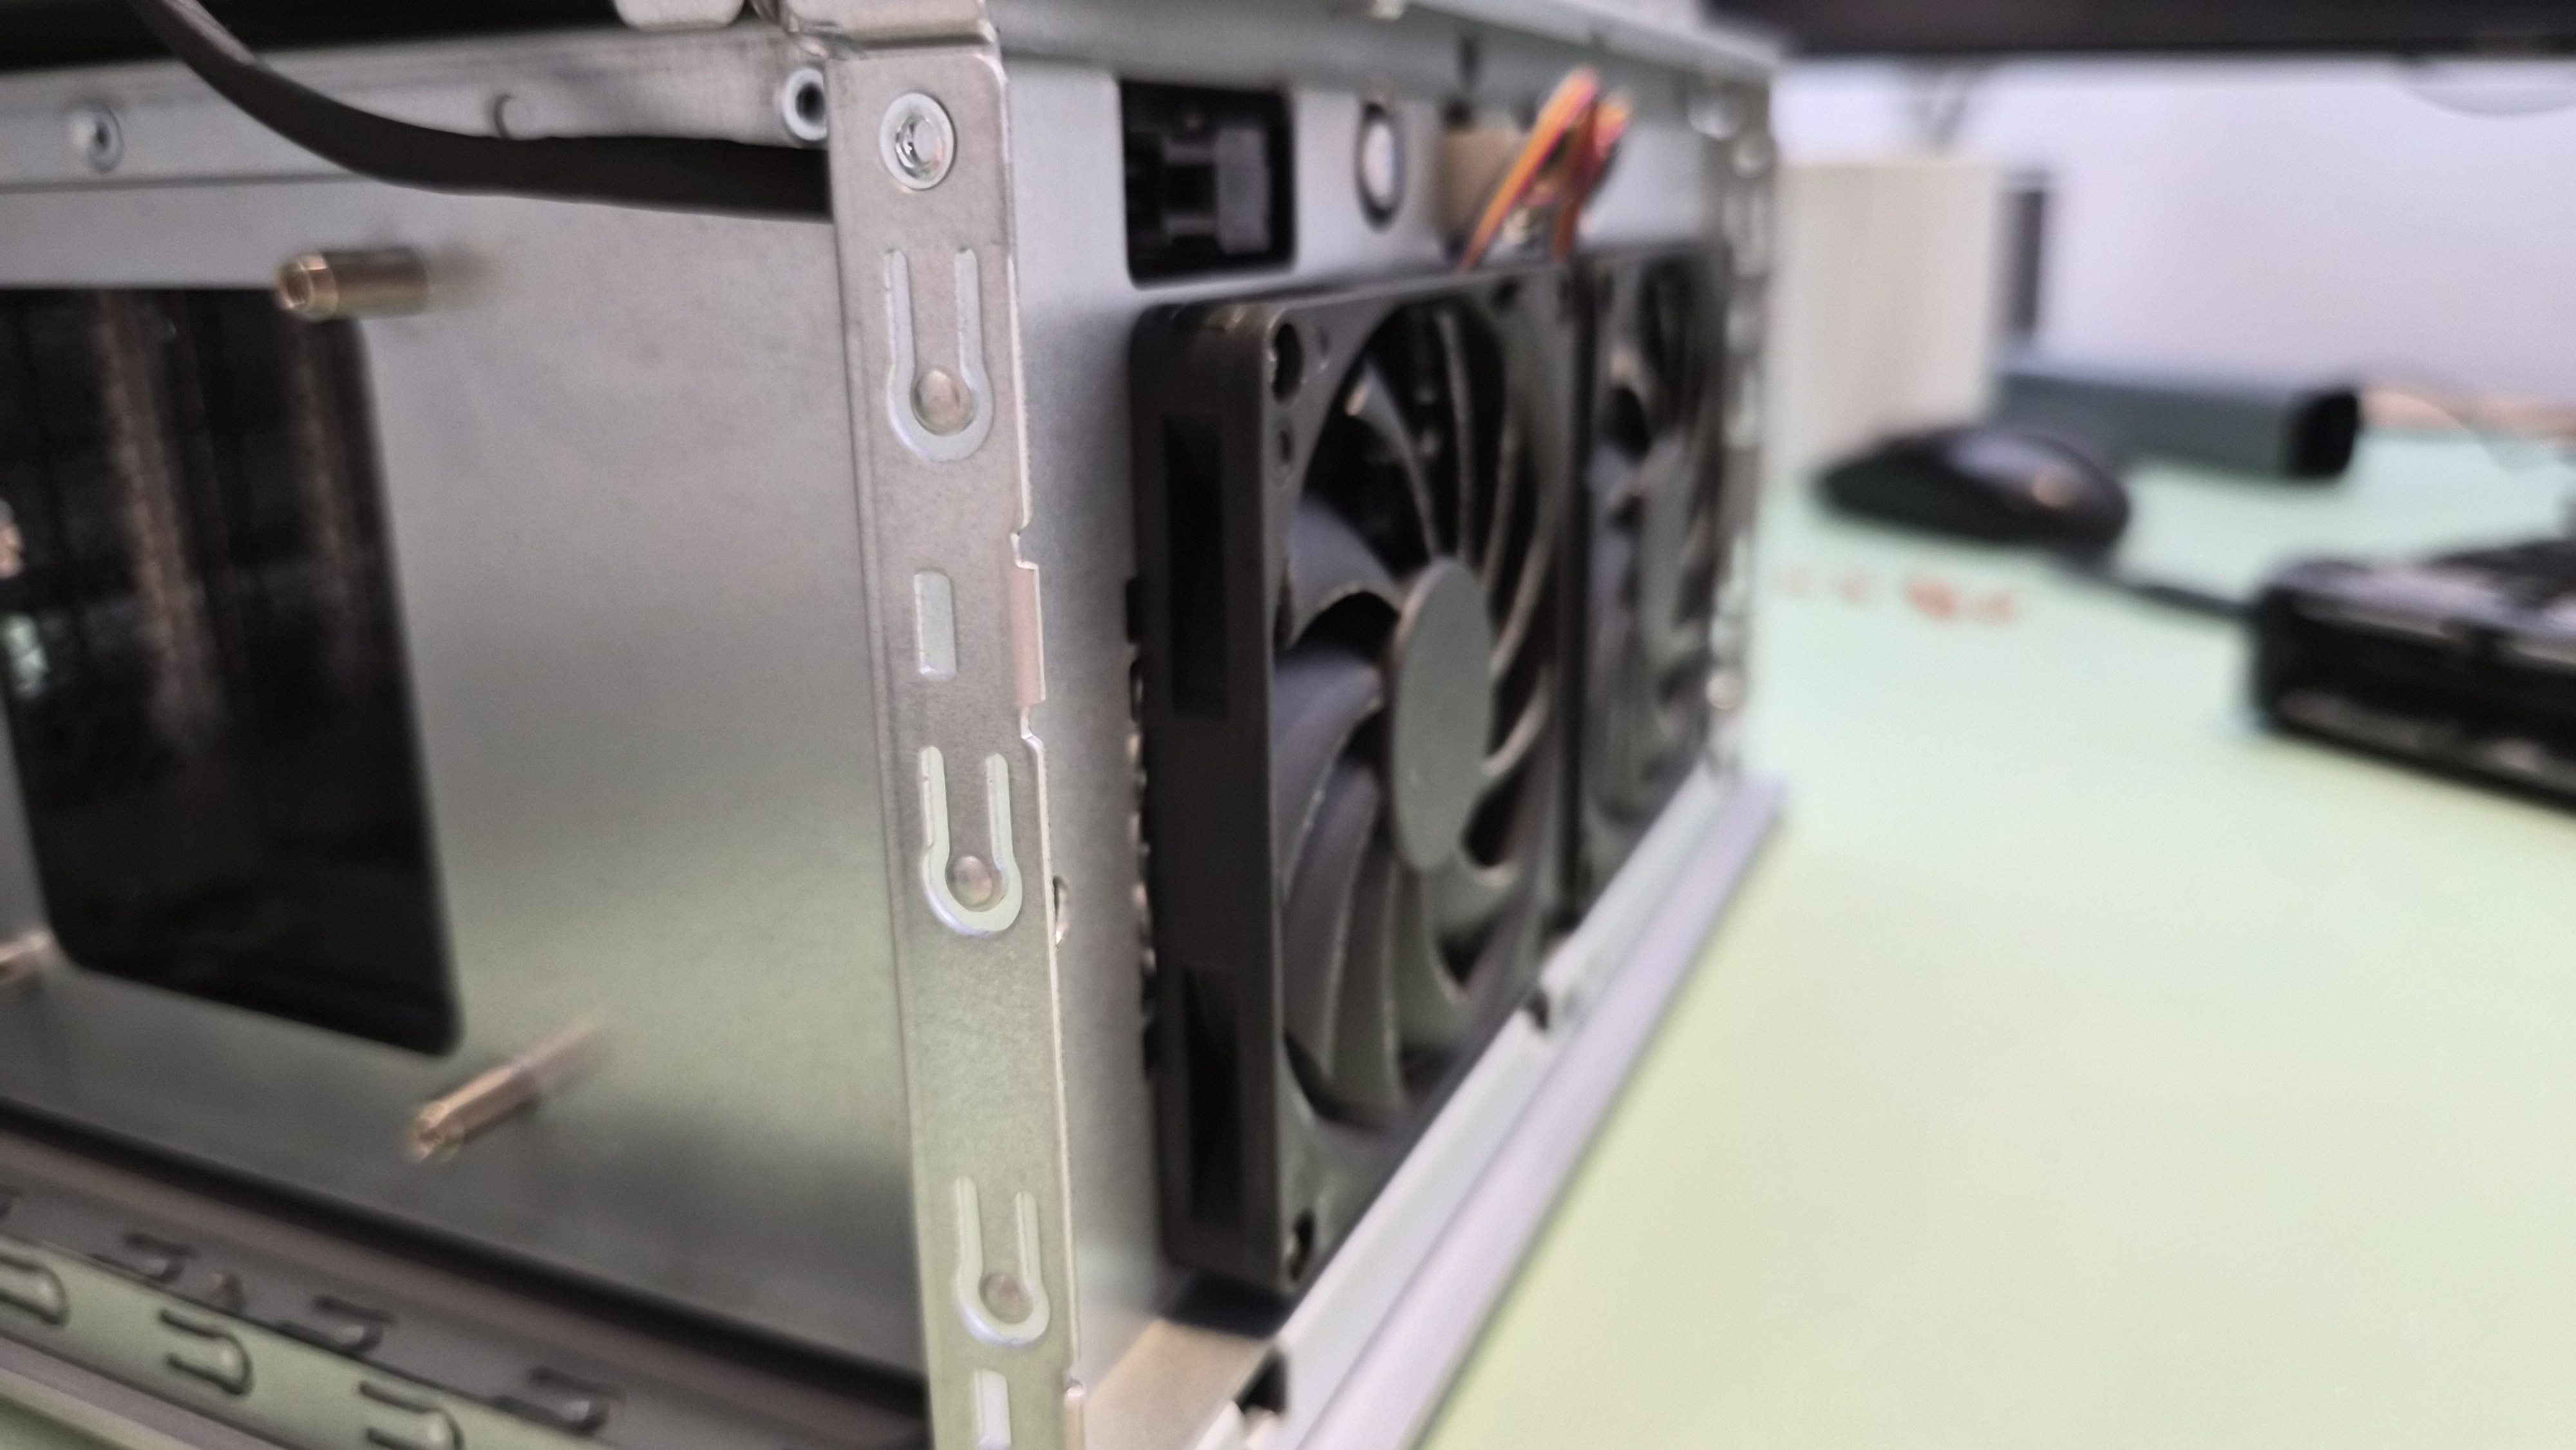
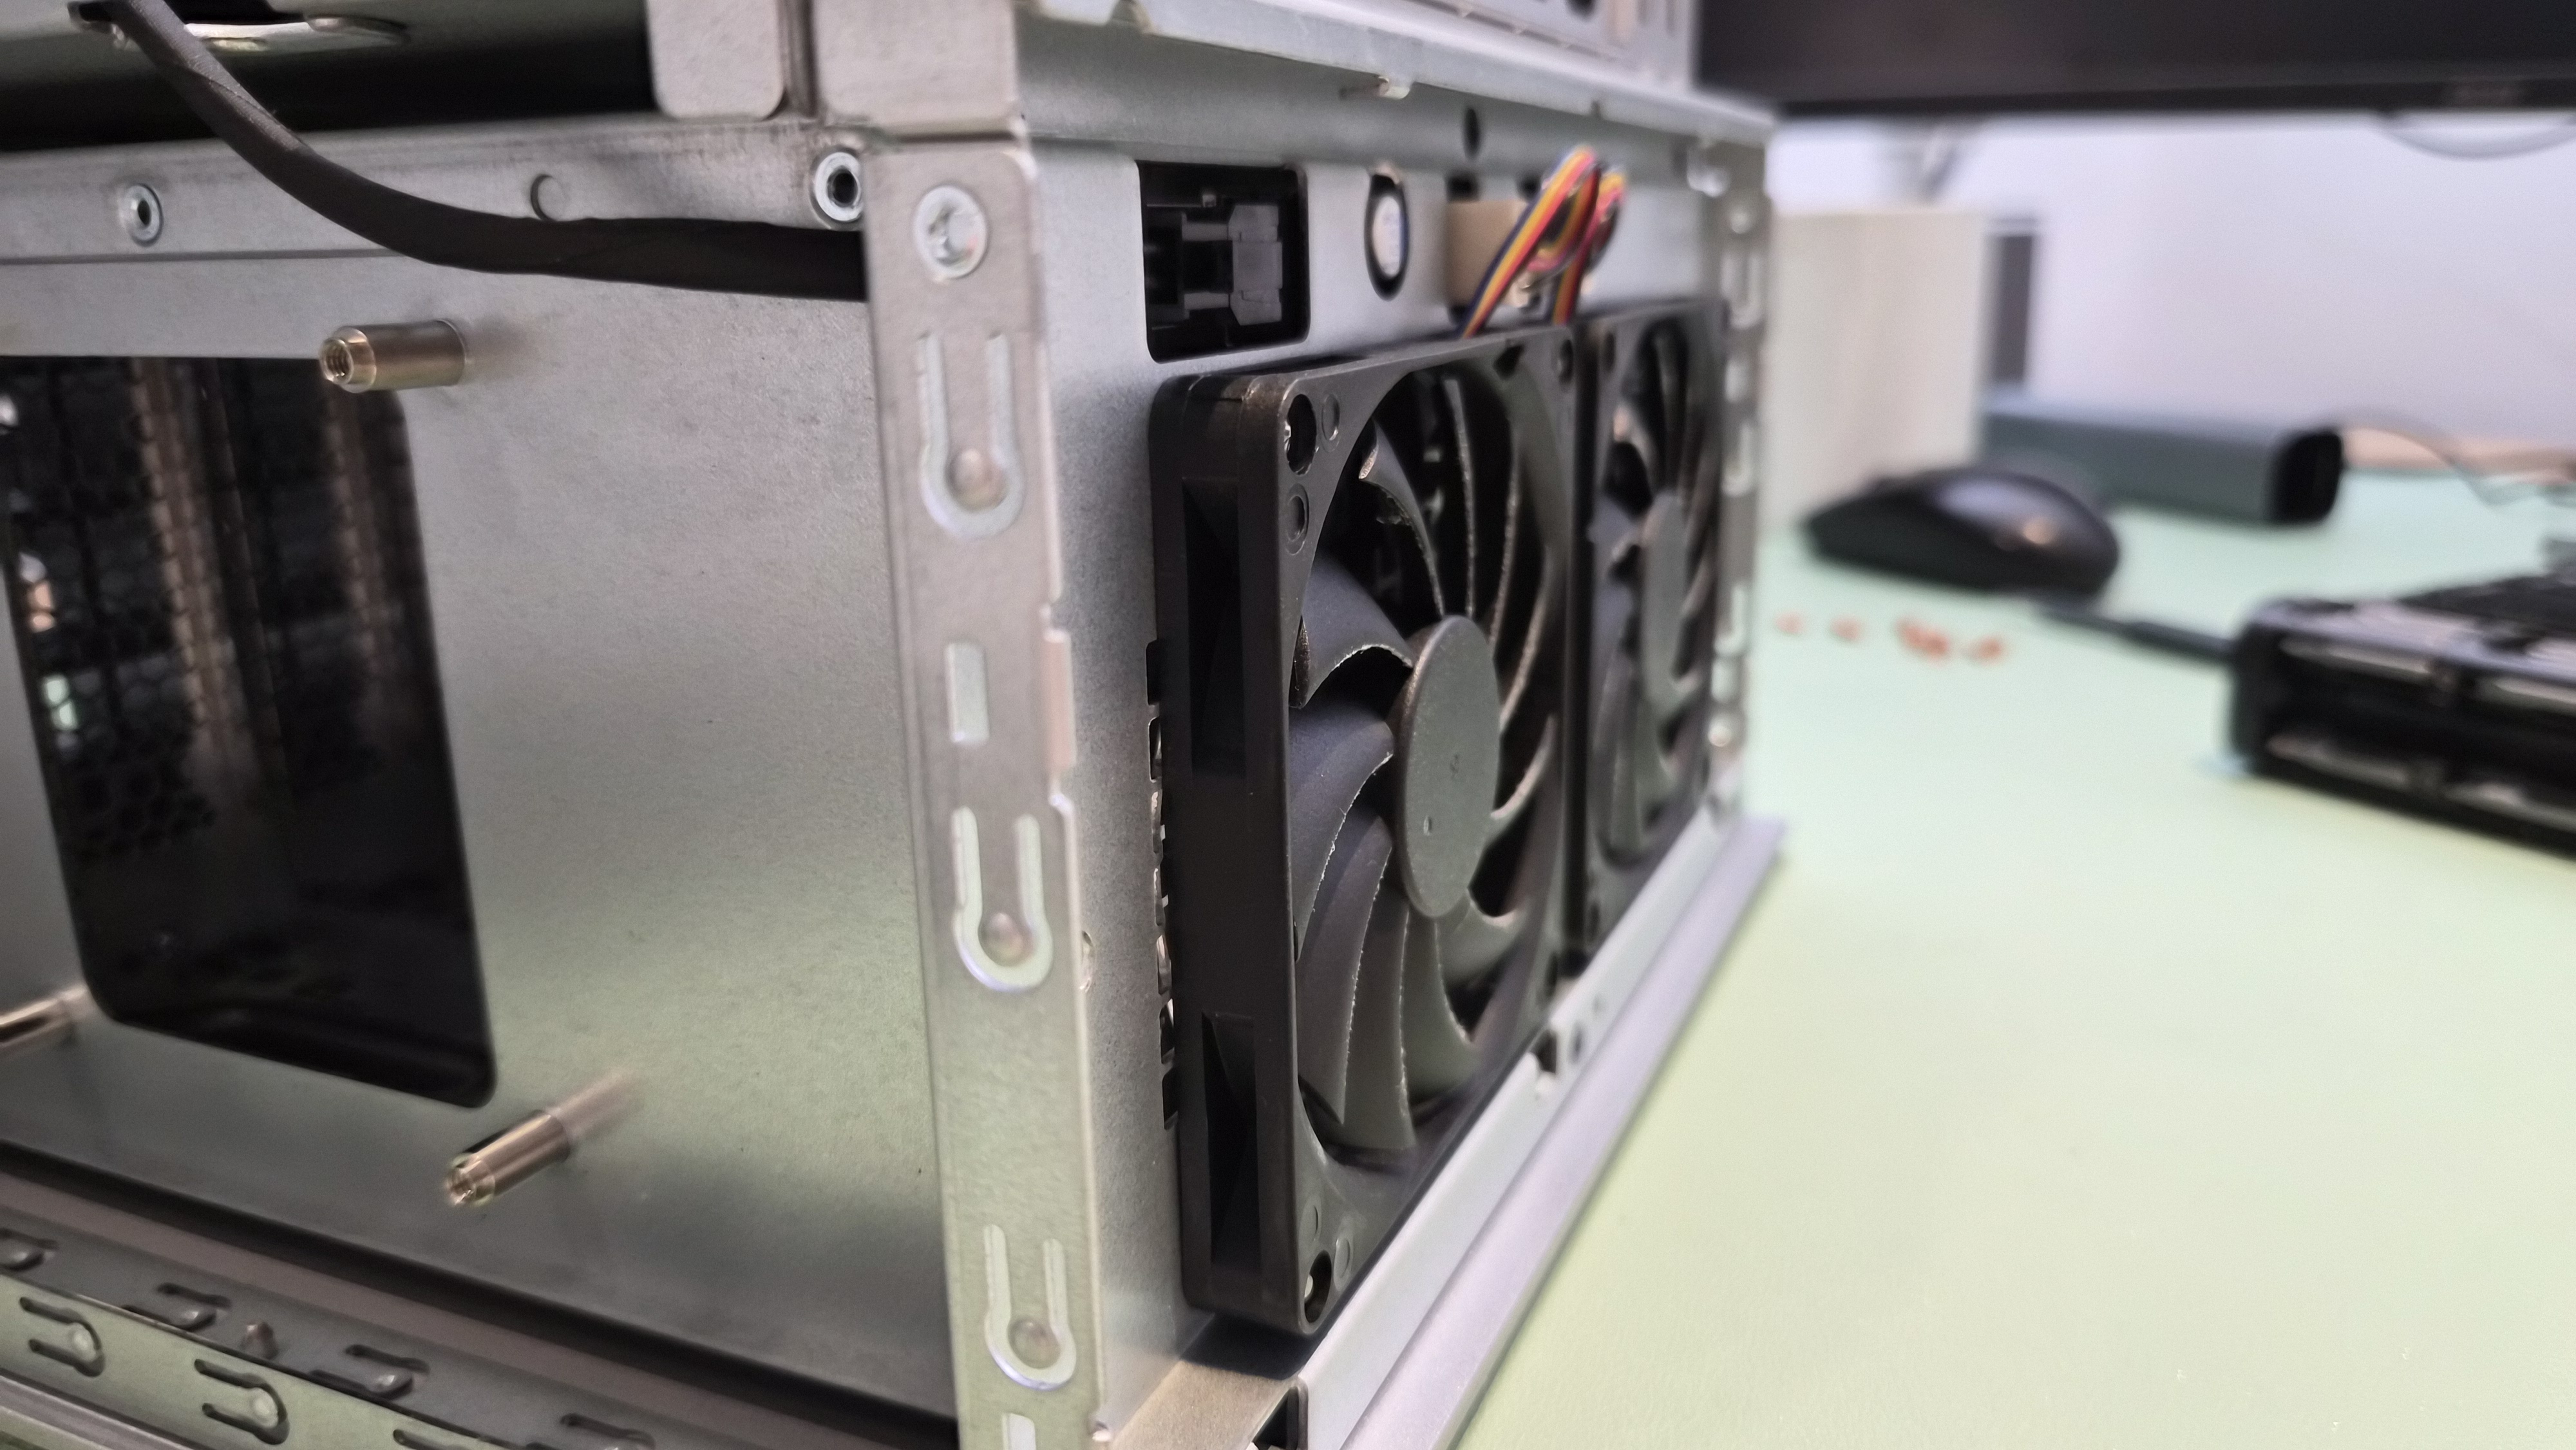
The Fan Situation
There are two fans at the rear. They cool the hard drive bays, and by default they're noticeable. Not screaming, but present. Audible in a quiet room.
I went into the BIOS to adjust the fan curve. Changed it. Saved. Rebooted. Nothing. Changed it again — more aggressively this time. Still nothing. The fans spun at whatever speed they felt like, completely ignoring my settings. I did this for days. Different profiles, different temperature thresholds, different everything. The BIOS accepted my changes and then promptly ignored them.
Then the ZimaCube shut down accidentally — not a crash, just an unplanned power-off. When it came back up, the fans fell silent. My profile had taken effect. Apparently the fan controller only reads the profile on a cold boot, not a warm reboot. I didn't see that documented anywhere.
The two rear fans. They're fine now. They were not fine for several days.
Now they're silent. The machine sits in my office and I can't hear it. The adjustment was worth it, even if the path there was absurd.
And then I found the real punchline.
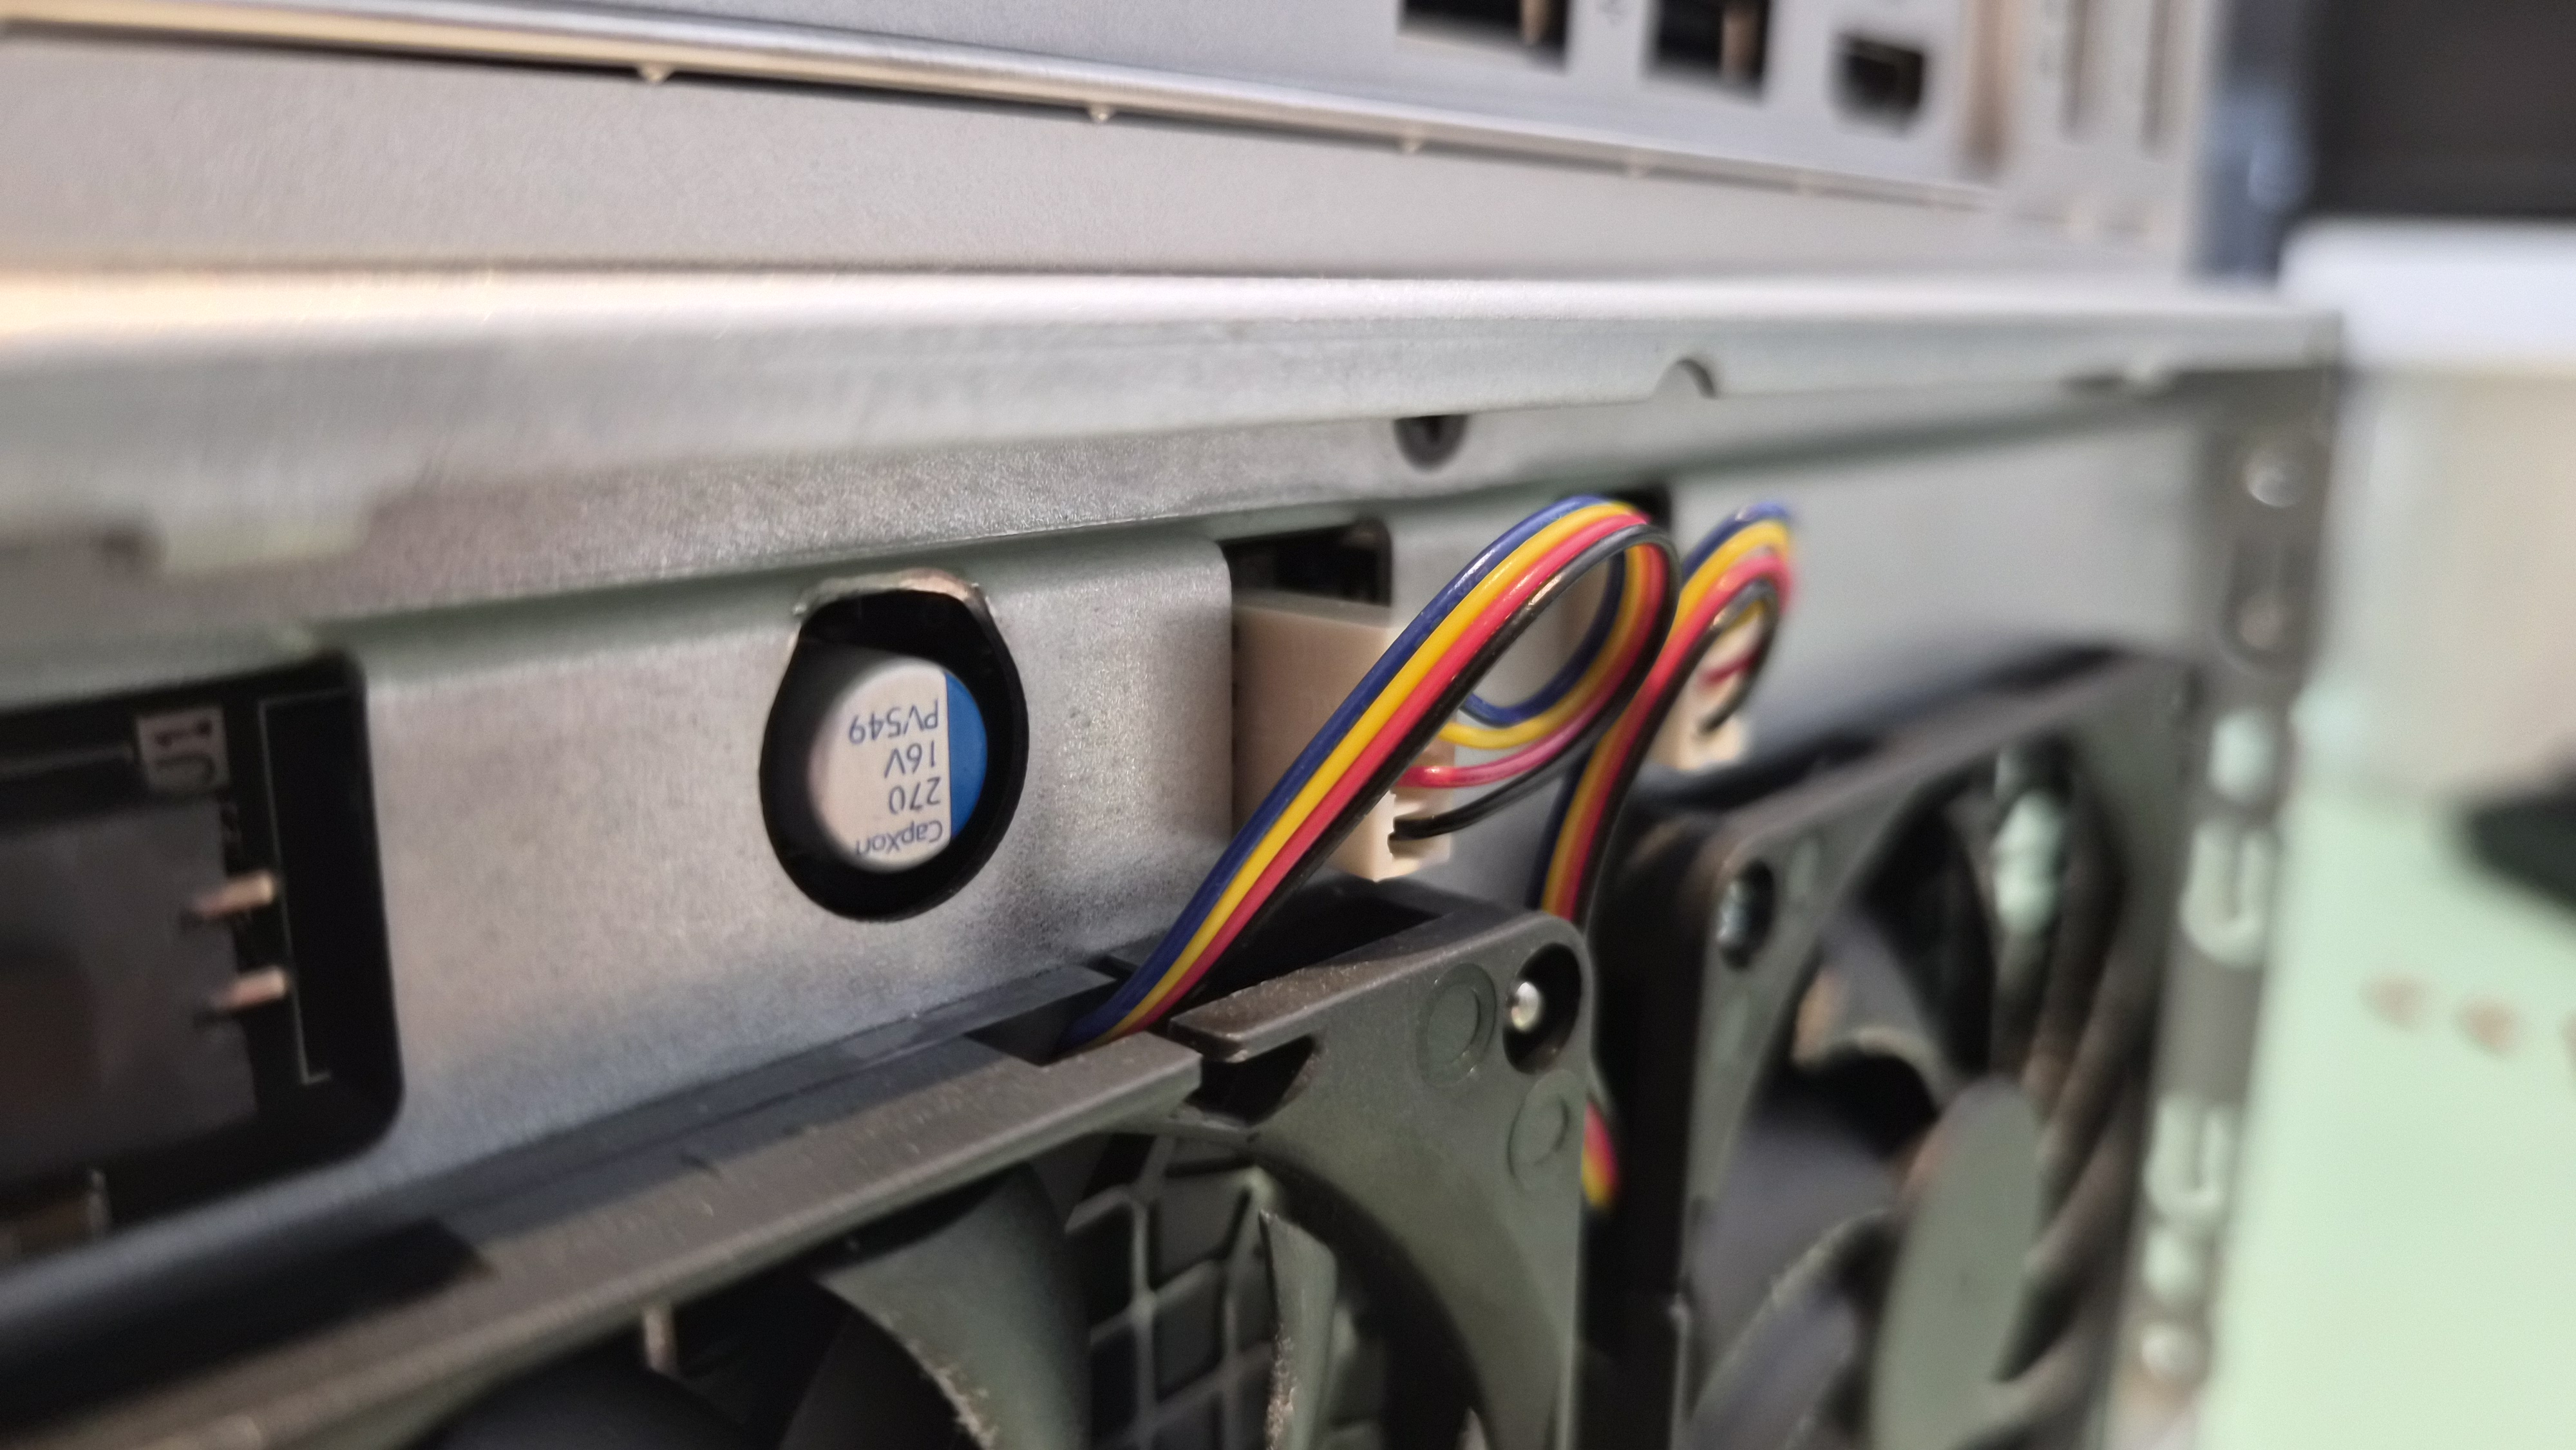
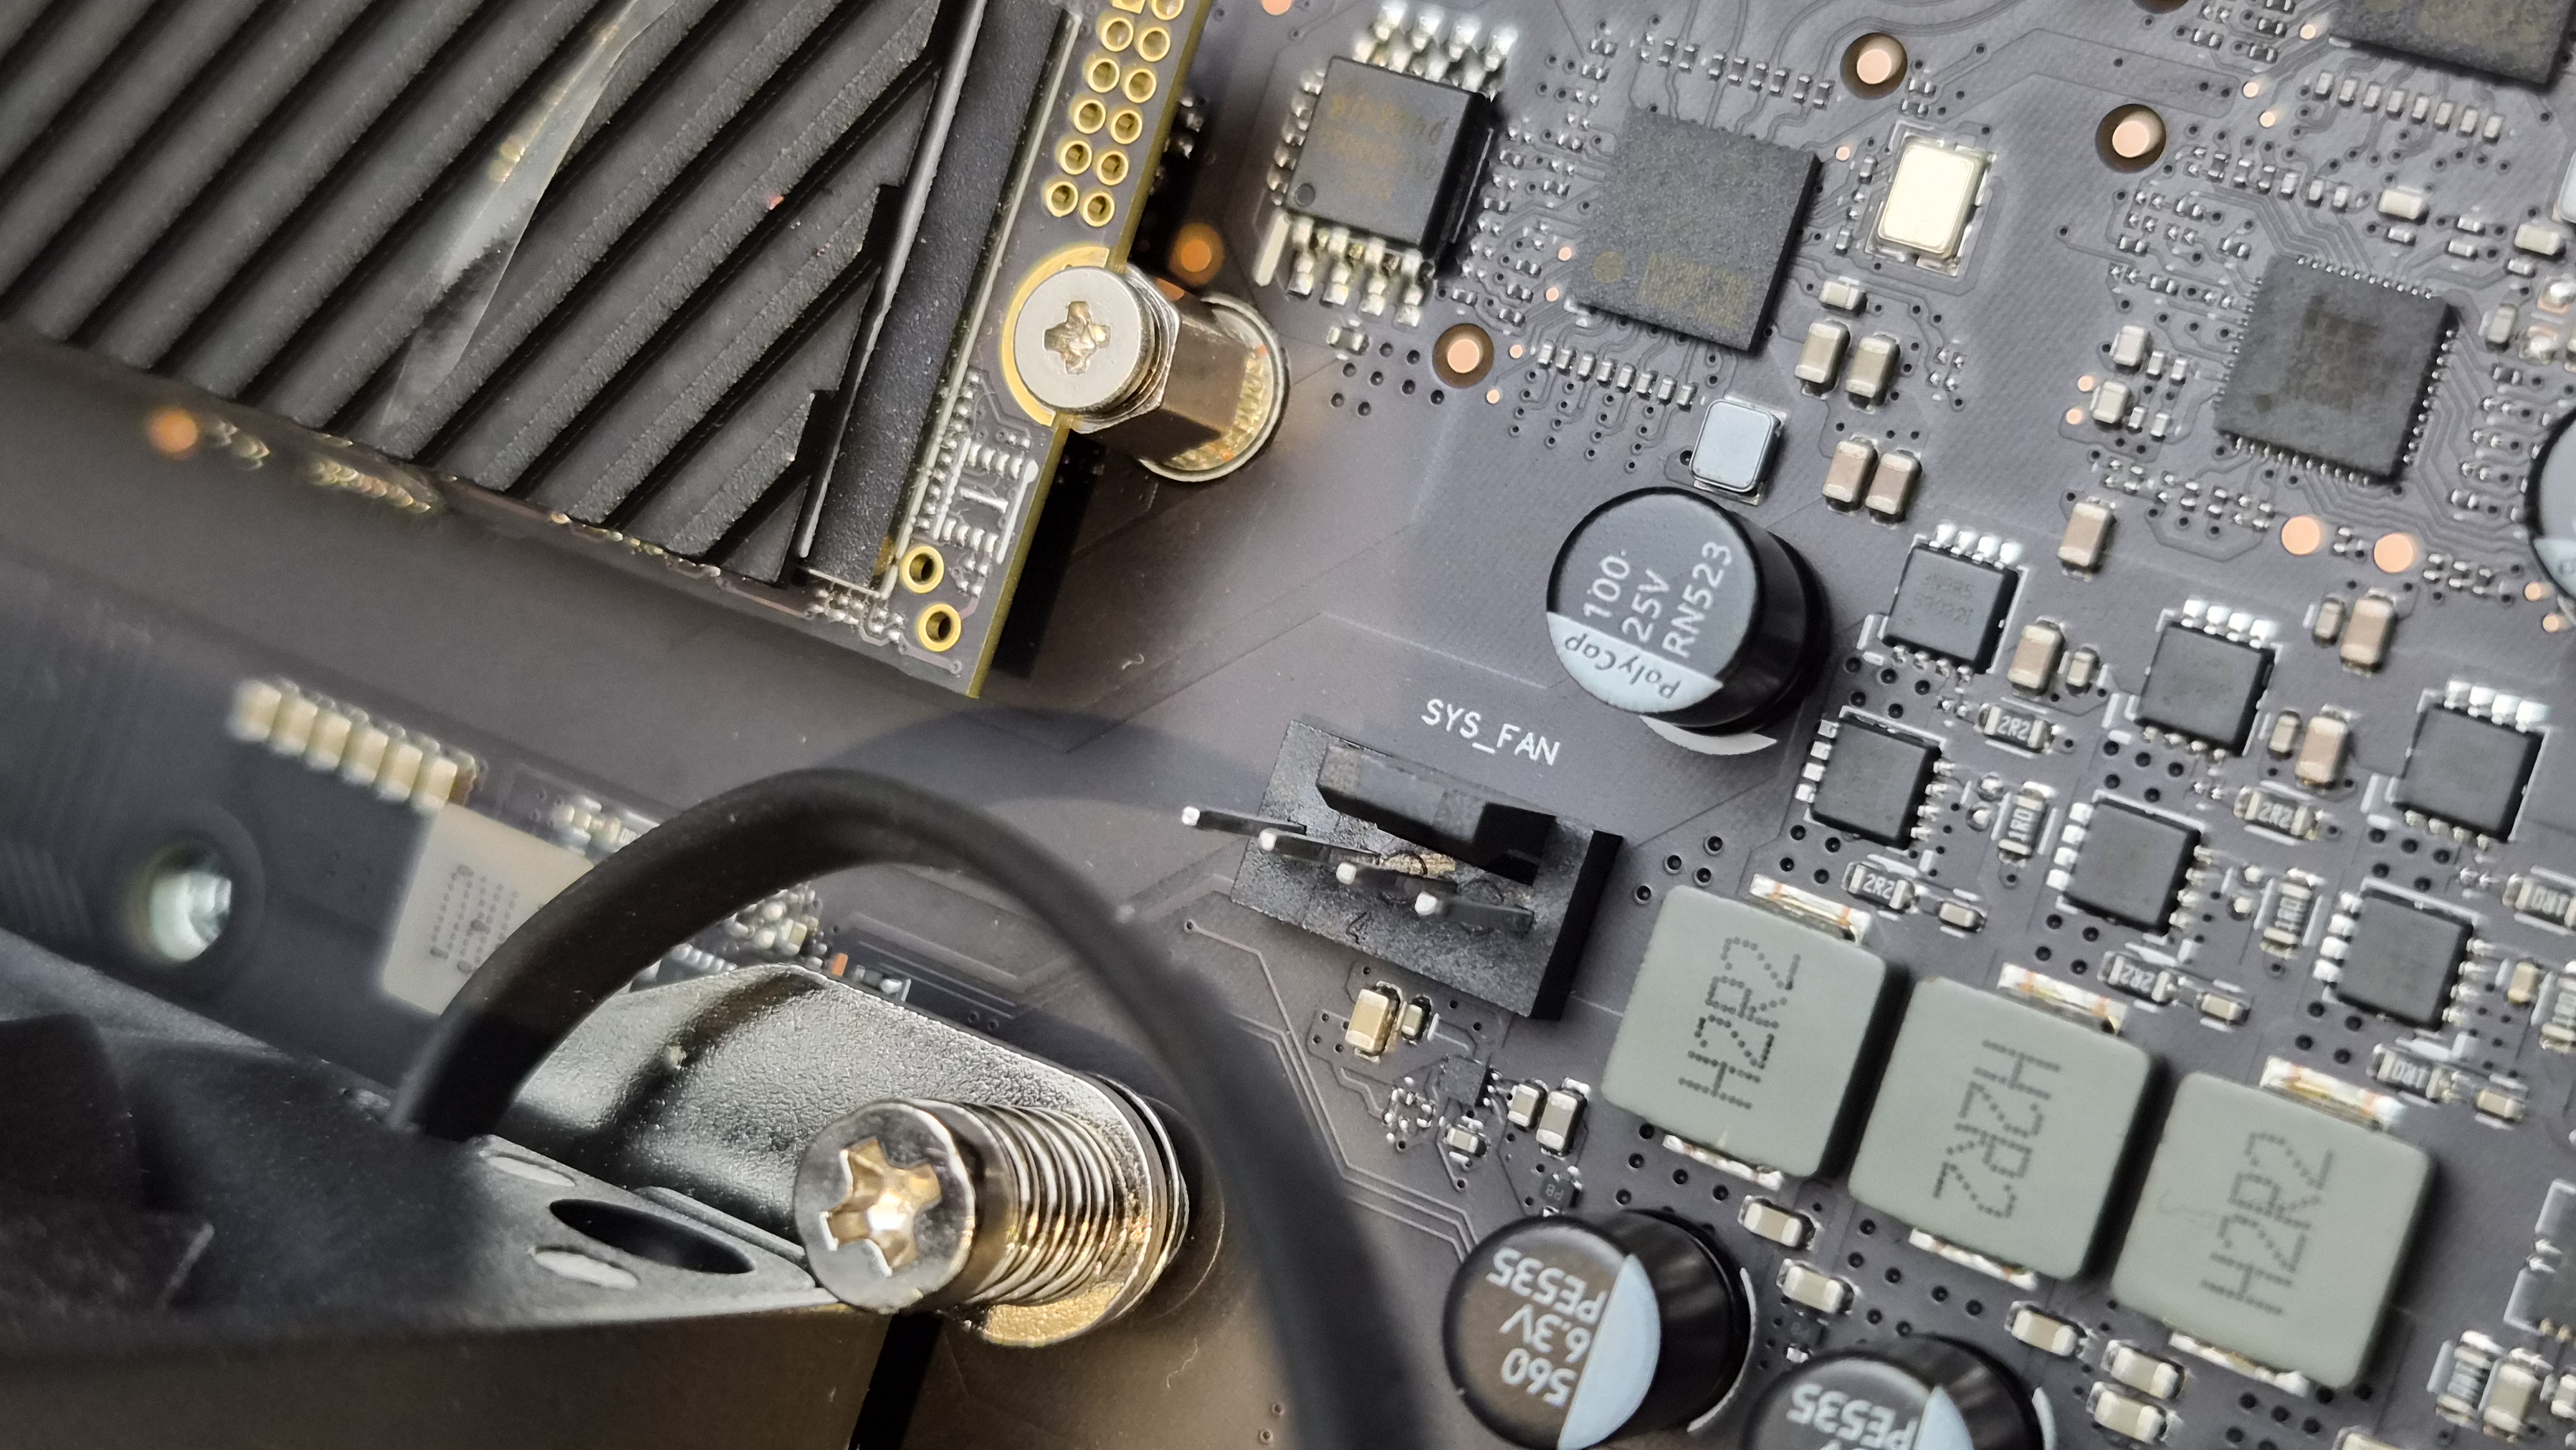
Rear fan wiring. These don't connect to the system fan header on the motherboard.
There's a system fan header on the motherboard. It's empty. Nothing connected to it. All those BIOS fan profile settings I was adjusting? They control this header. Not the rear fans. The rear fans are connected to a separate controller that doesn't listen to the BIOS fan curve at all.
So my "cold boot fixed it" discovery was probably just coincidence — maybe the separate fan controller reset itself after the power loss, or the drives happened to be cooler. Either way, the BIOS fan profile had nothing to do with it.
This raises a question: what is the system fan header actually for? It's there, it's labelled, it has power. Could I connect the rear fans to it via an extension cable? Possibly. That's something I'll try.
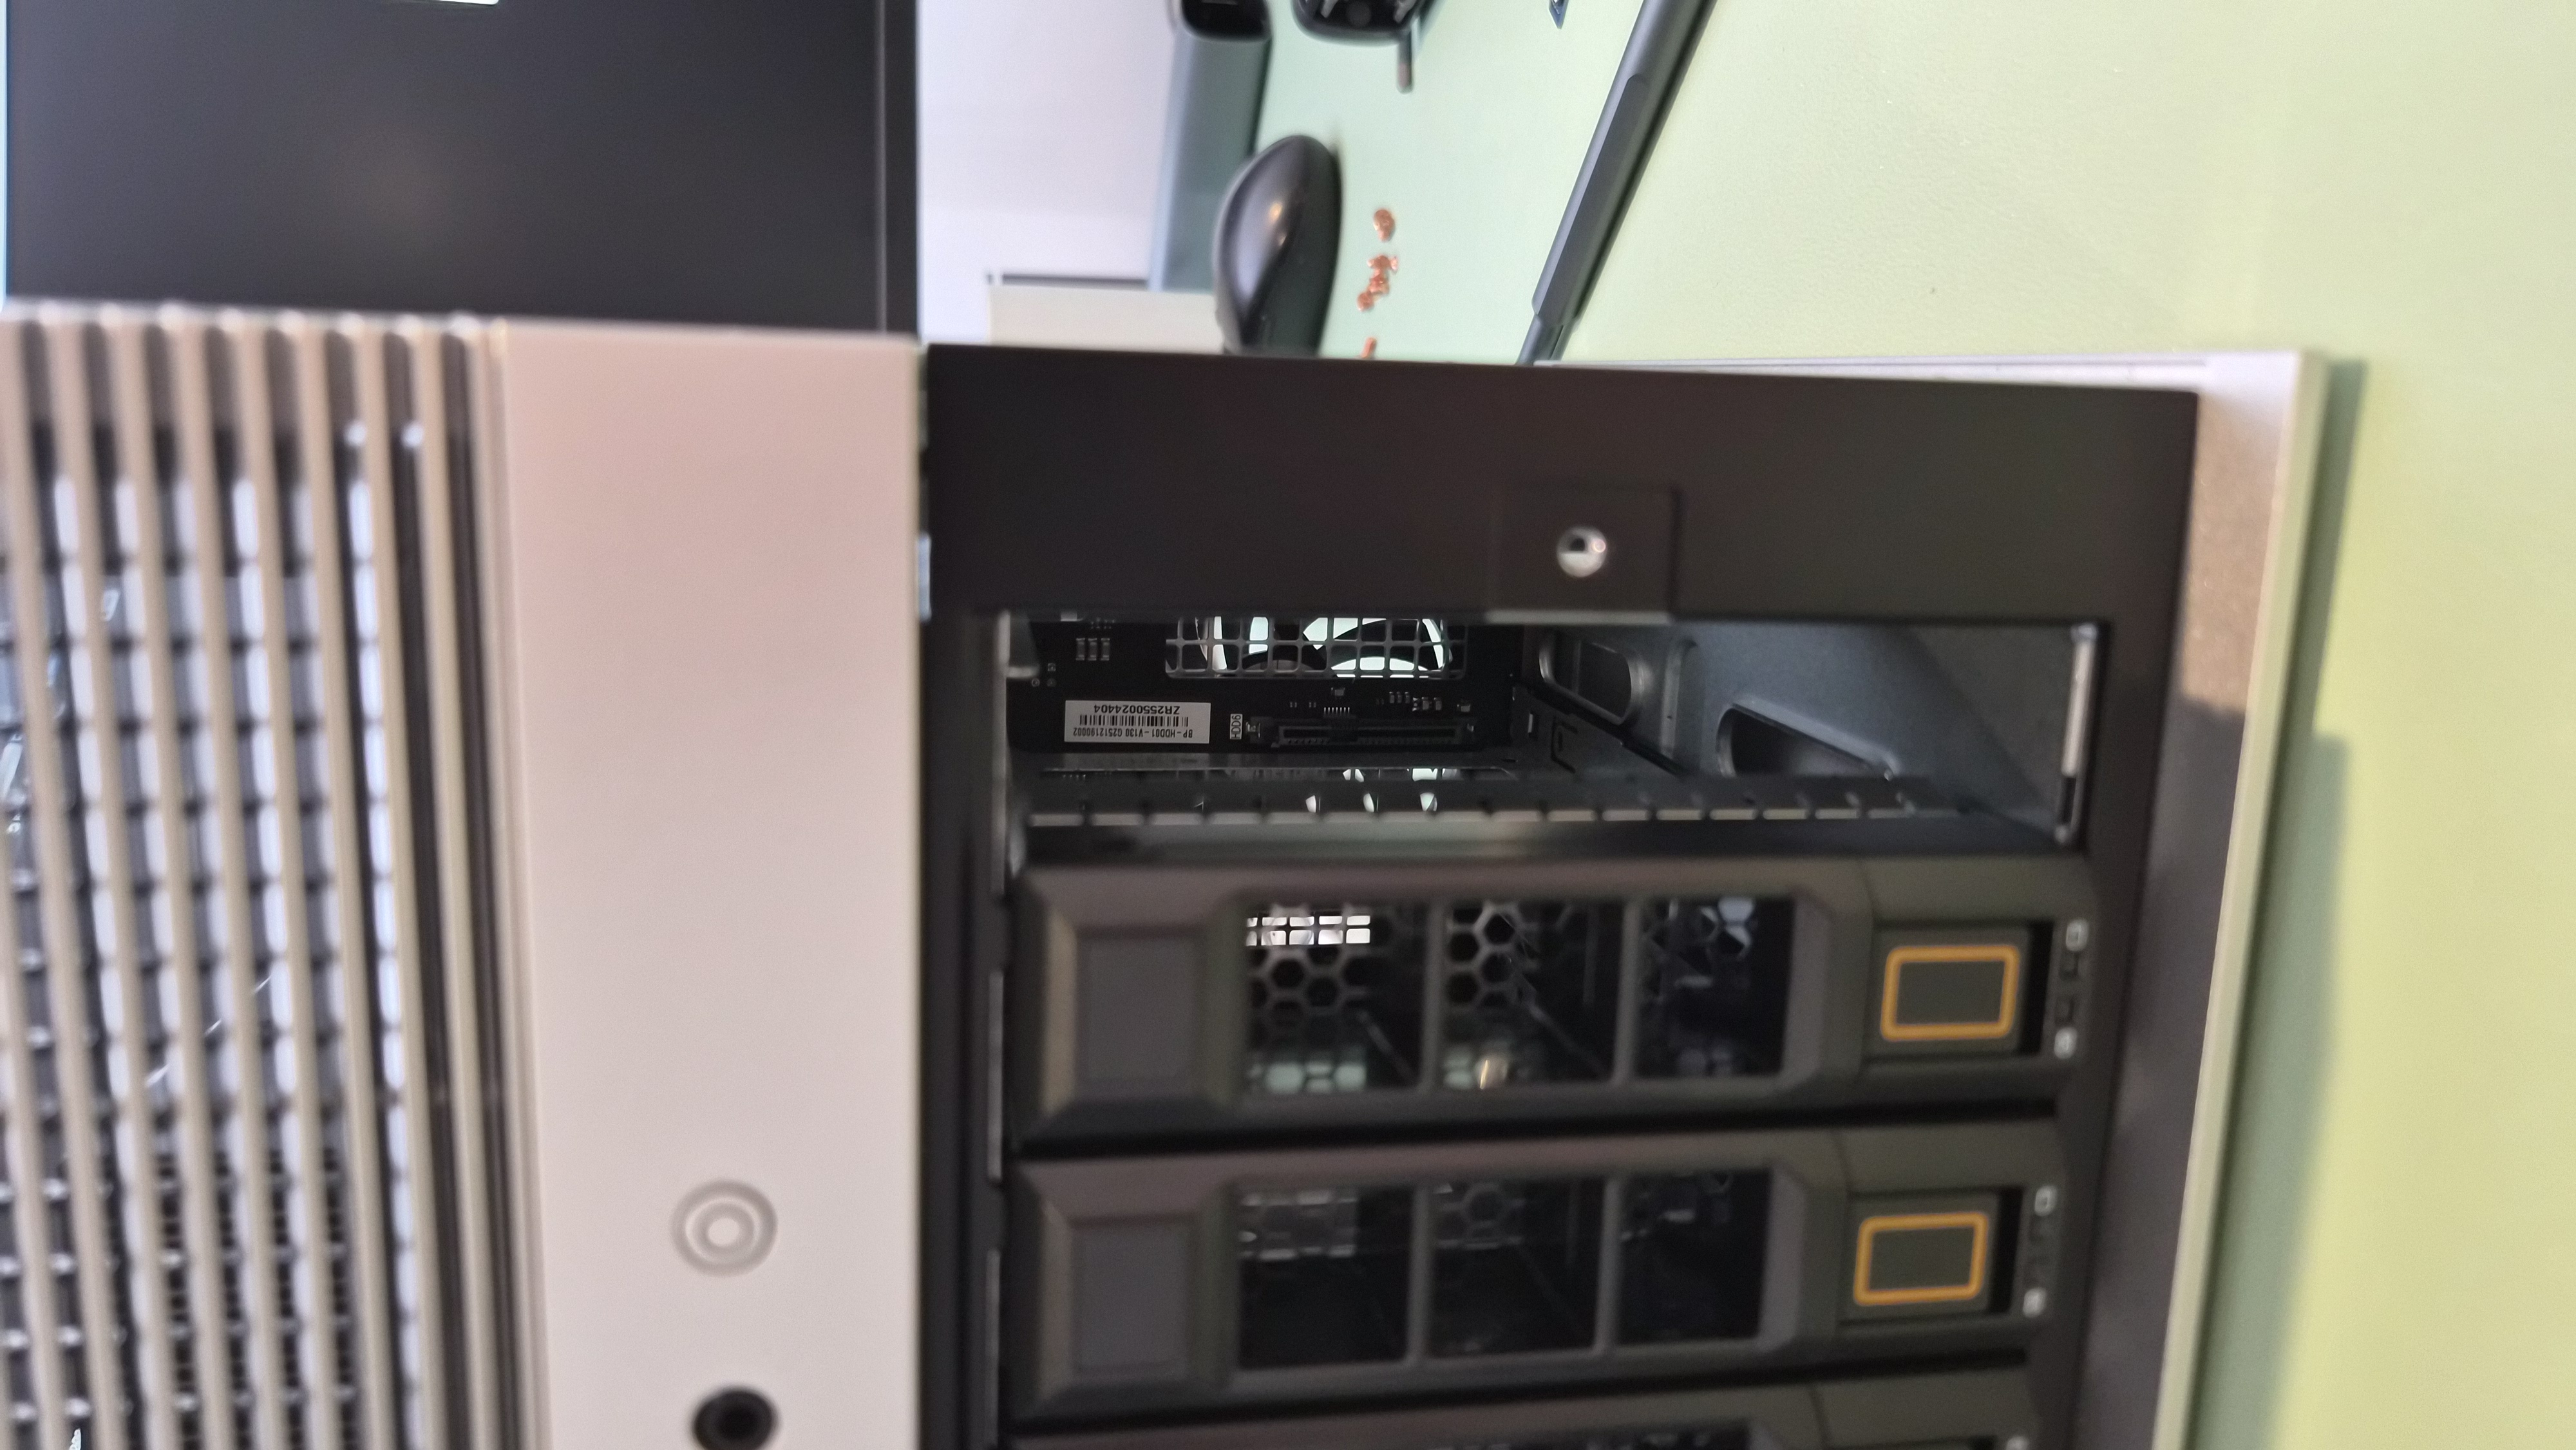
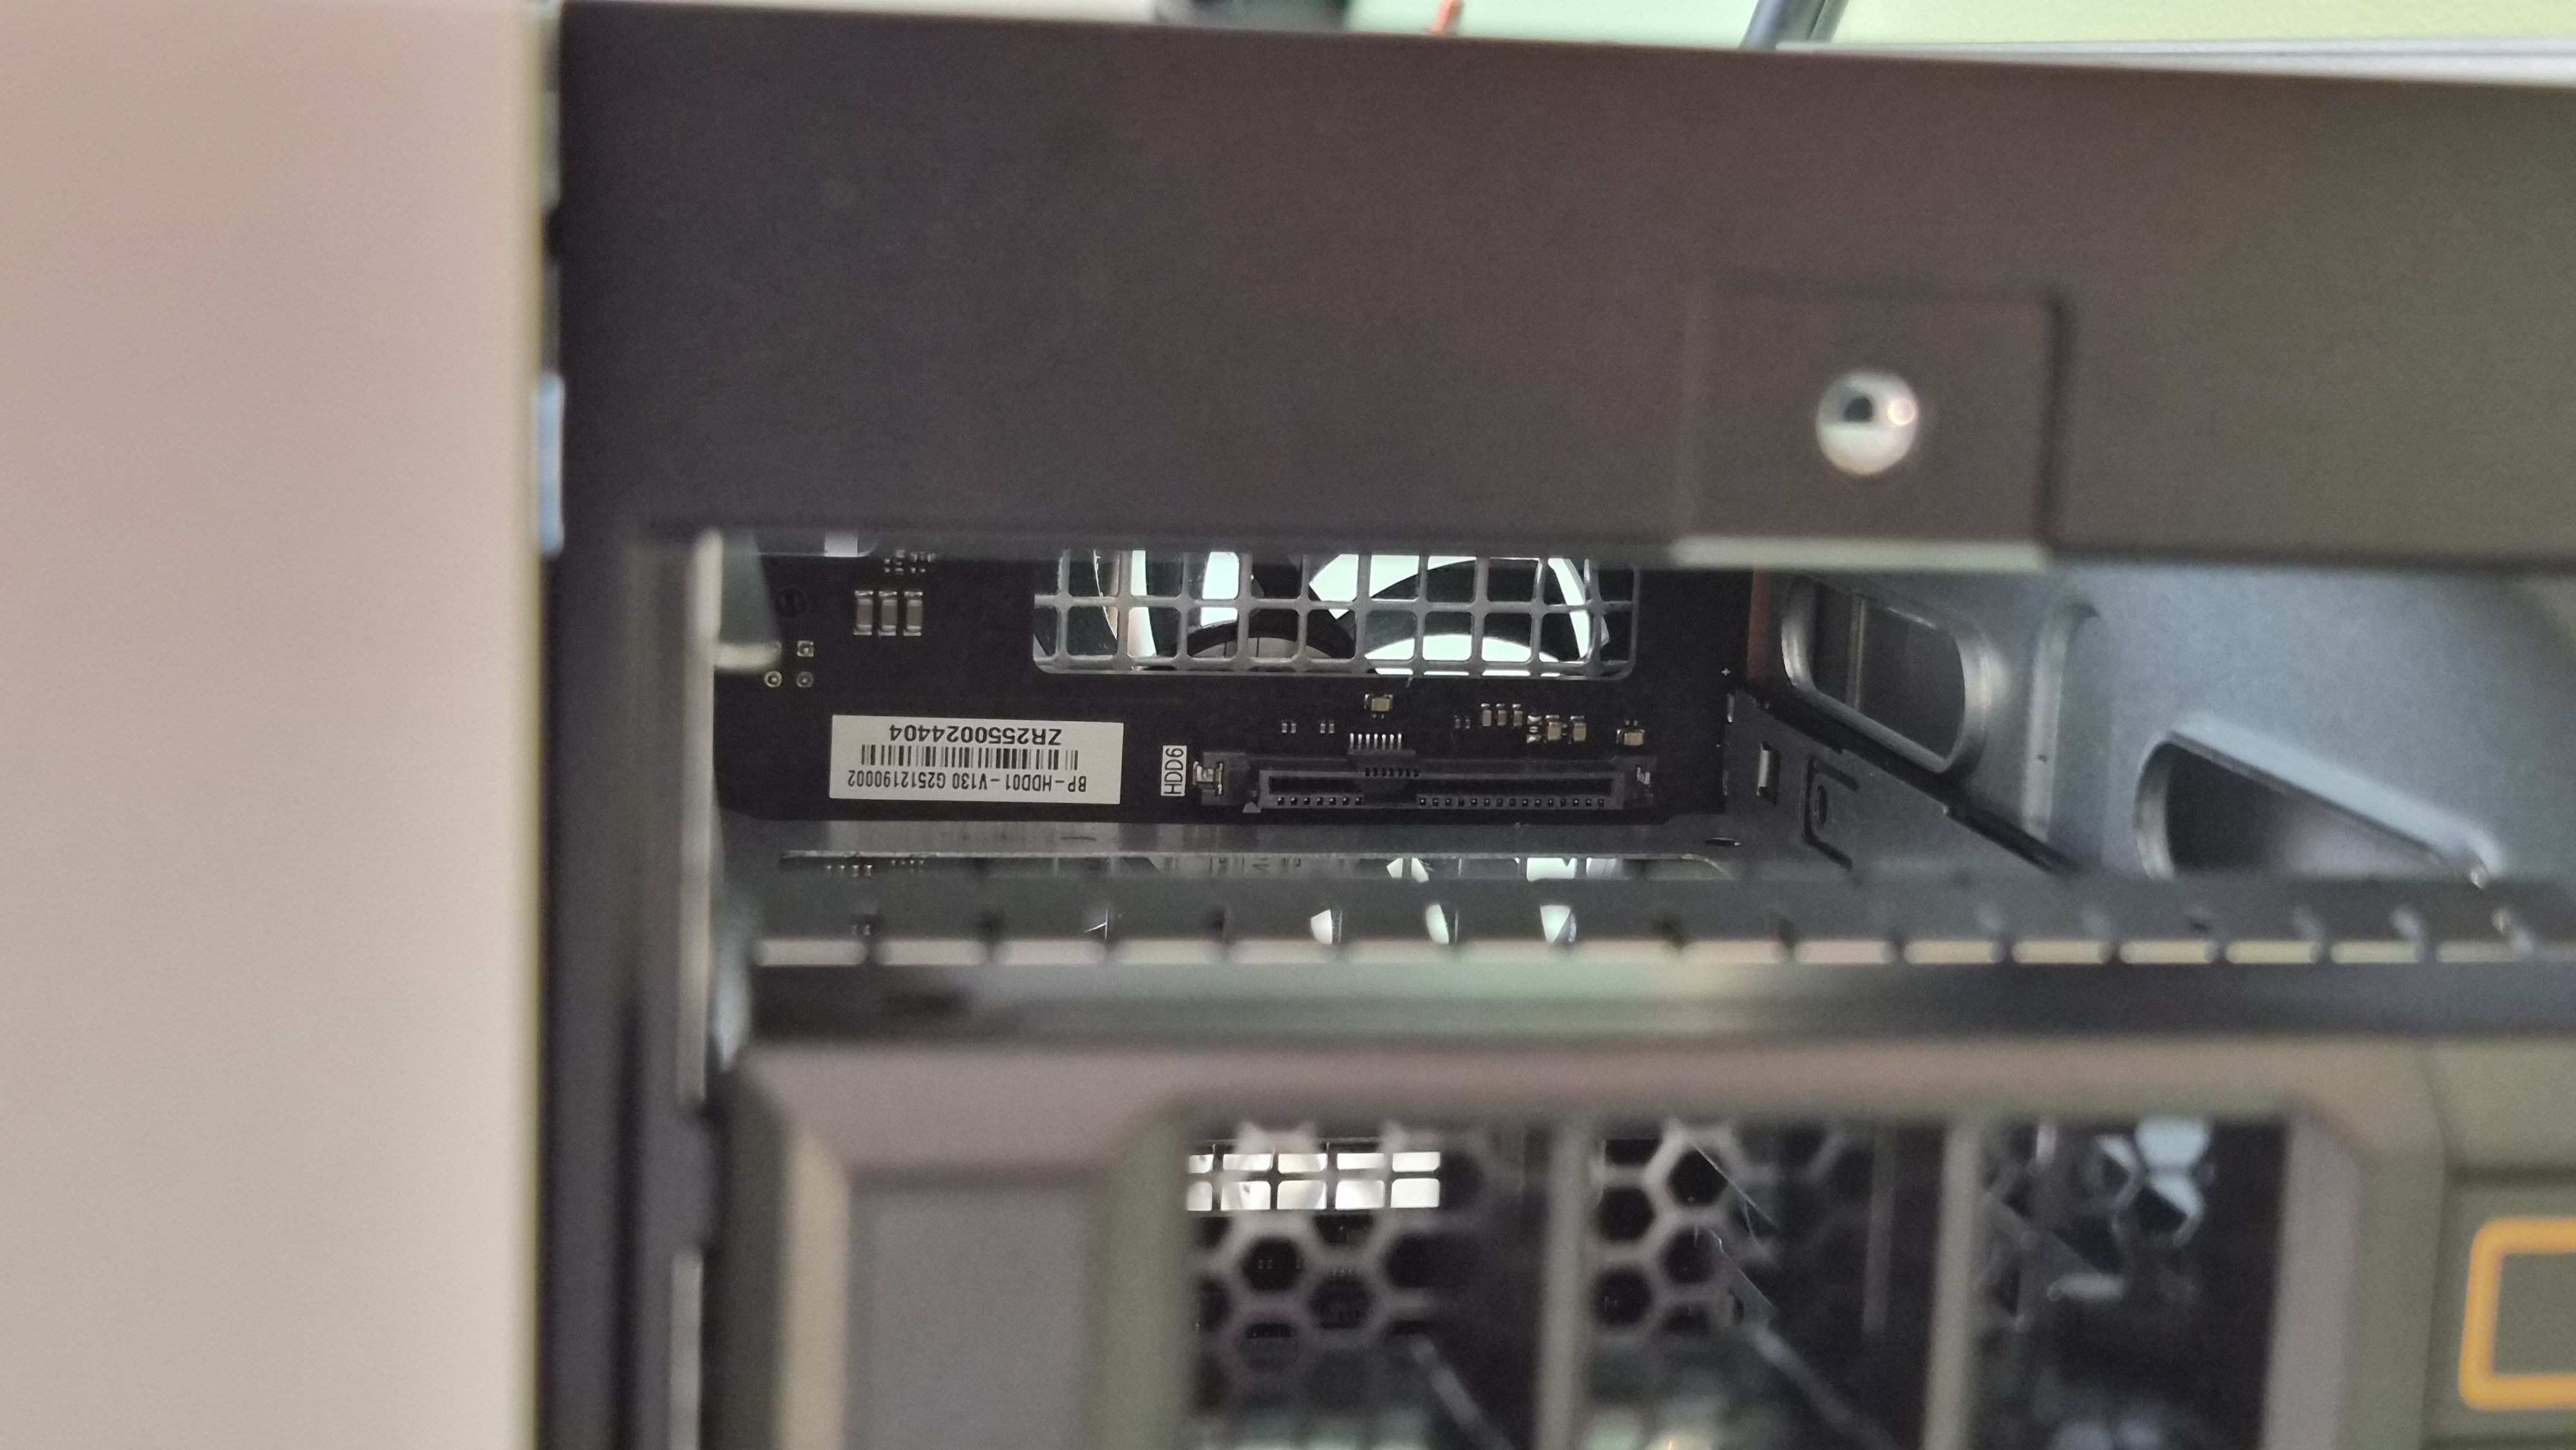
Drives and NVMe
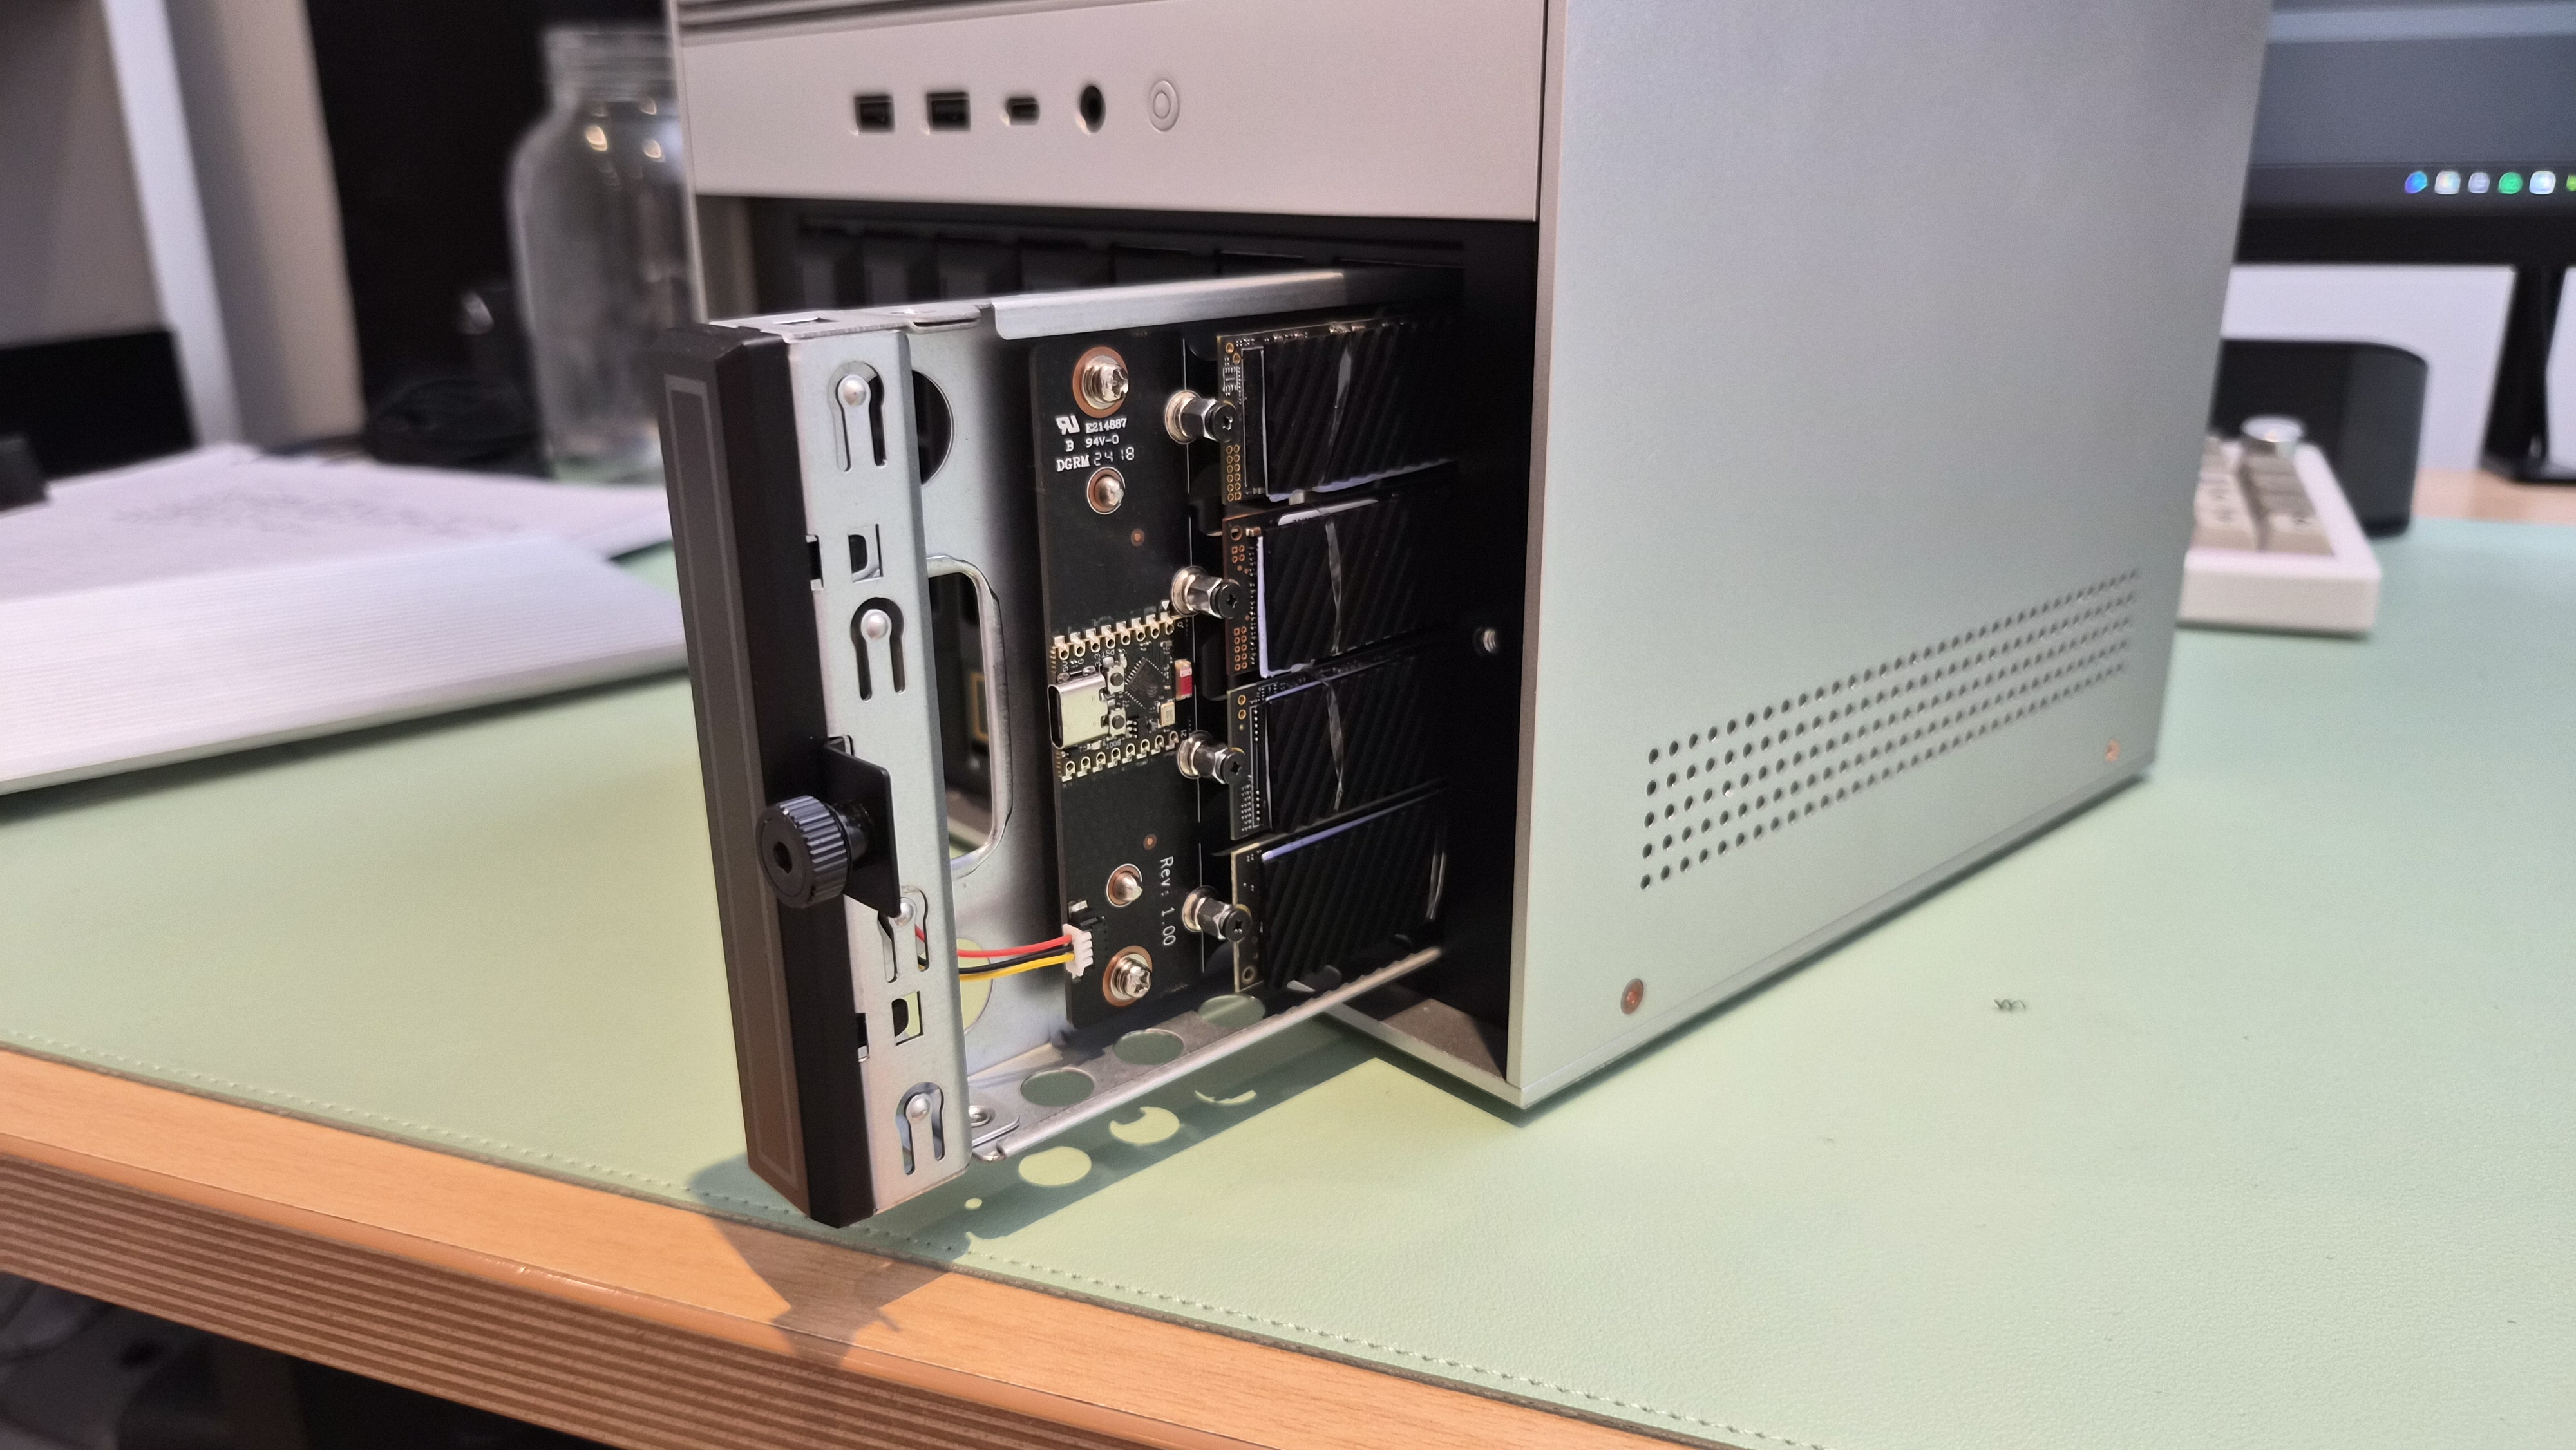
The drive caddies are solid. Six bays, tool-free once the drives are in, and they slide in with a satisfying click. I'm running three 1TB drives in mine right now, giving me plenty of room to grow.
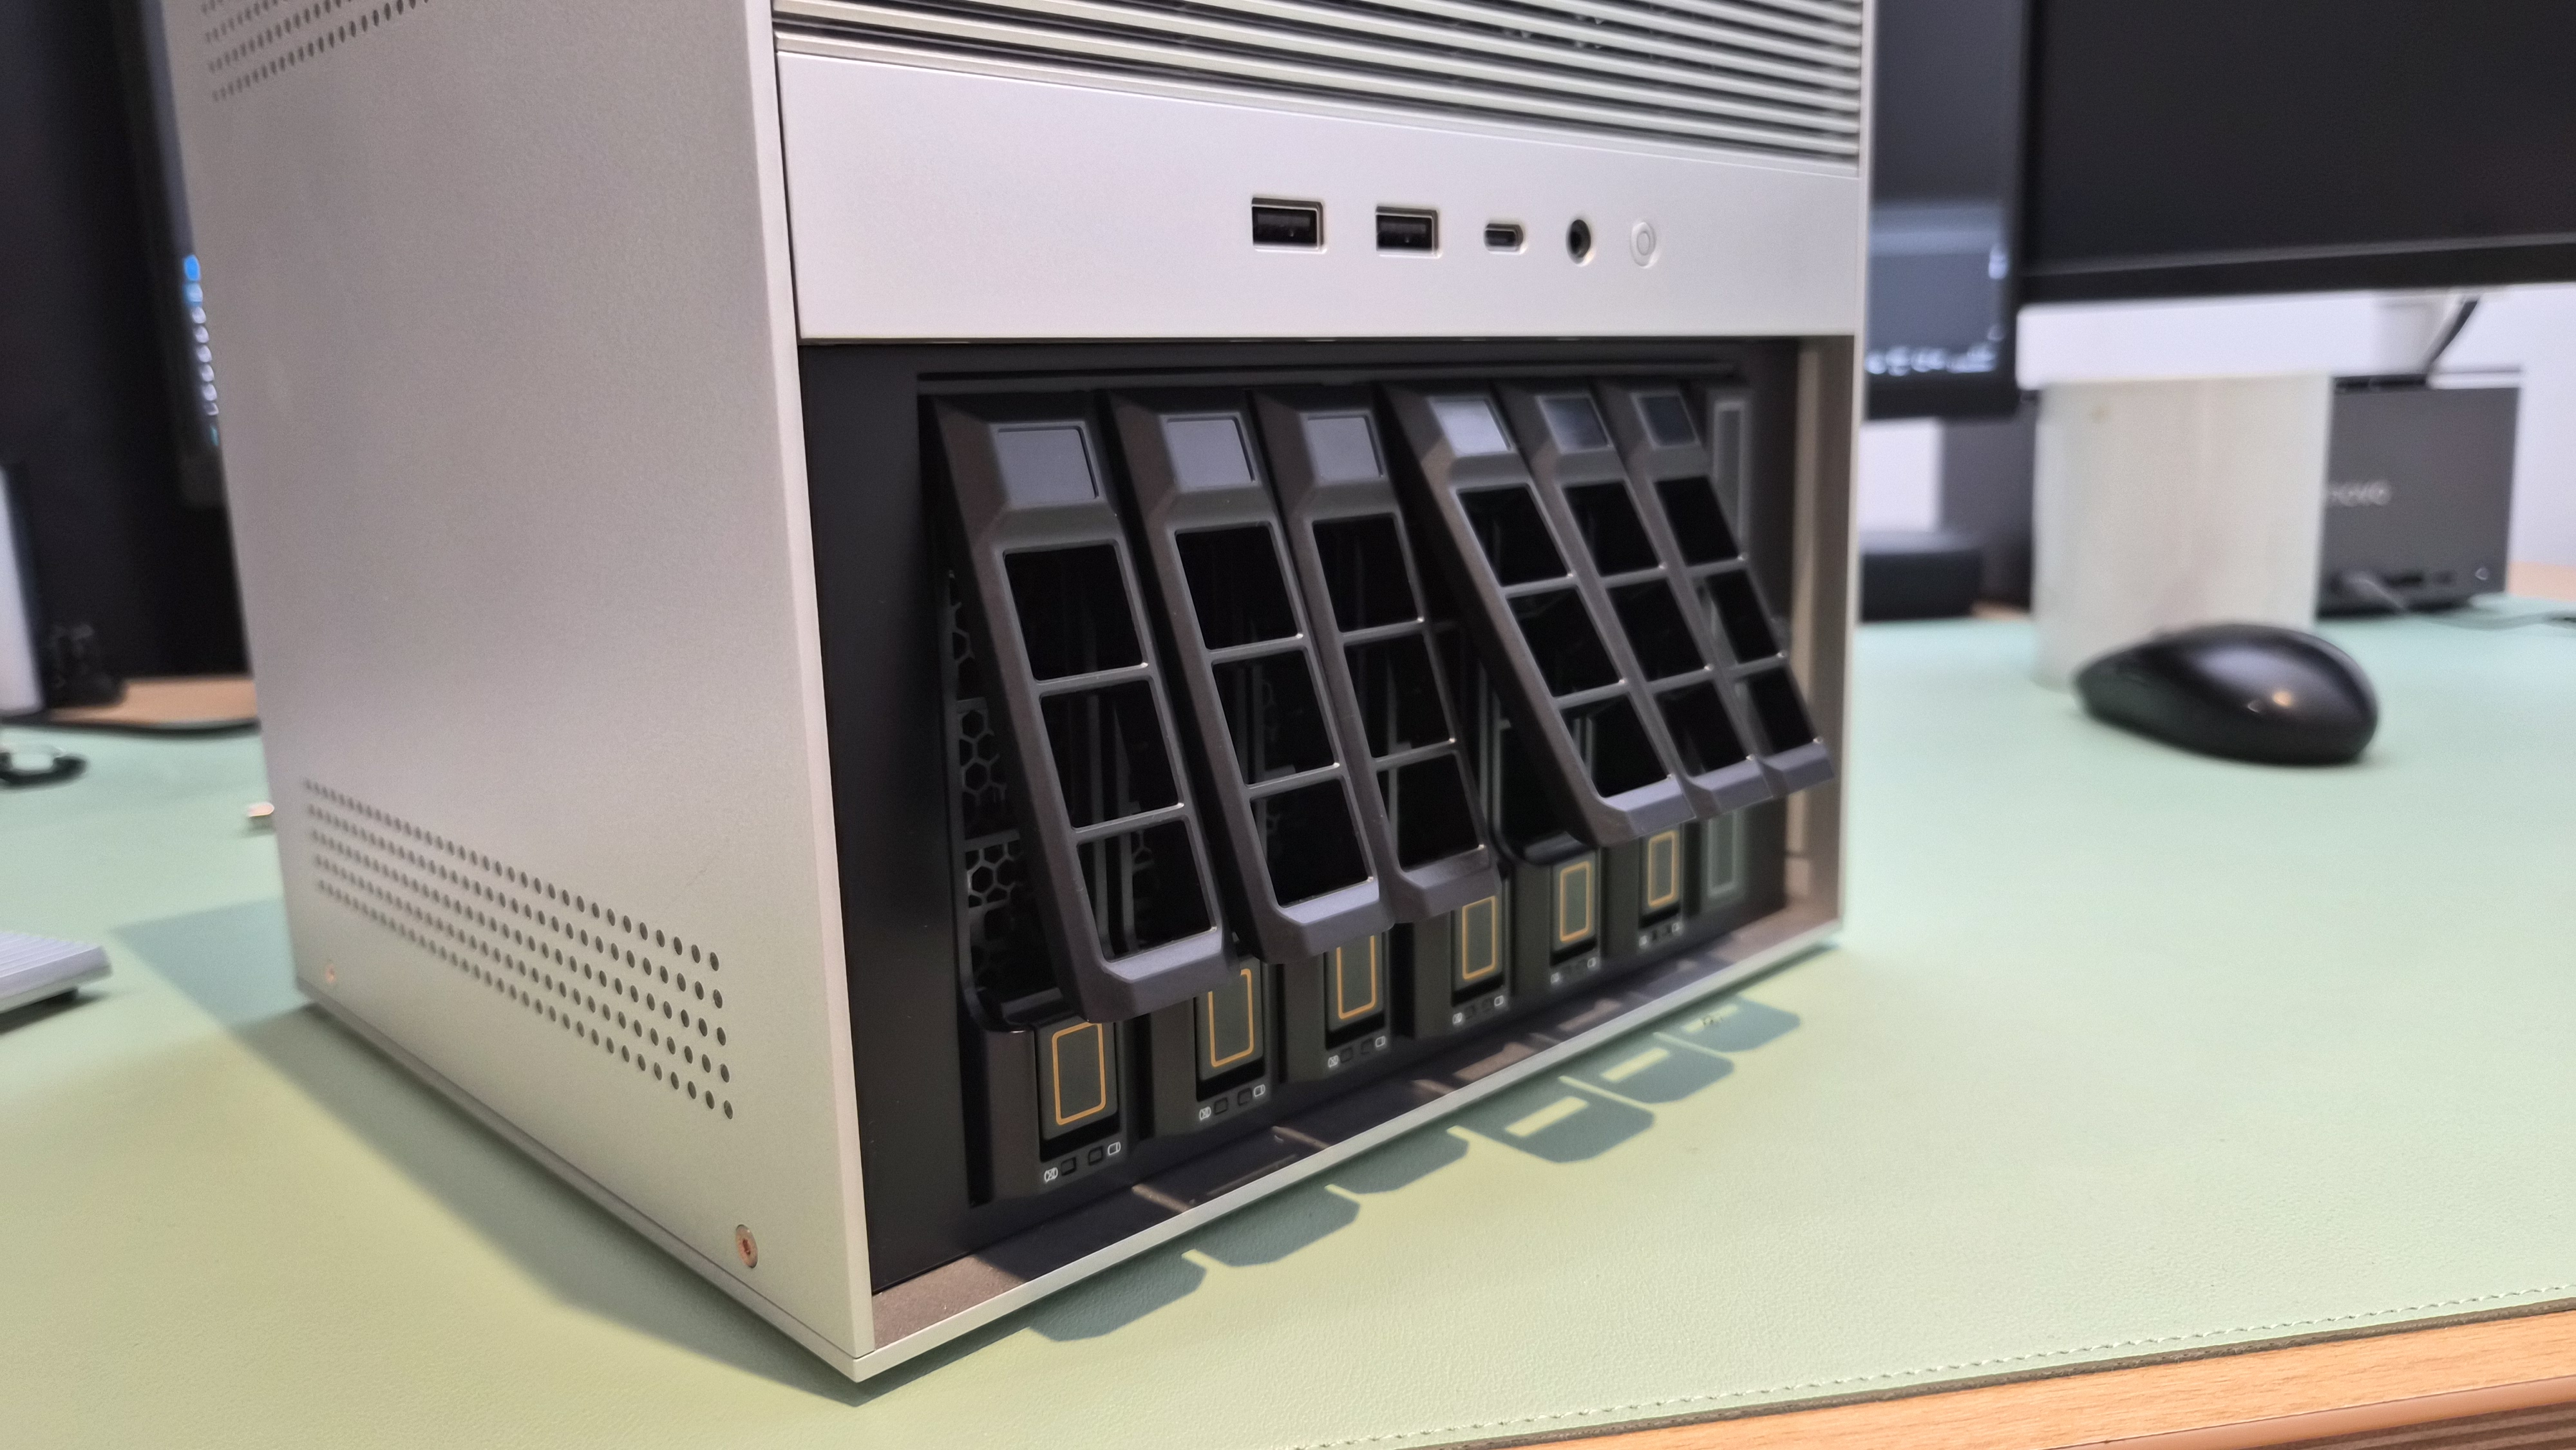
Drive bays unlocked and ready.
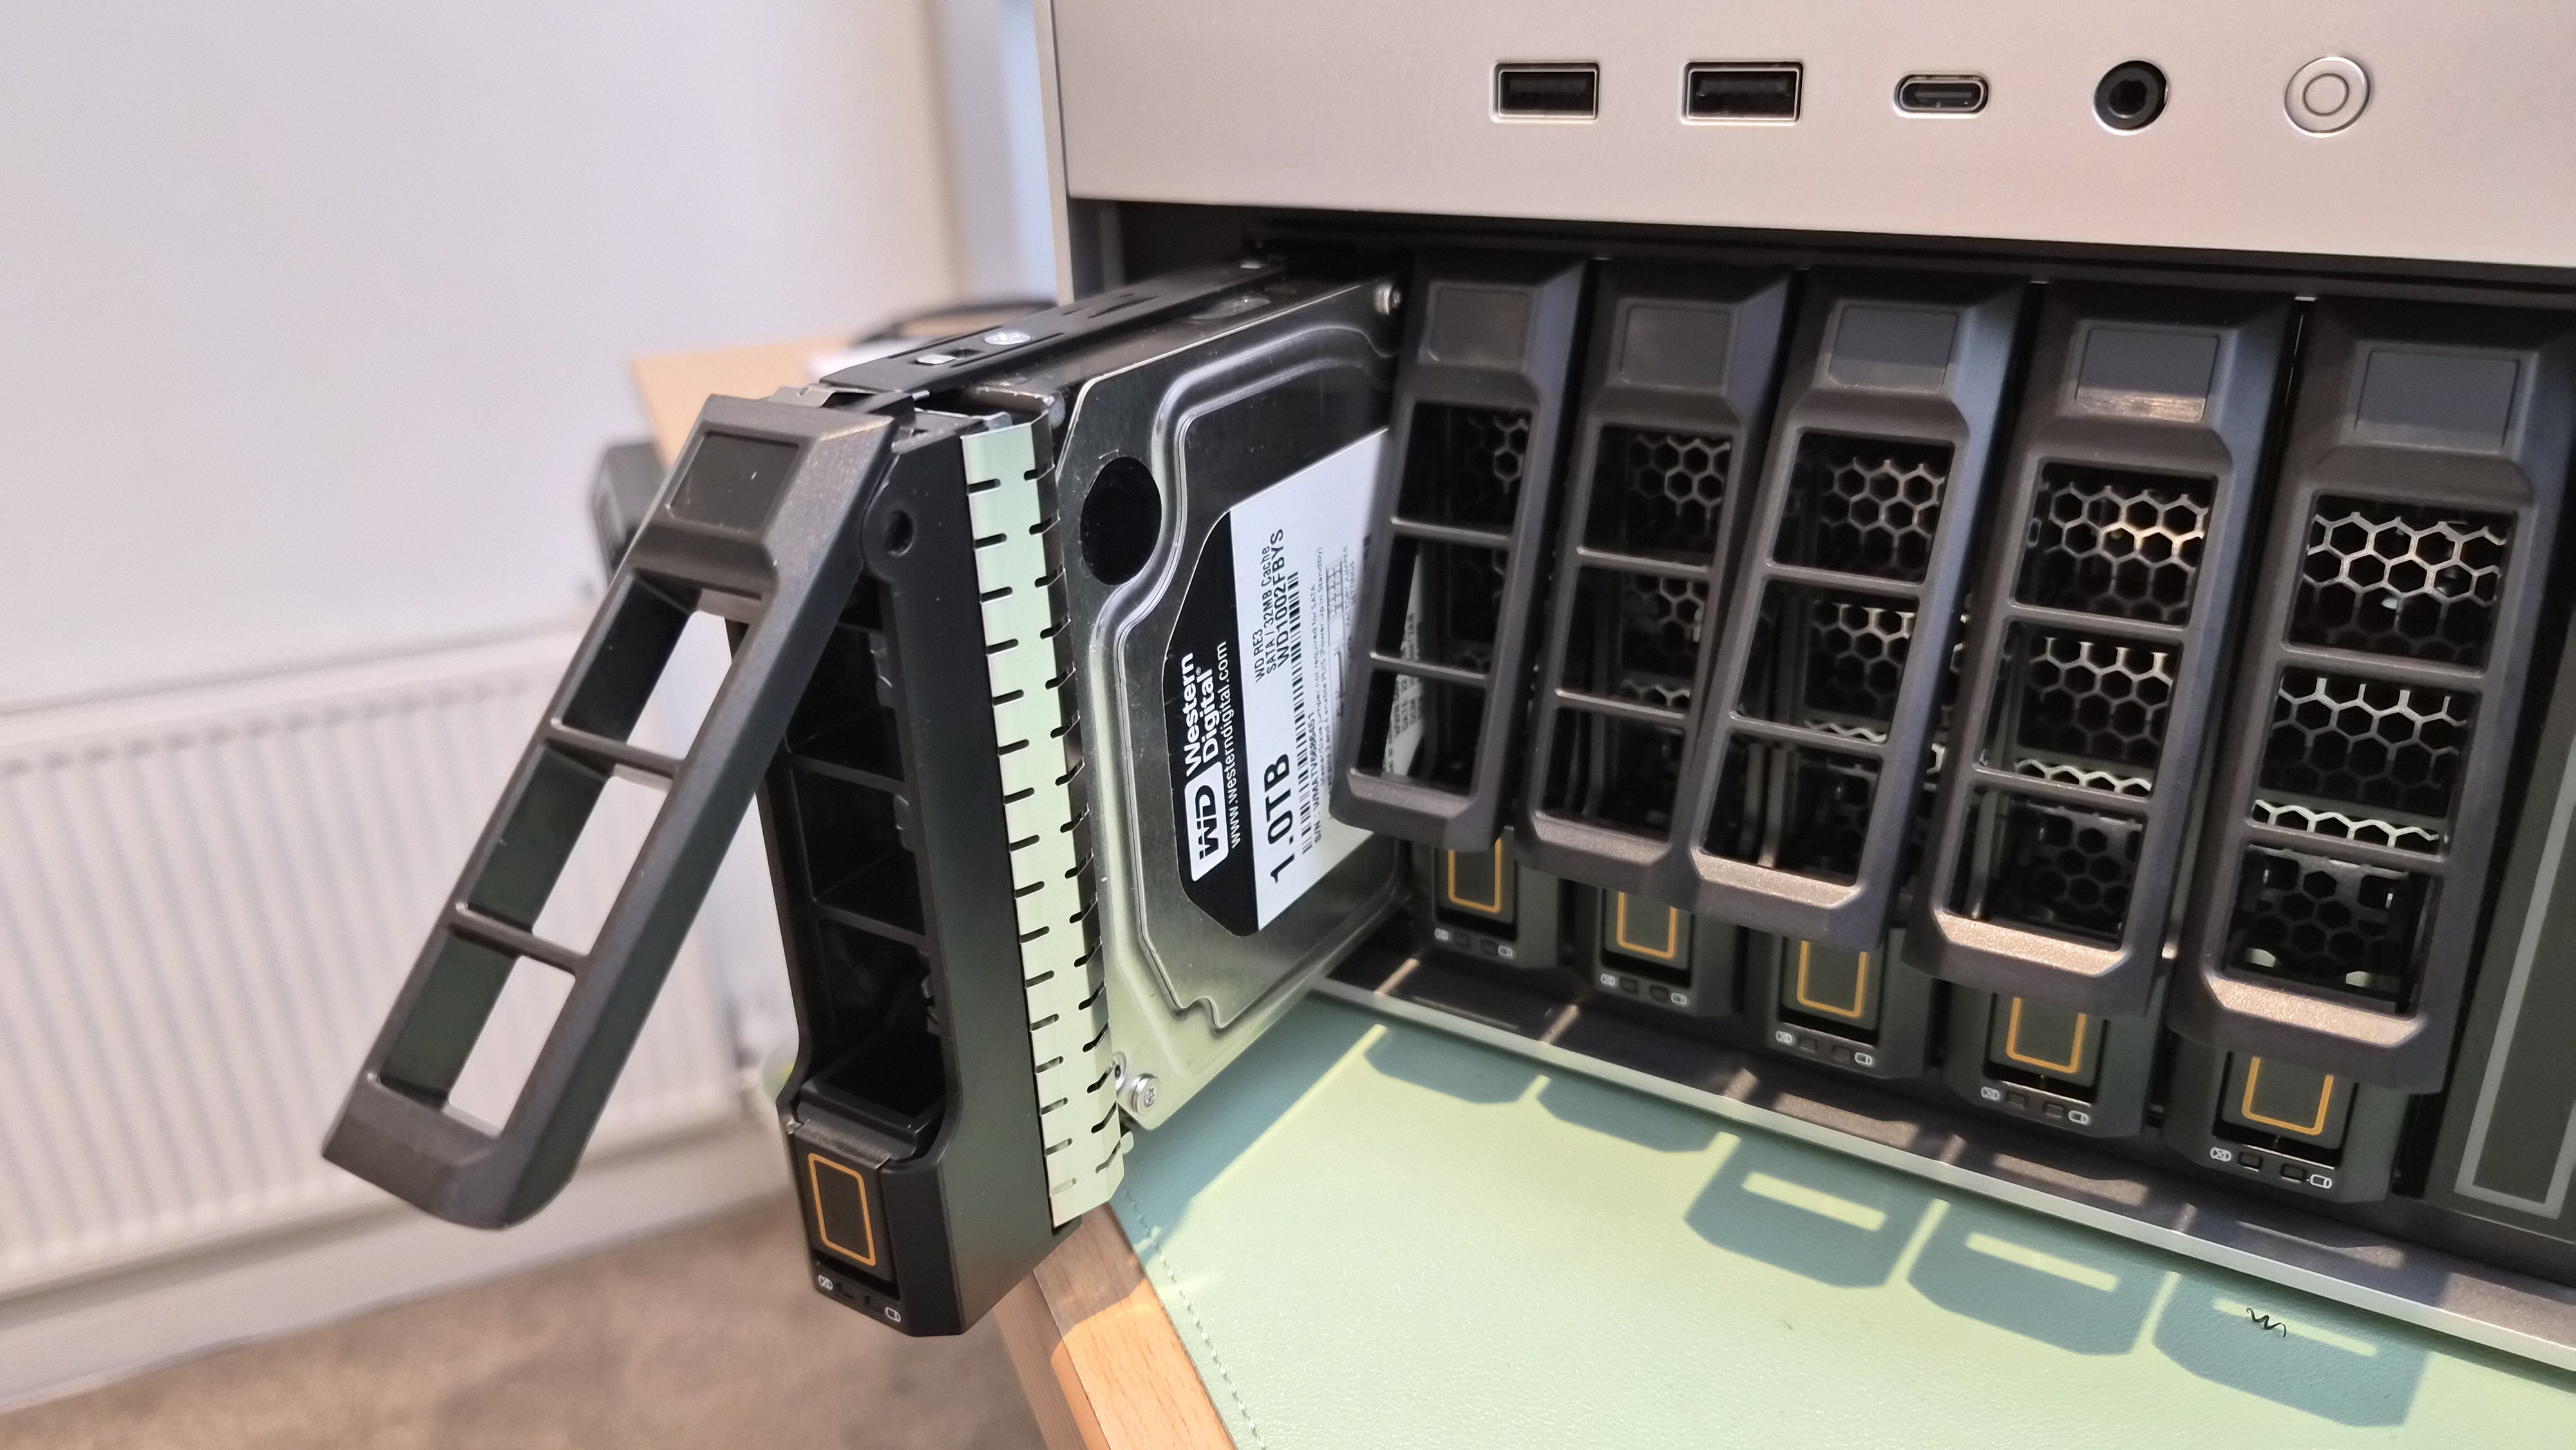
A drive pulled out in its caddy. Simple, solid.
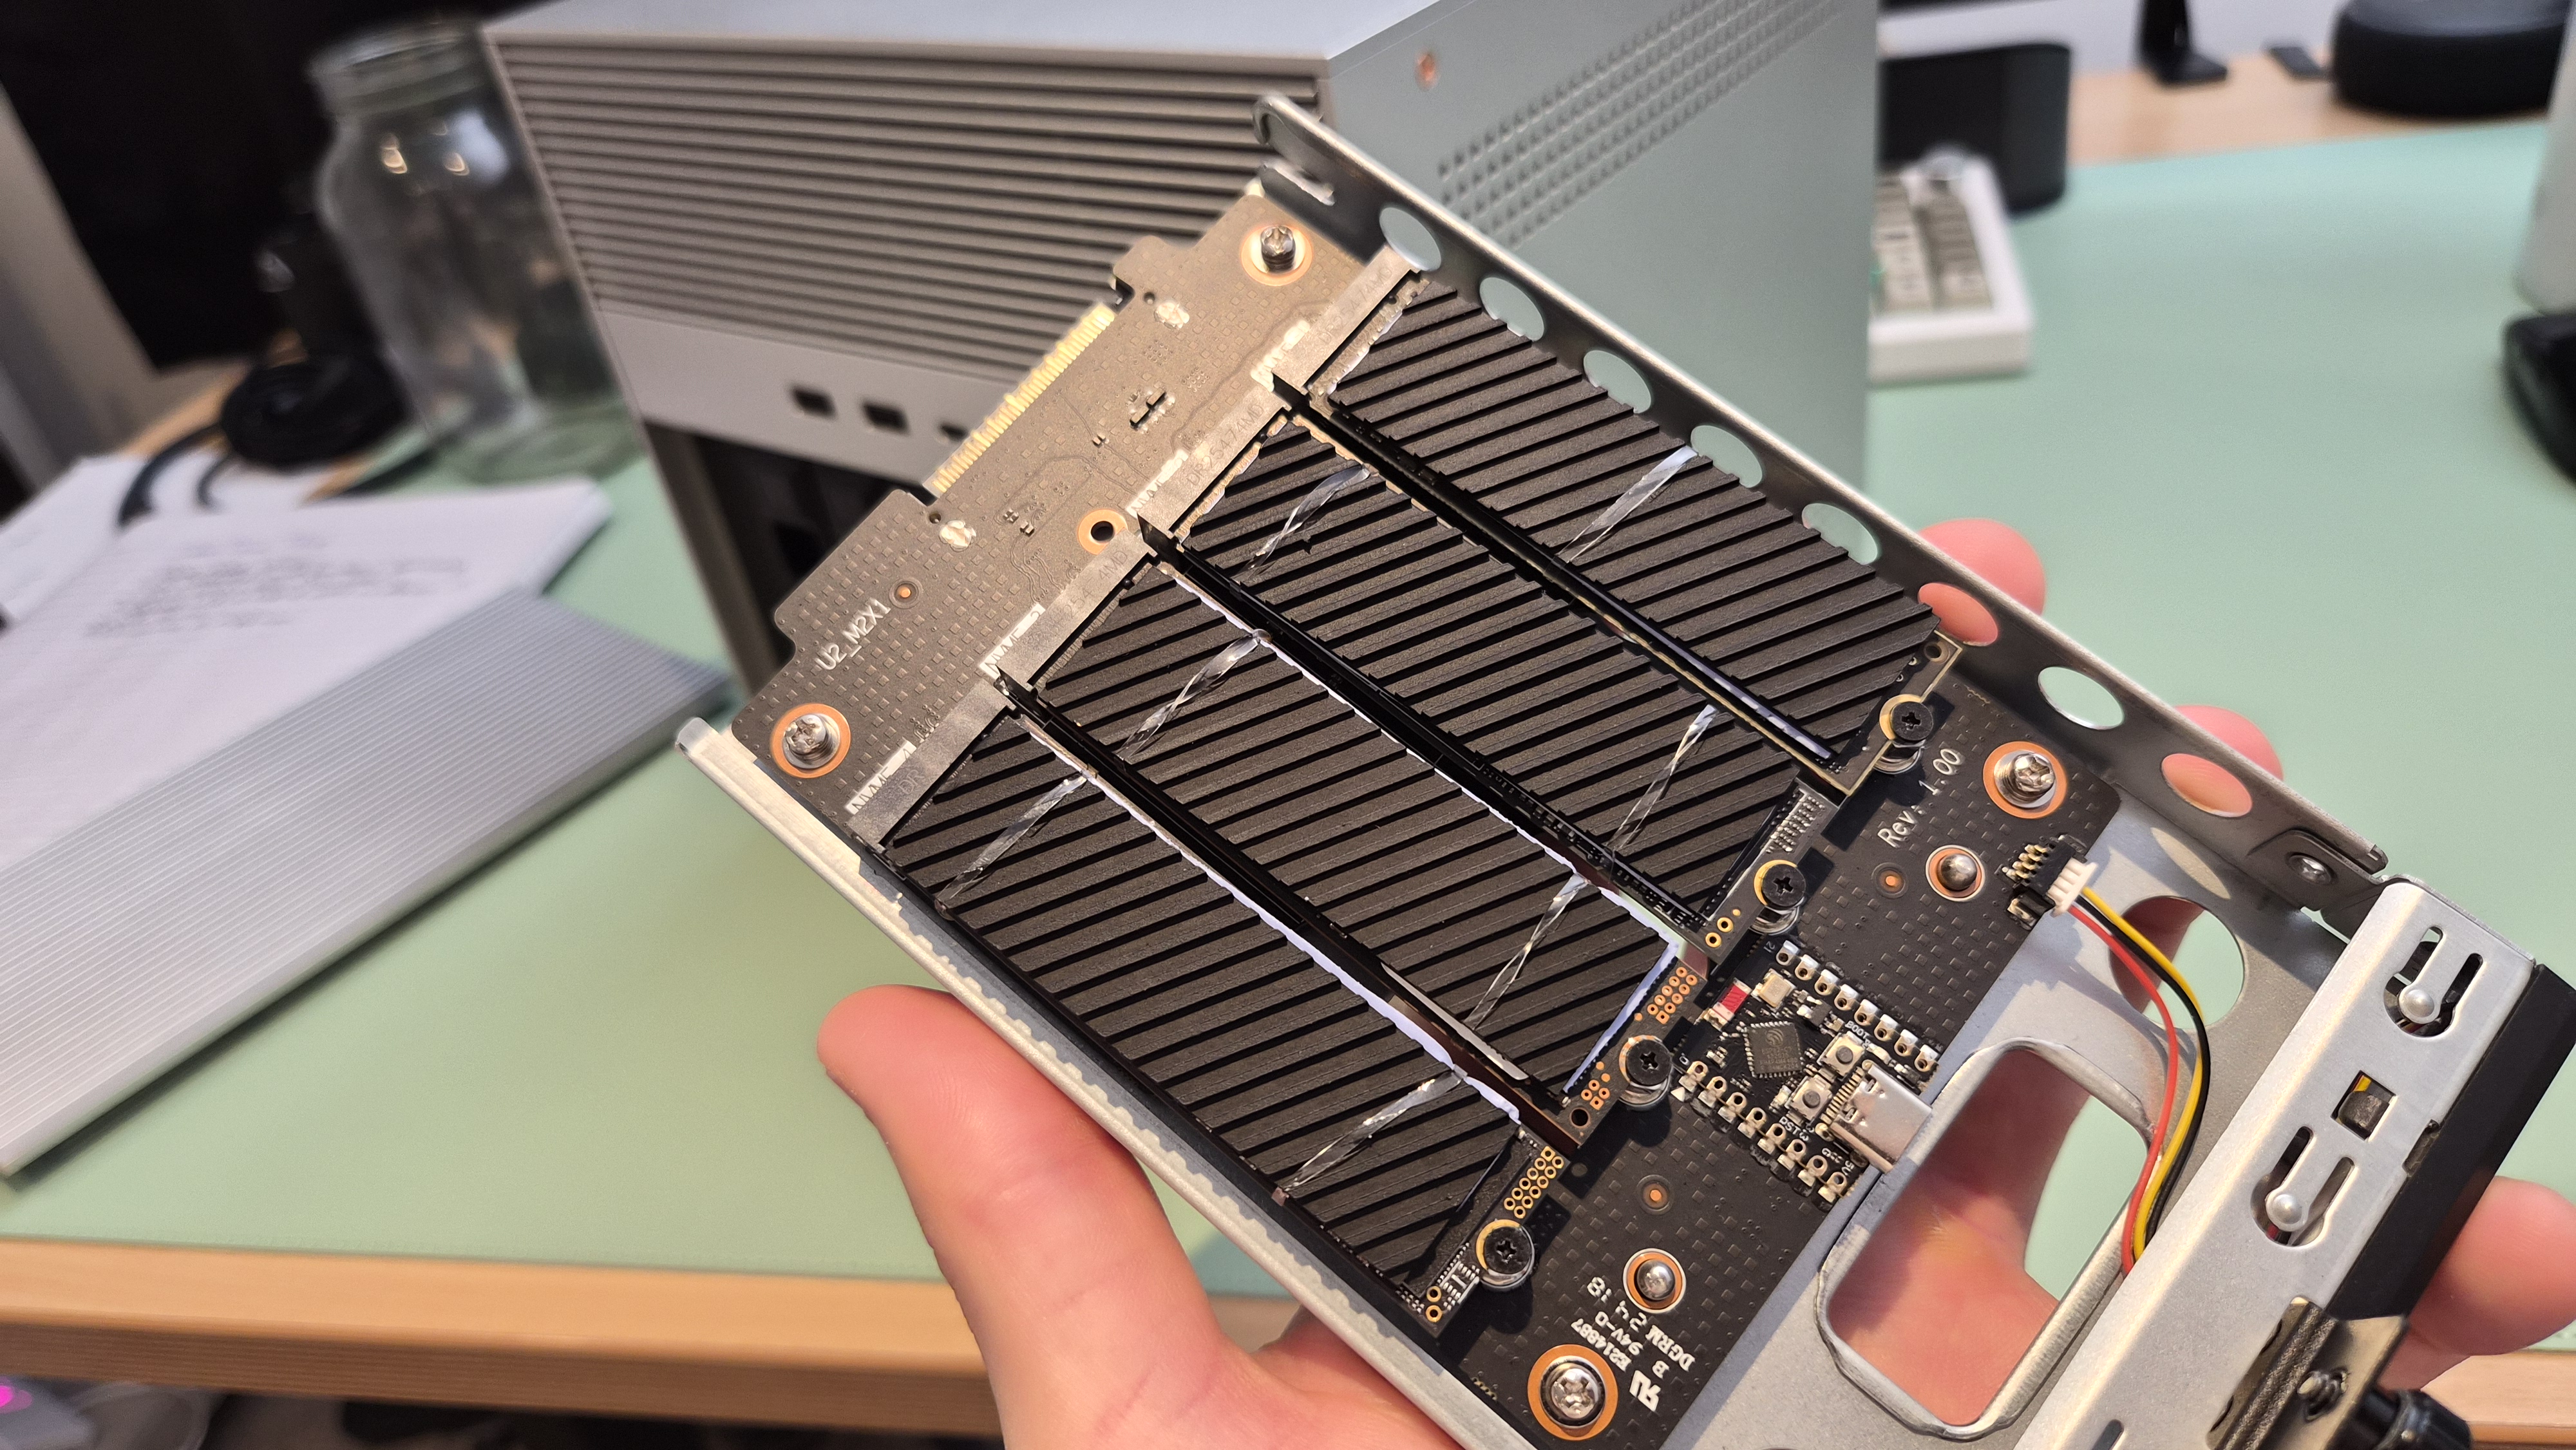
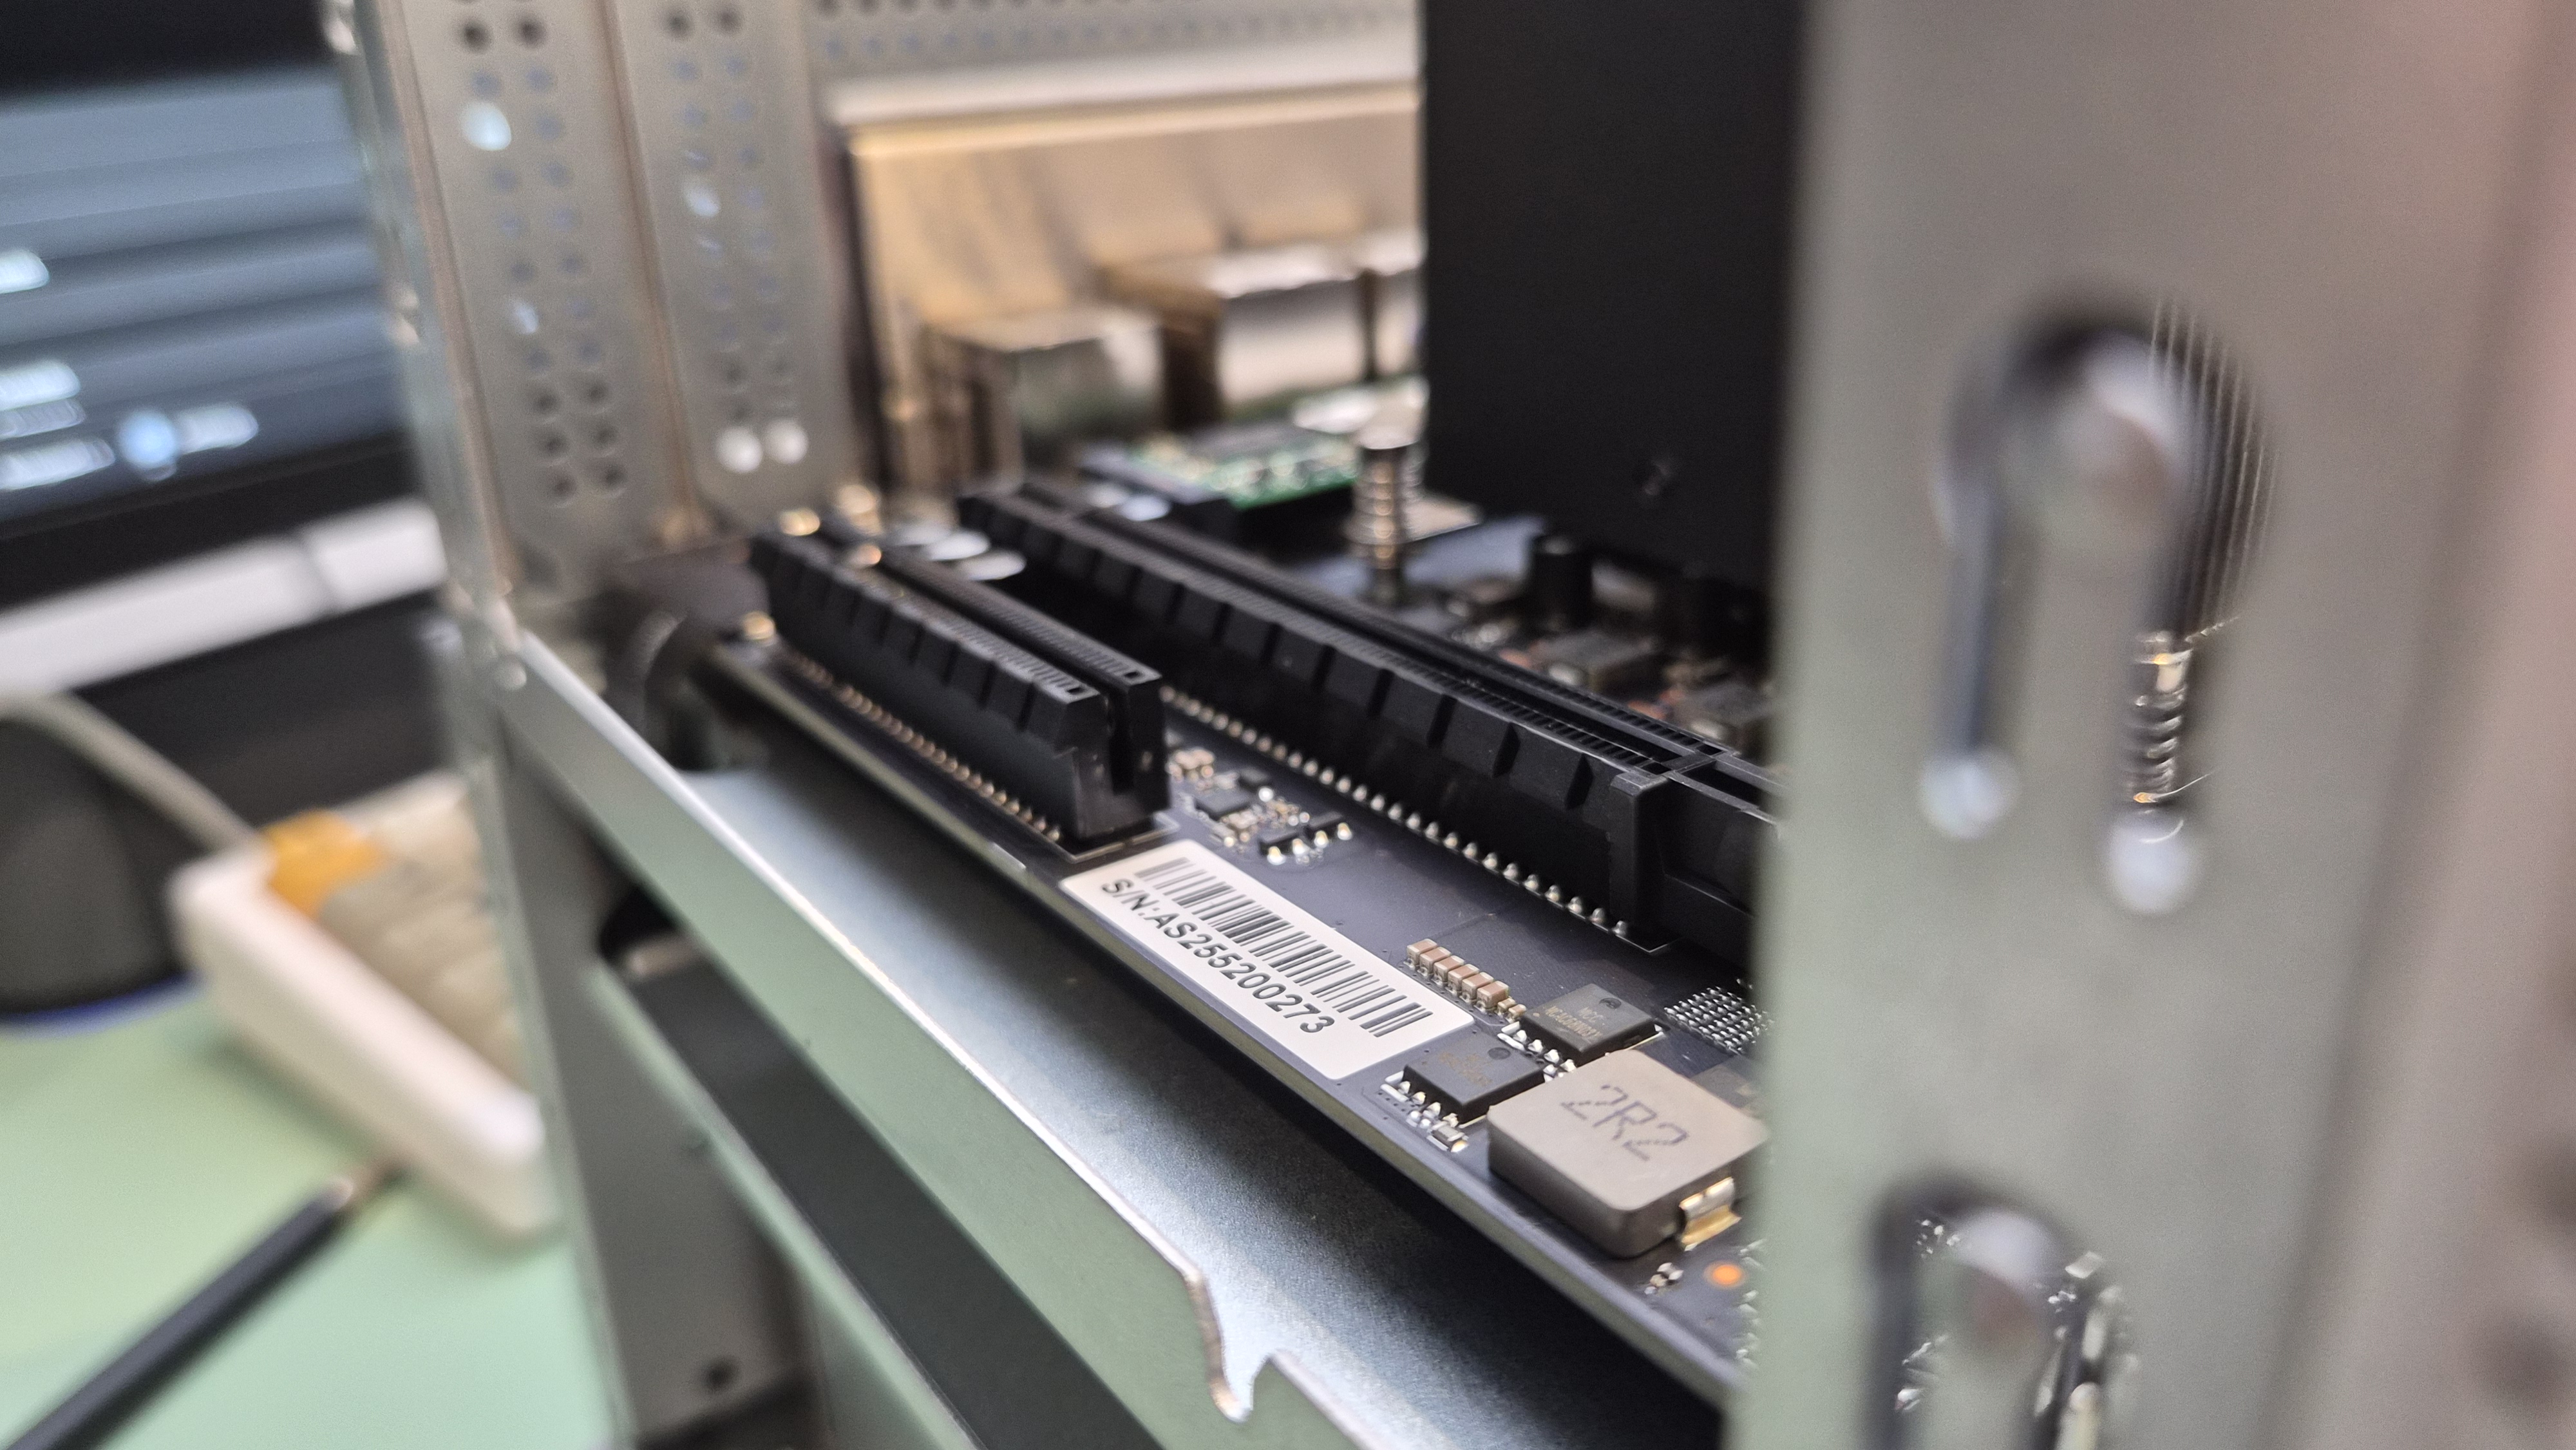
I've also moved my two NVMe drives out of the 4-bay NVMe adapter and into the motherboard slots. The motherboard slots aren't capped like the adapter ones — you get full PCIe bandwidth there, not the ~800MB/s limit that comes from the adapter sharing lanes.
The NVMe adapter board itself is a neat piece of engineering. Four NVMe slots on a single board, compact, well-made. I pulled it out to move my drives to the faster motherboard slots.

The NVMe adapter board — four slots in one compact unit.
Halfway out. It slides in and out cleanly.
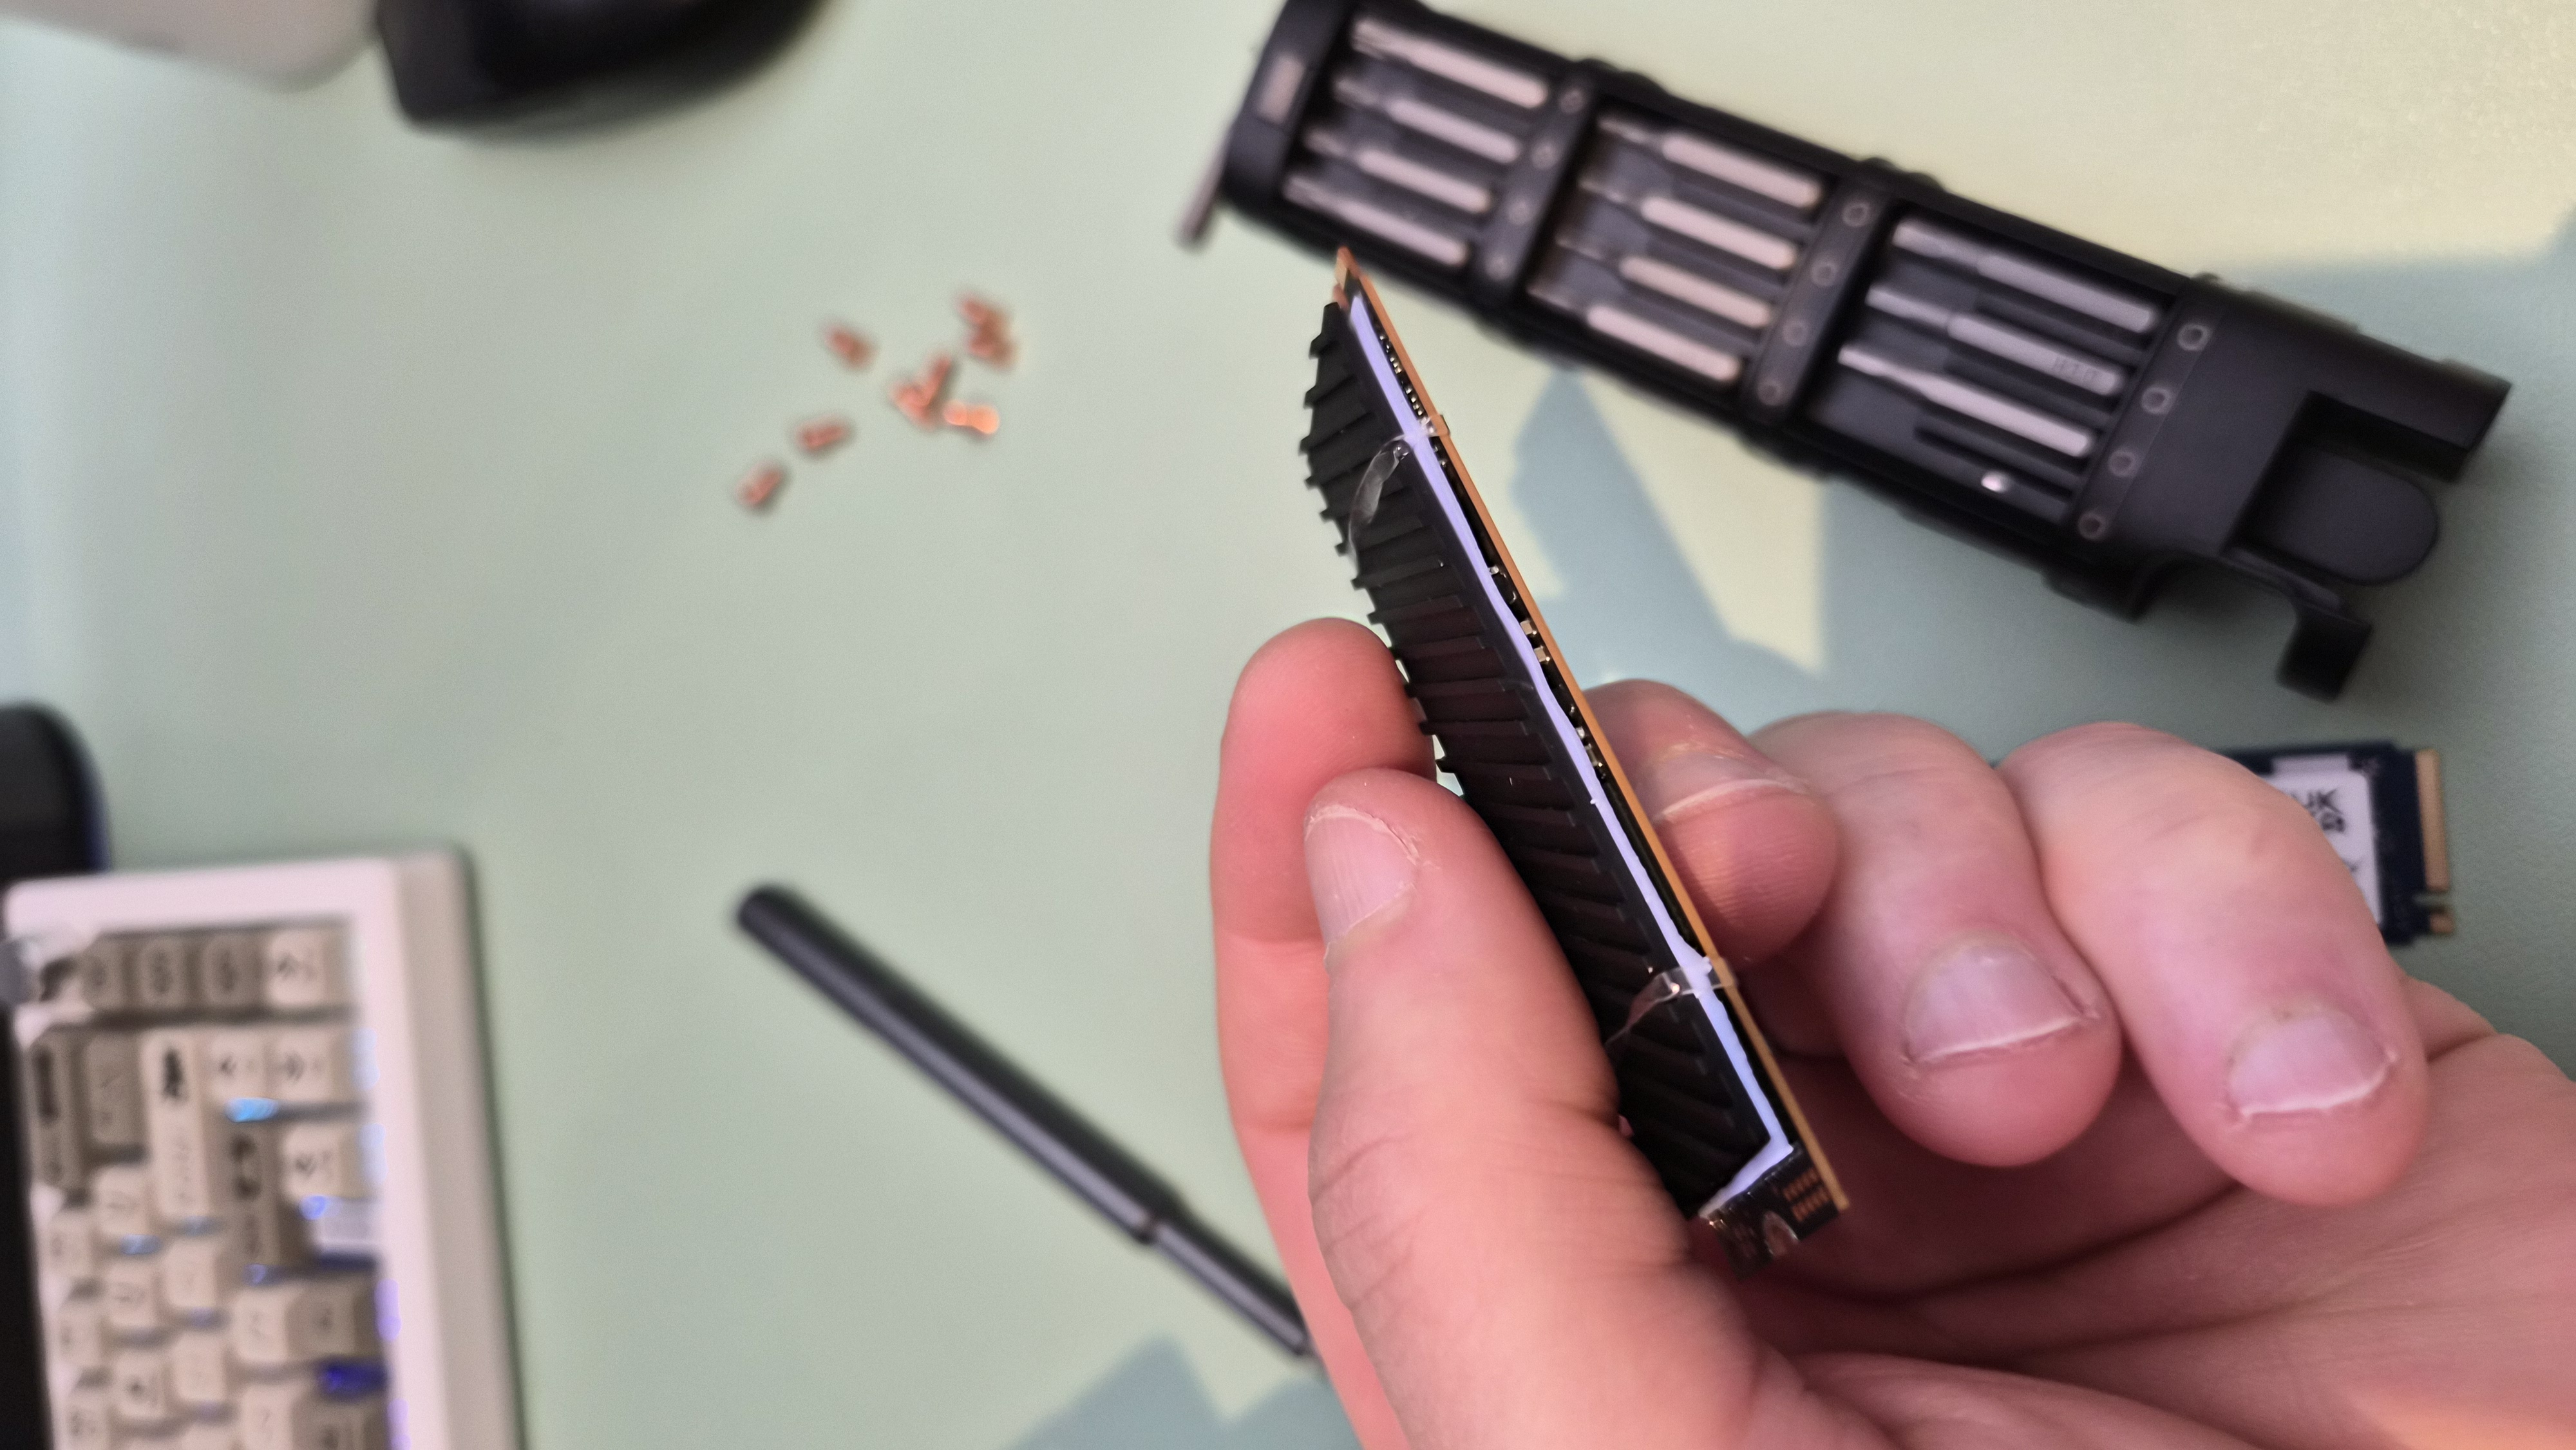
The heatsink that came with the ZimaCube — keeps the boot drive cool.
But here's the oddity: there's a USB-C port on the back of the NVMe adapter board. I stared at this for a while. What is it for? Is it data passthrough? Is it for an external drive? Is it for debugging? I don't have an answer yet, but I'm curious enough that I'll figure it out eventually.
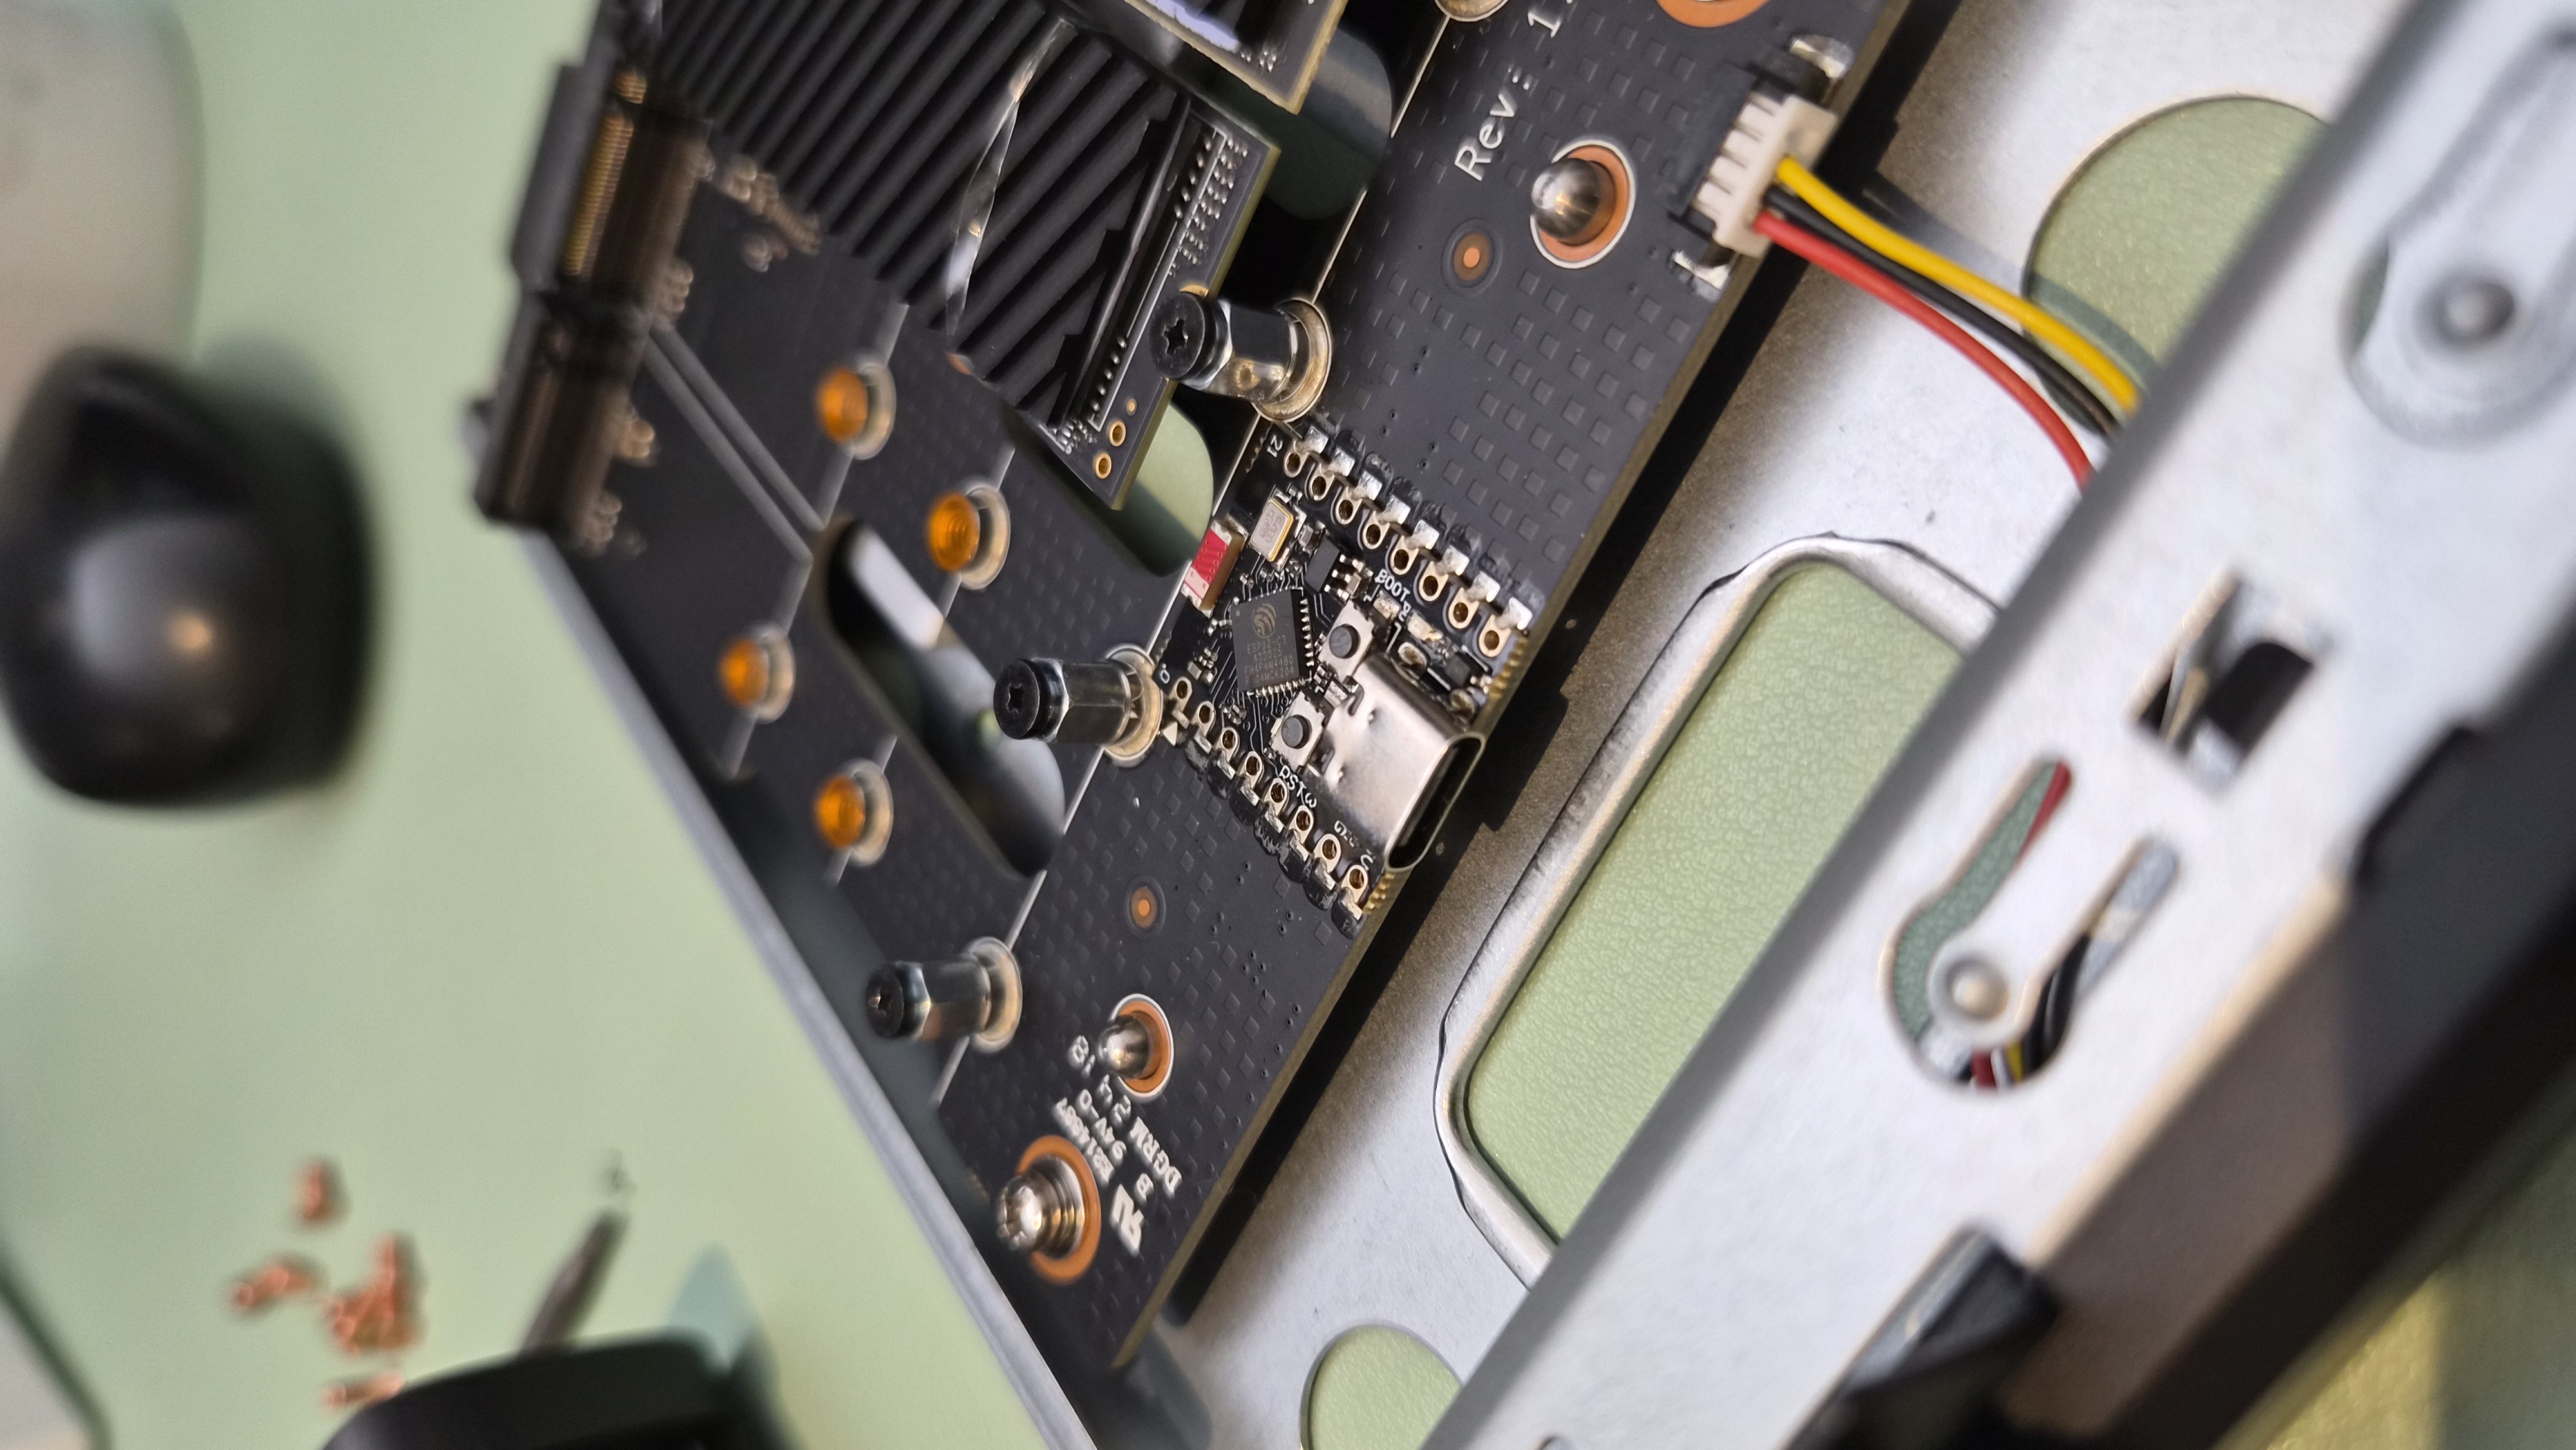
The mystery USB-C port on the back of the NVMe adapter. No idea what it's for.
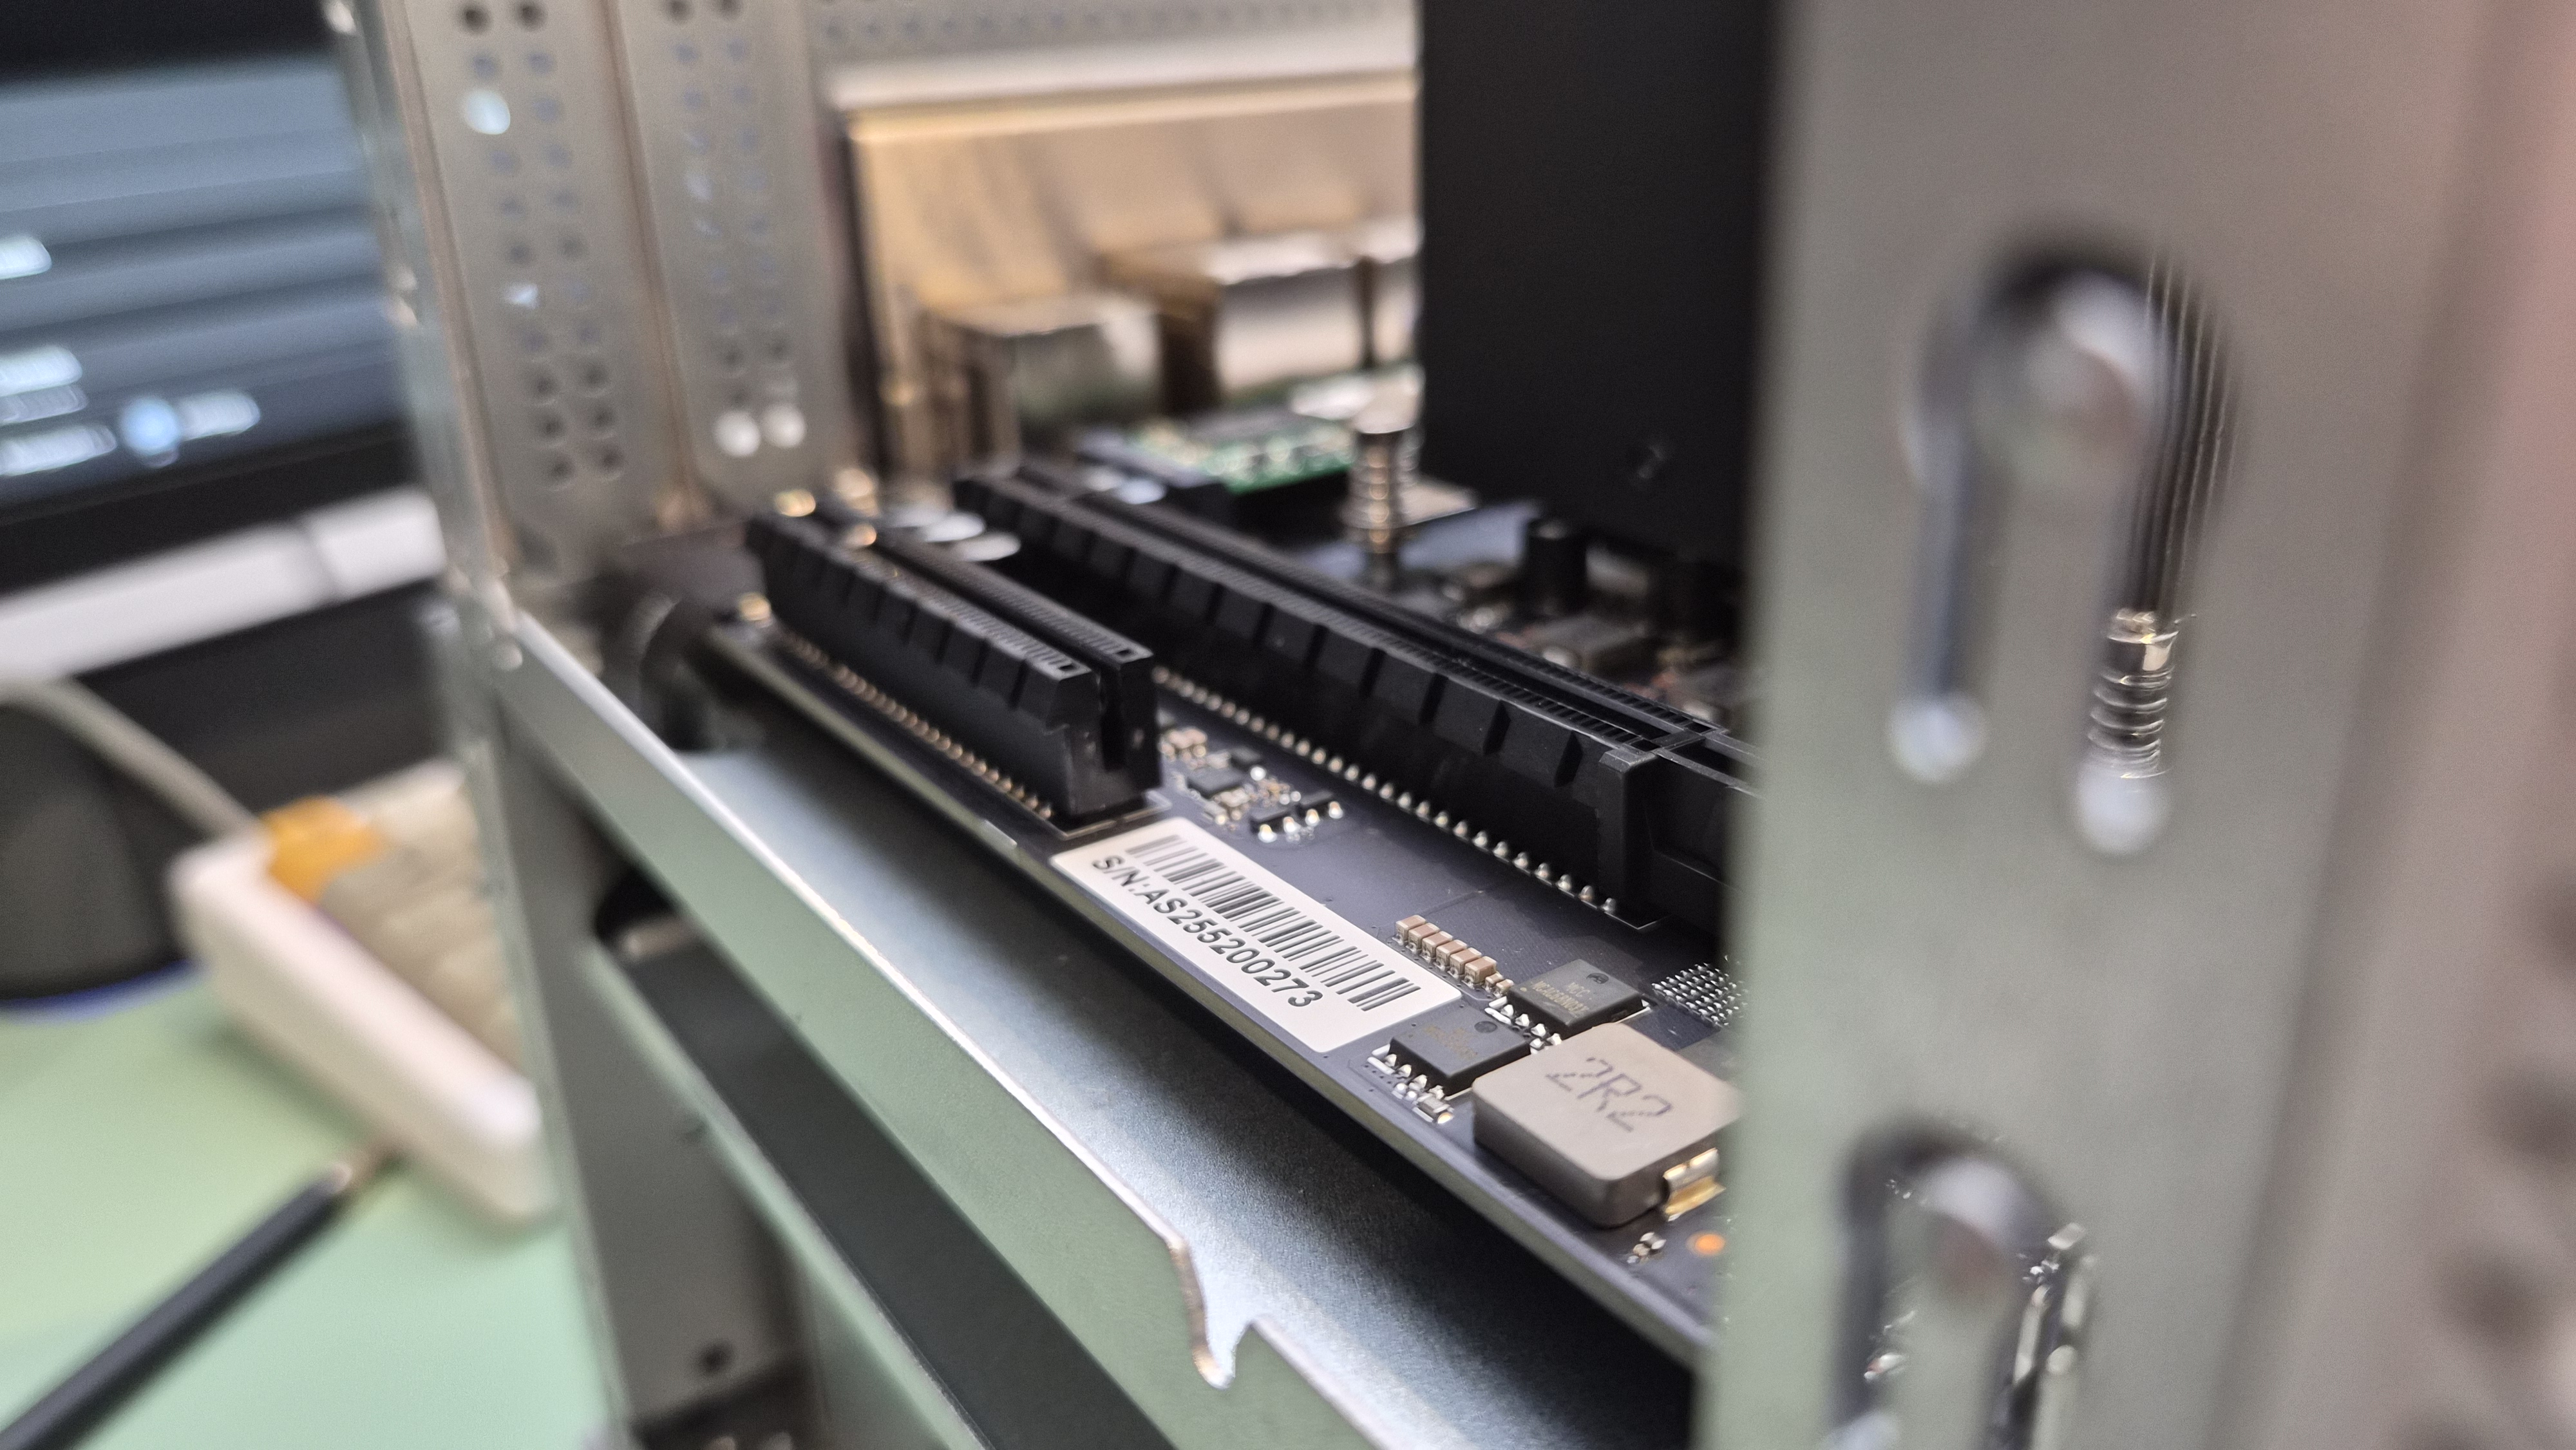
The motherboard NVMe slots are unrestricted and easy to access. One of them had the 256GB ZimaOS boot drive under the heatsink; the other was free. That's where my faster drives live now.
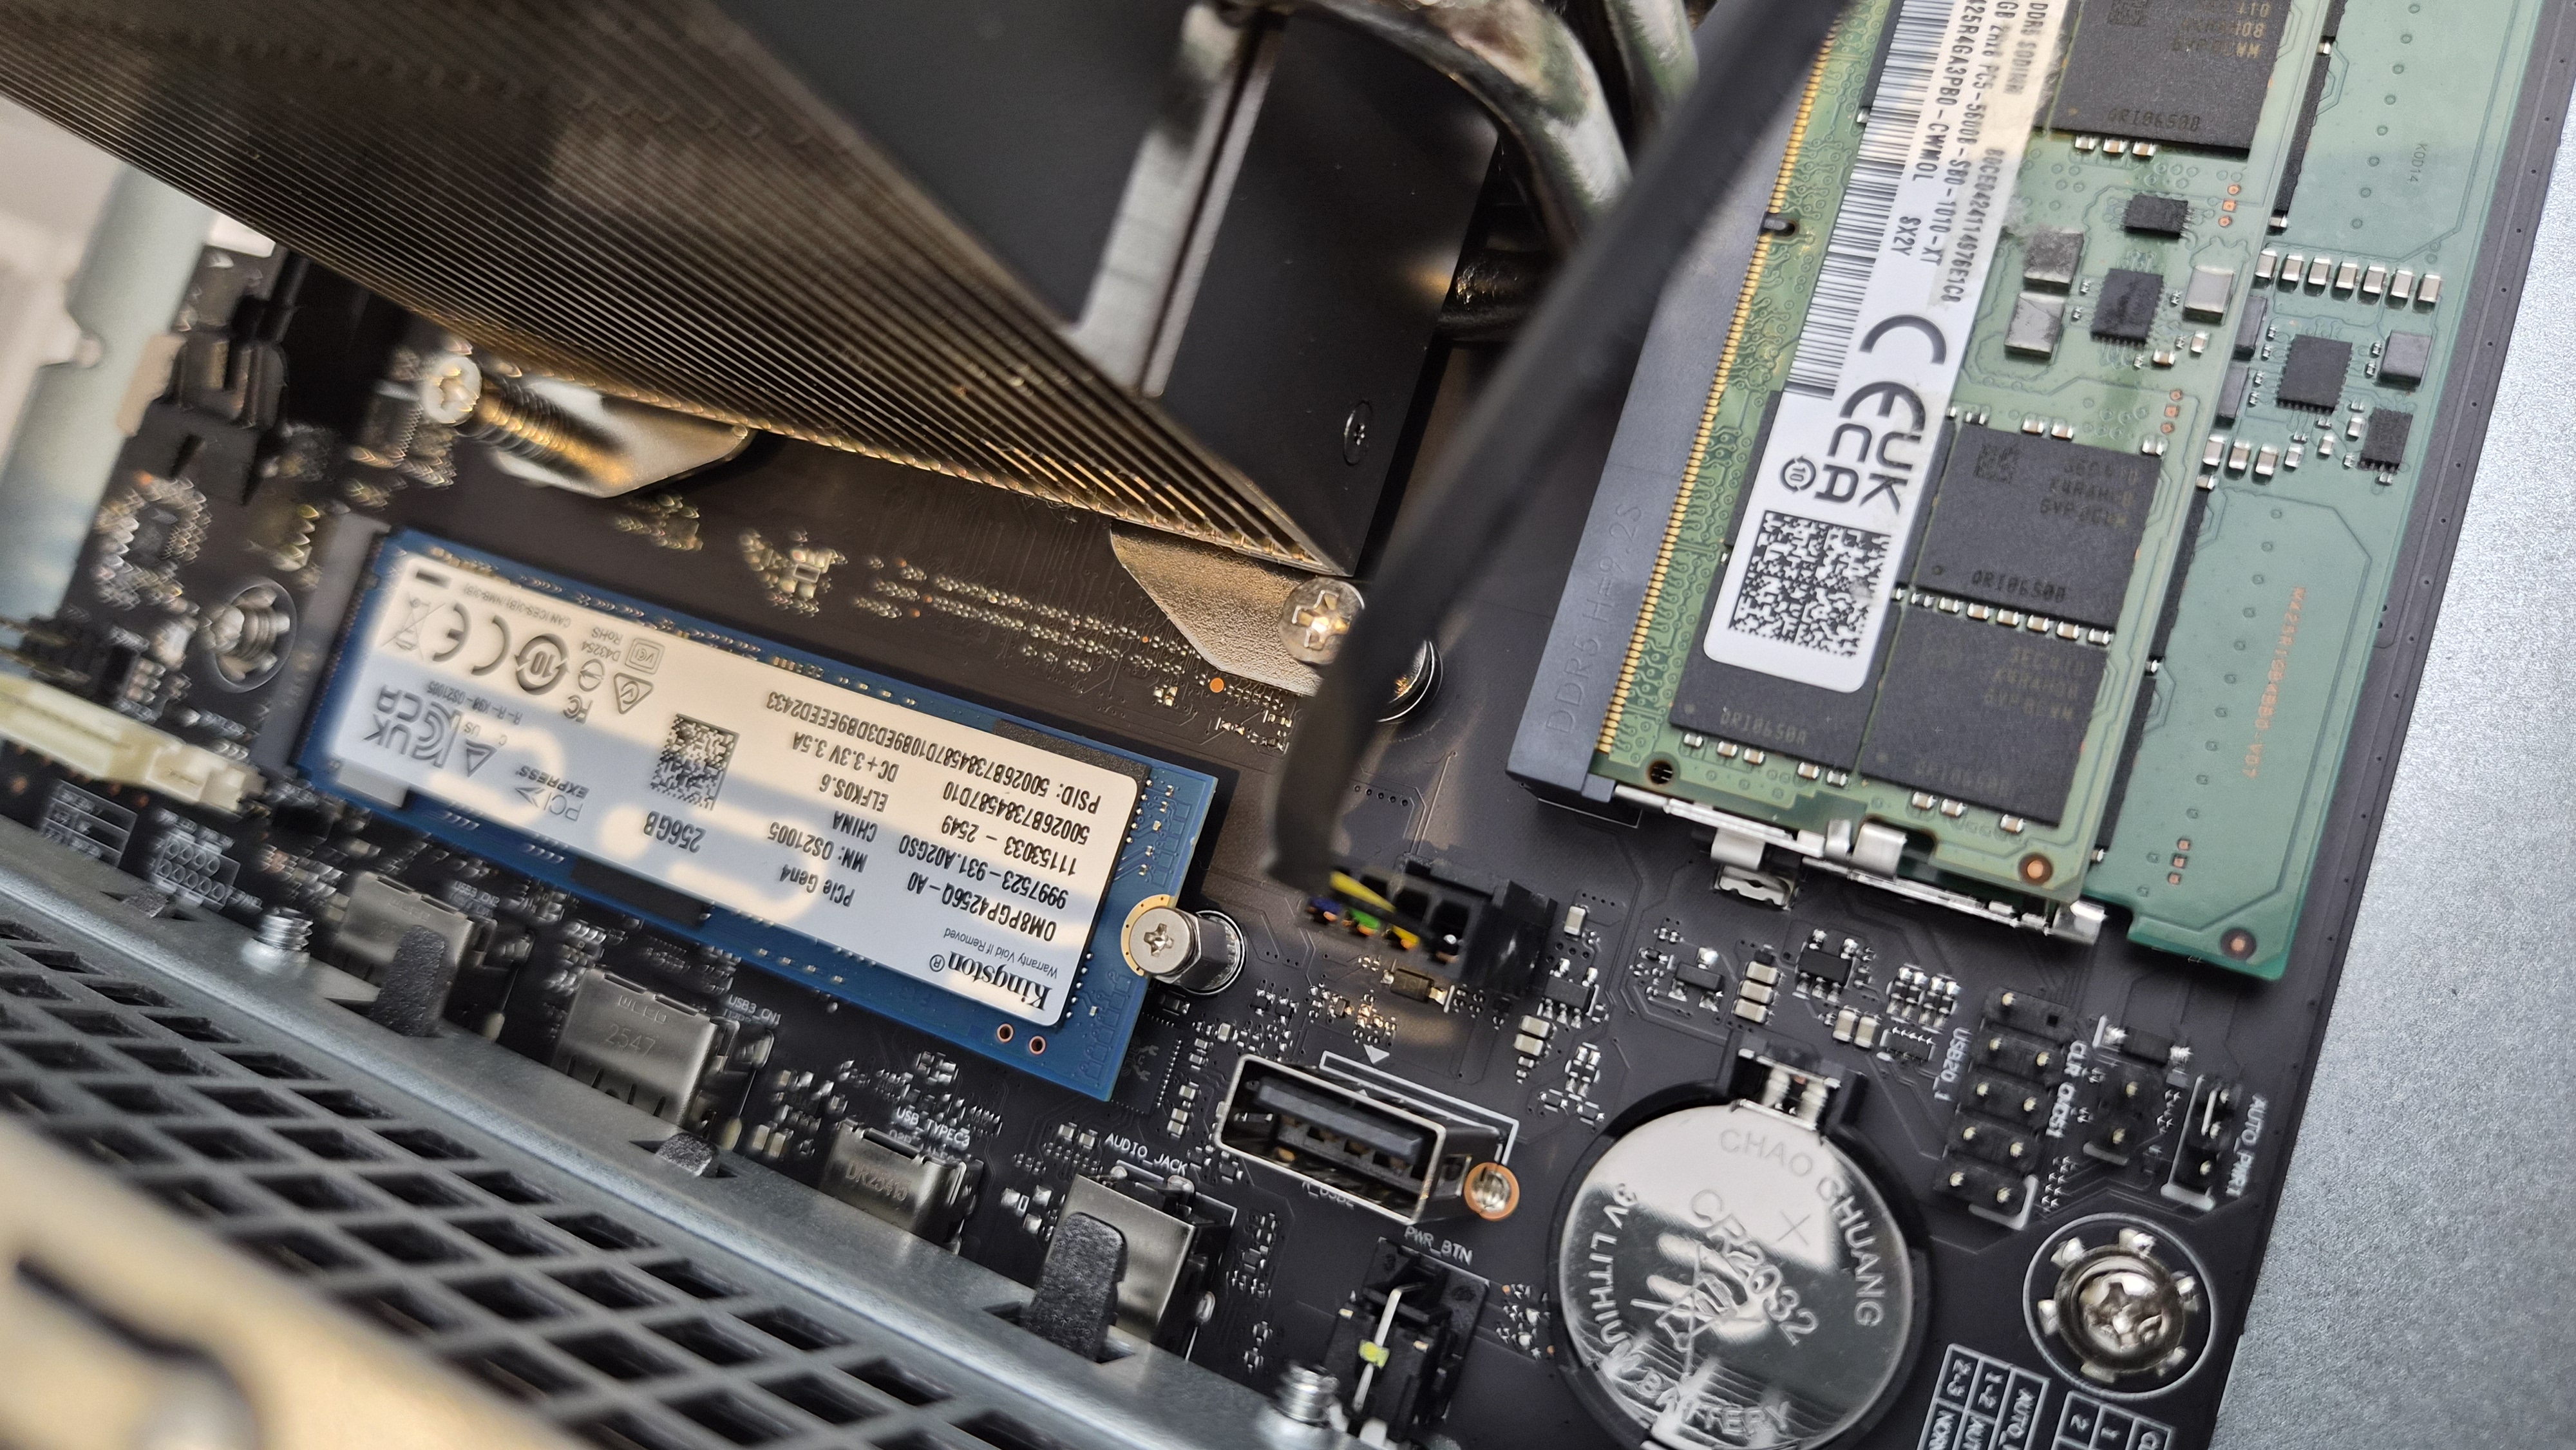
Motherboard NVMe slots — no speed cap here.
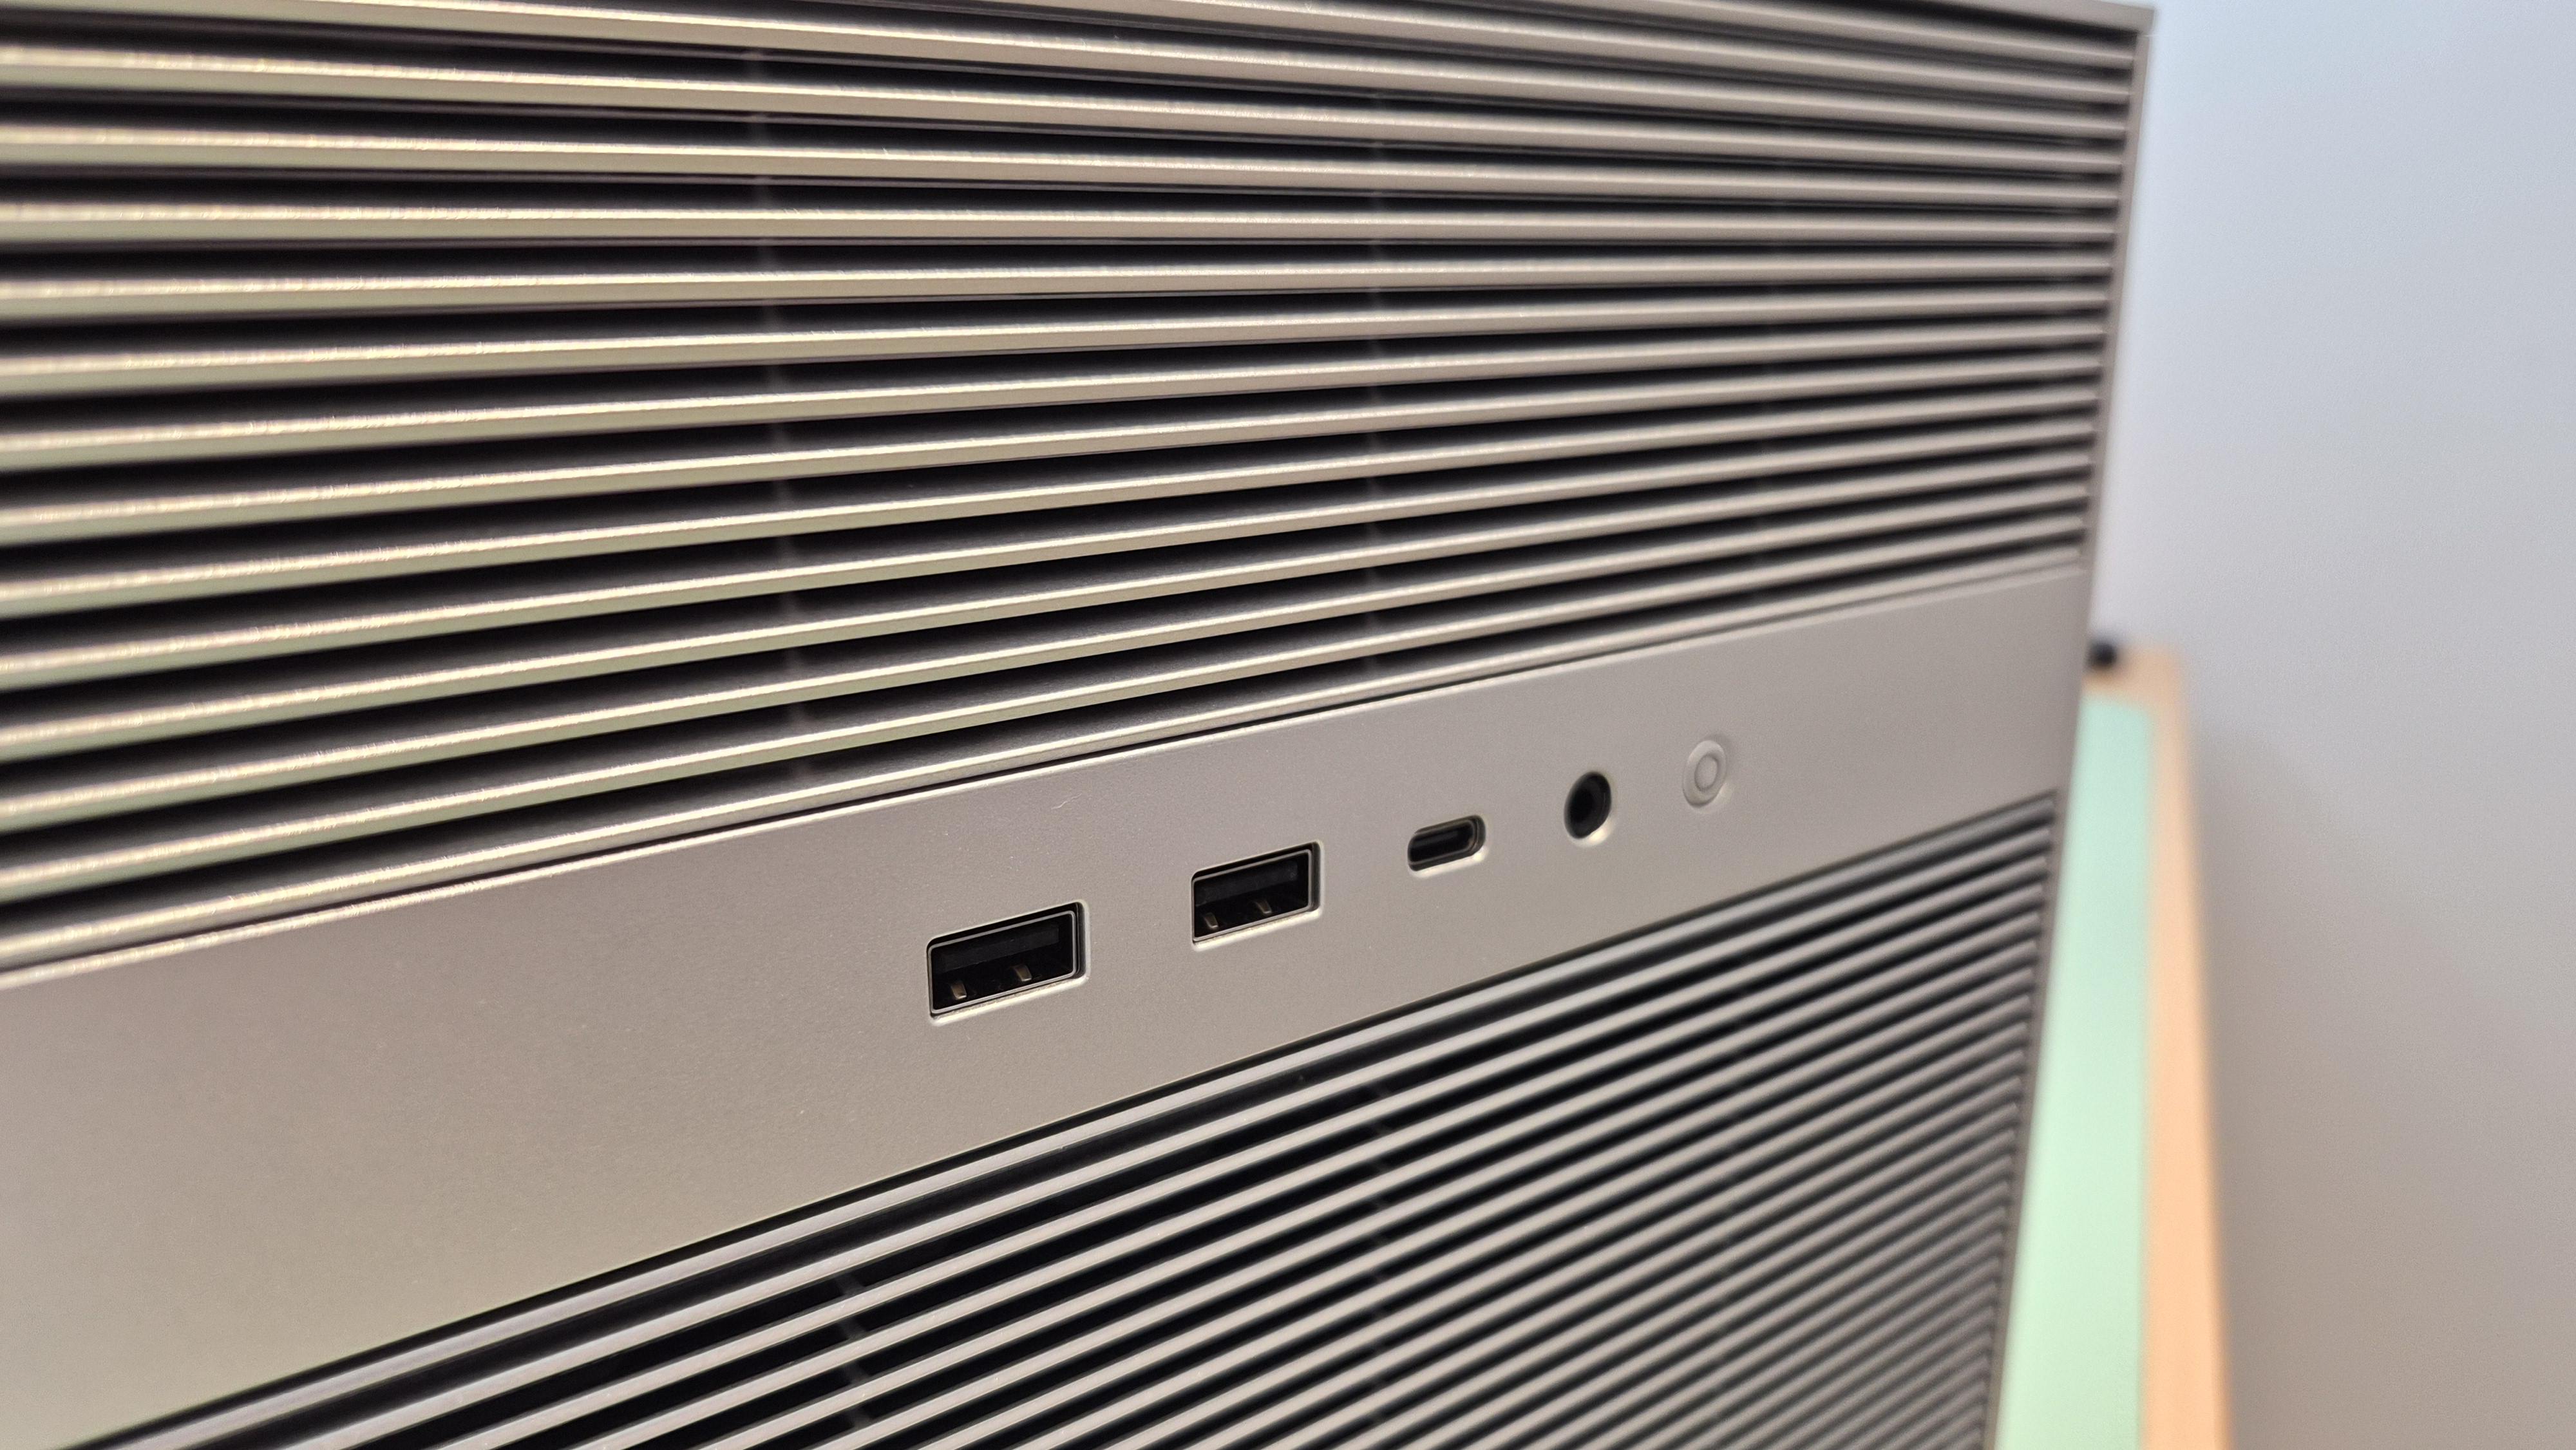
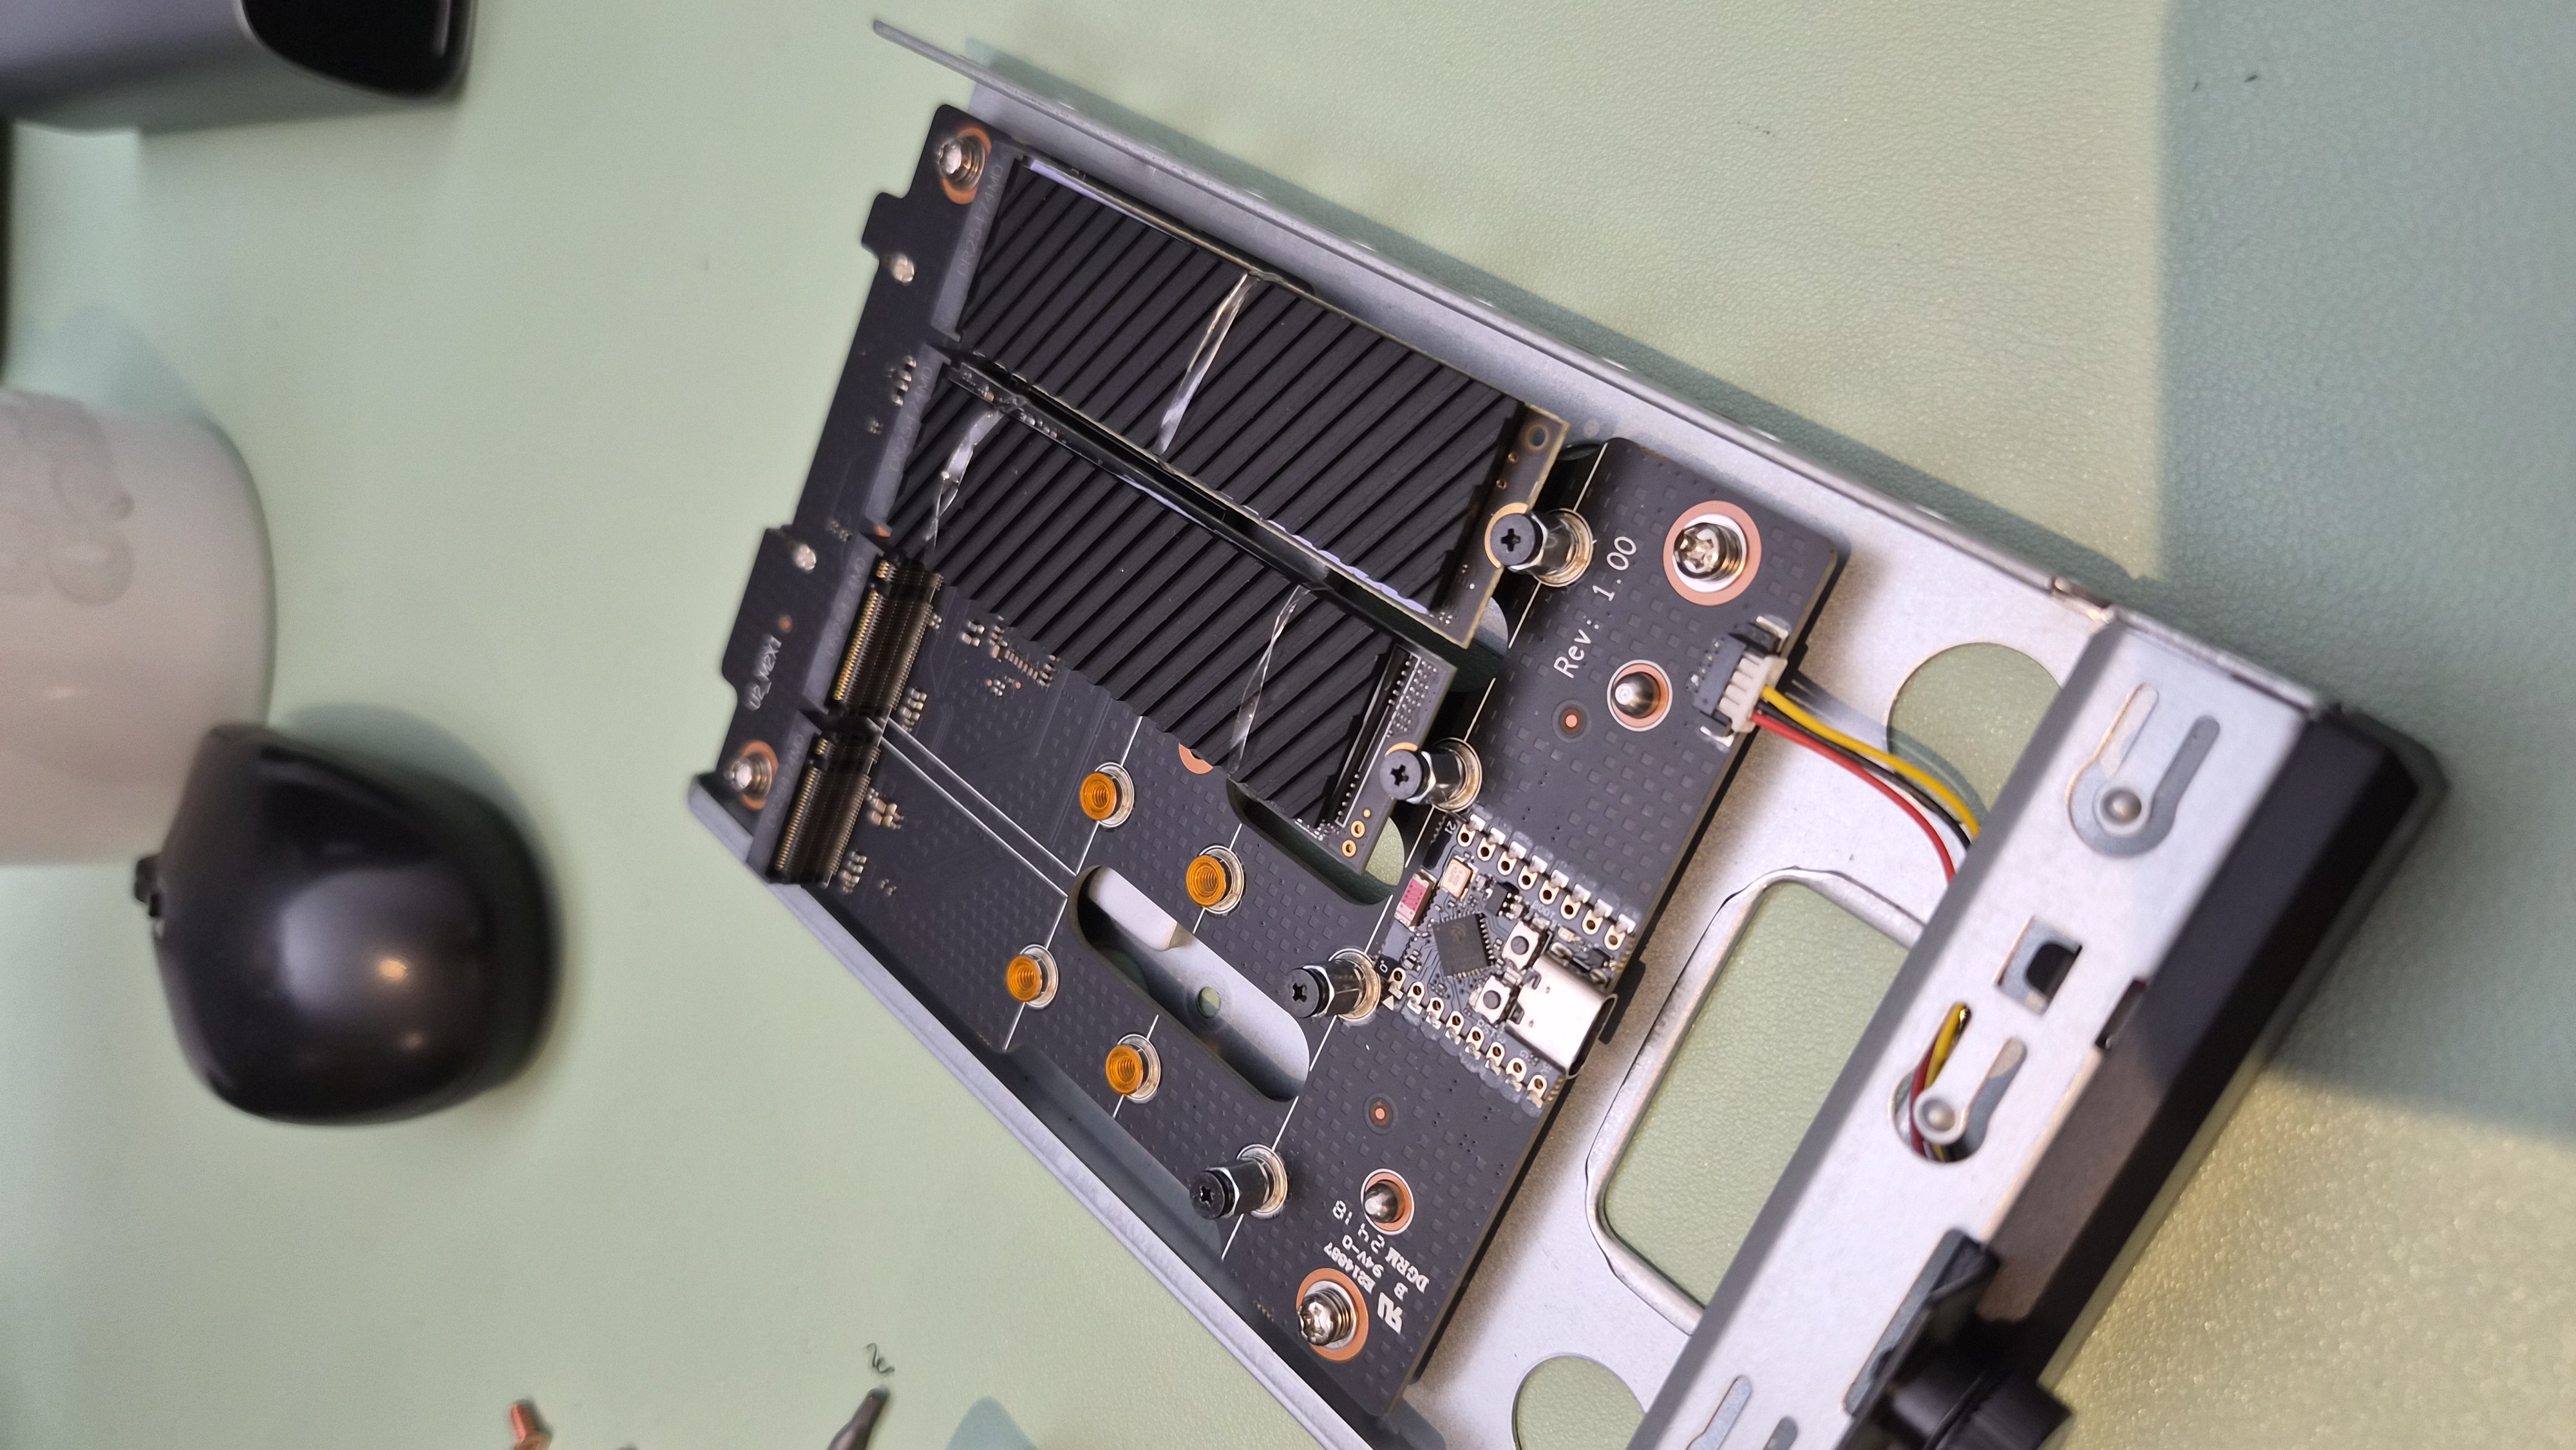
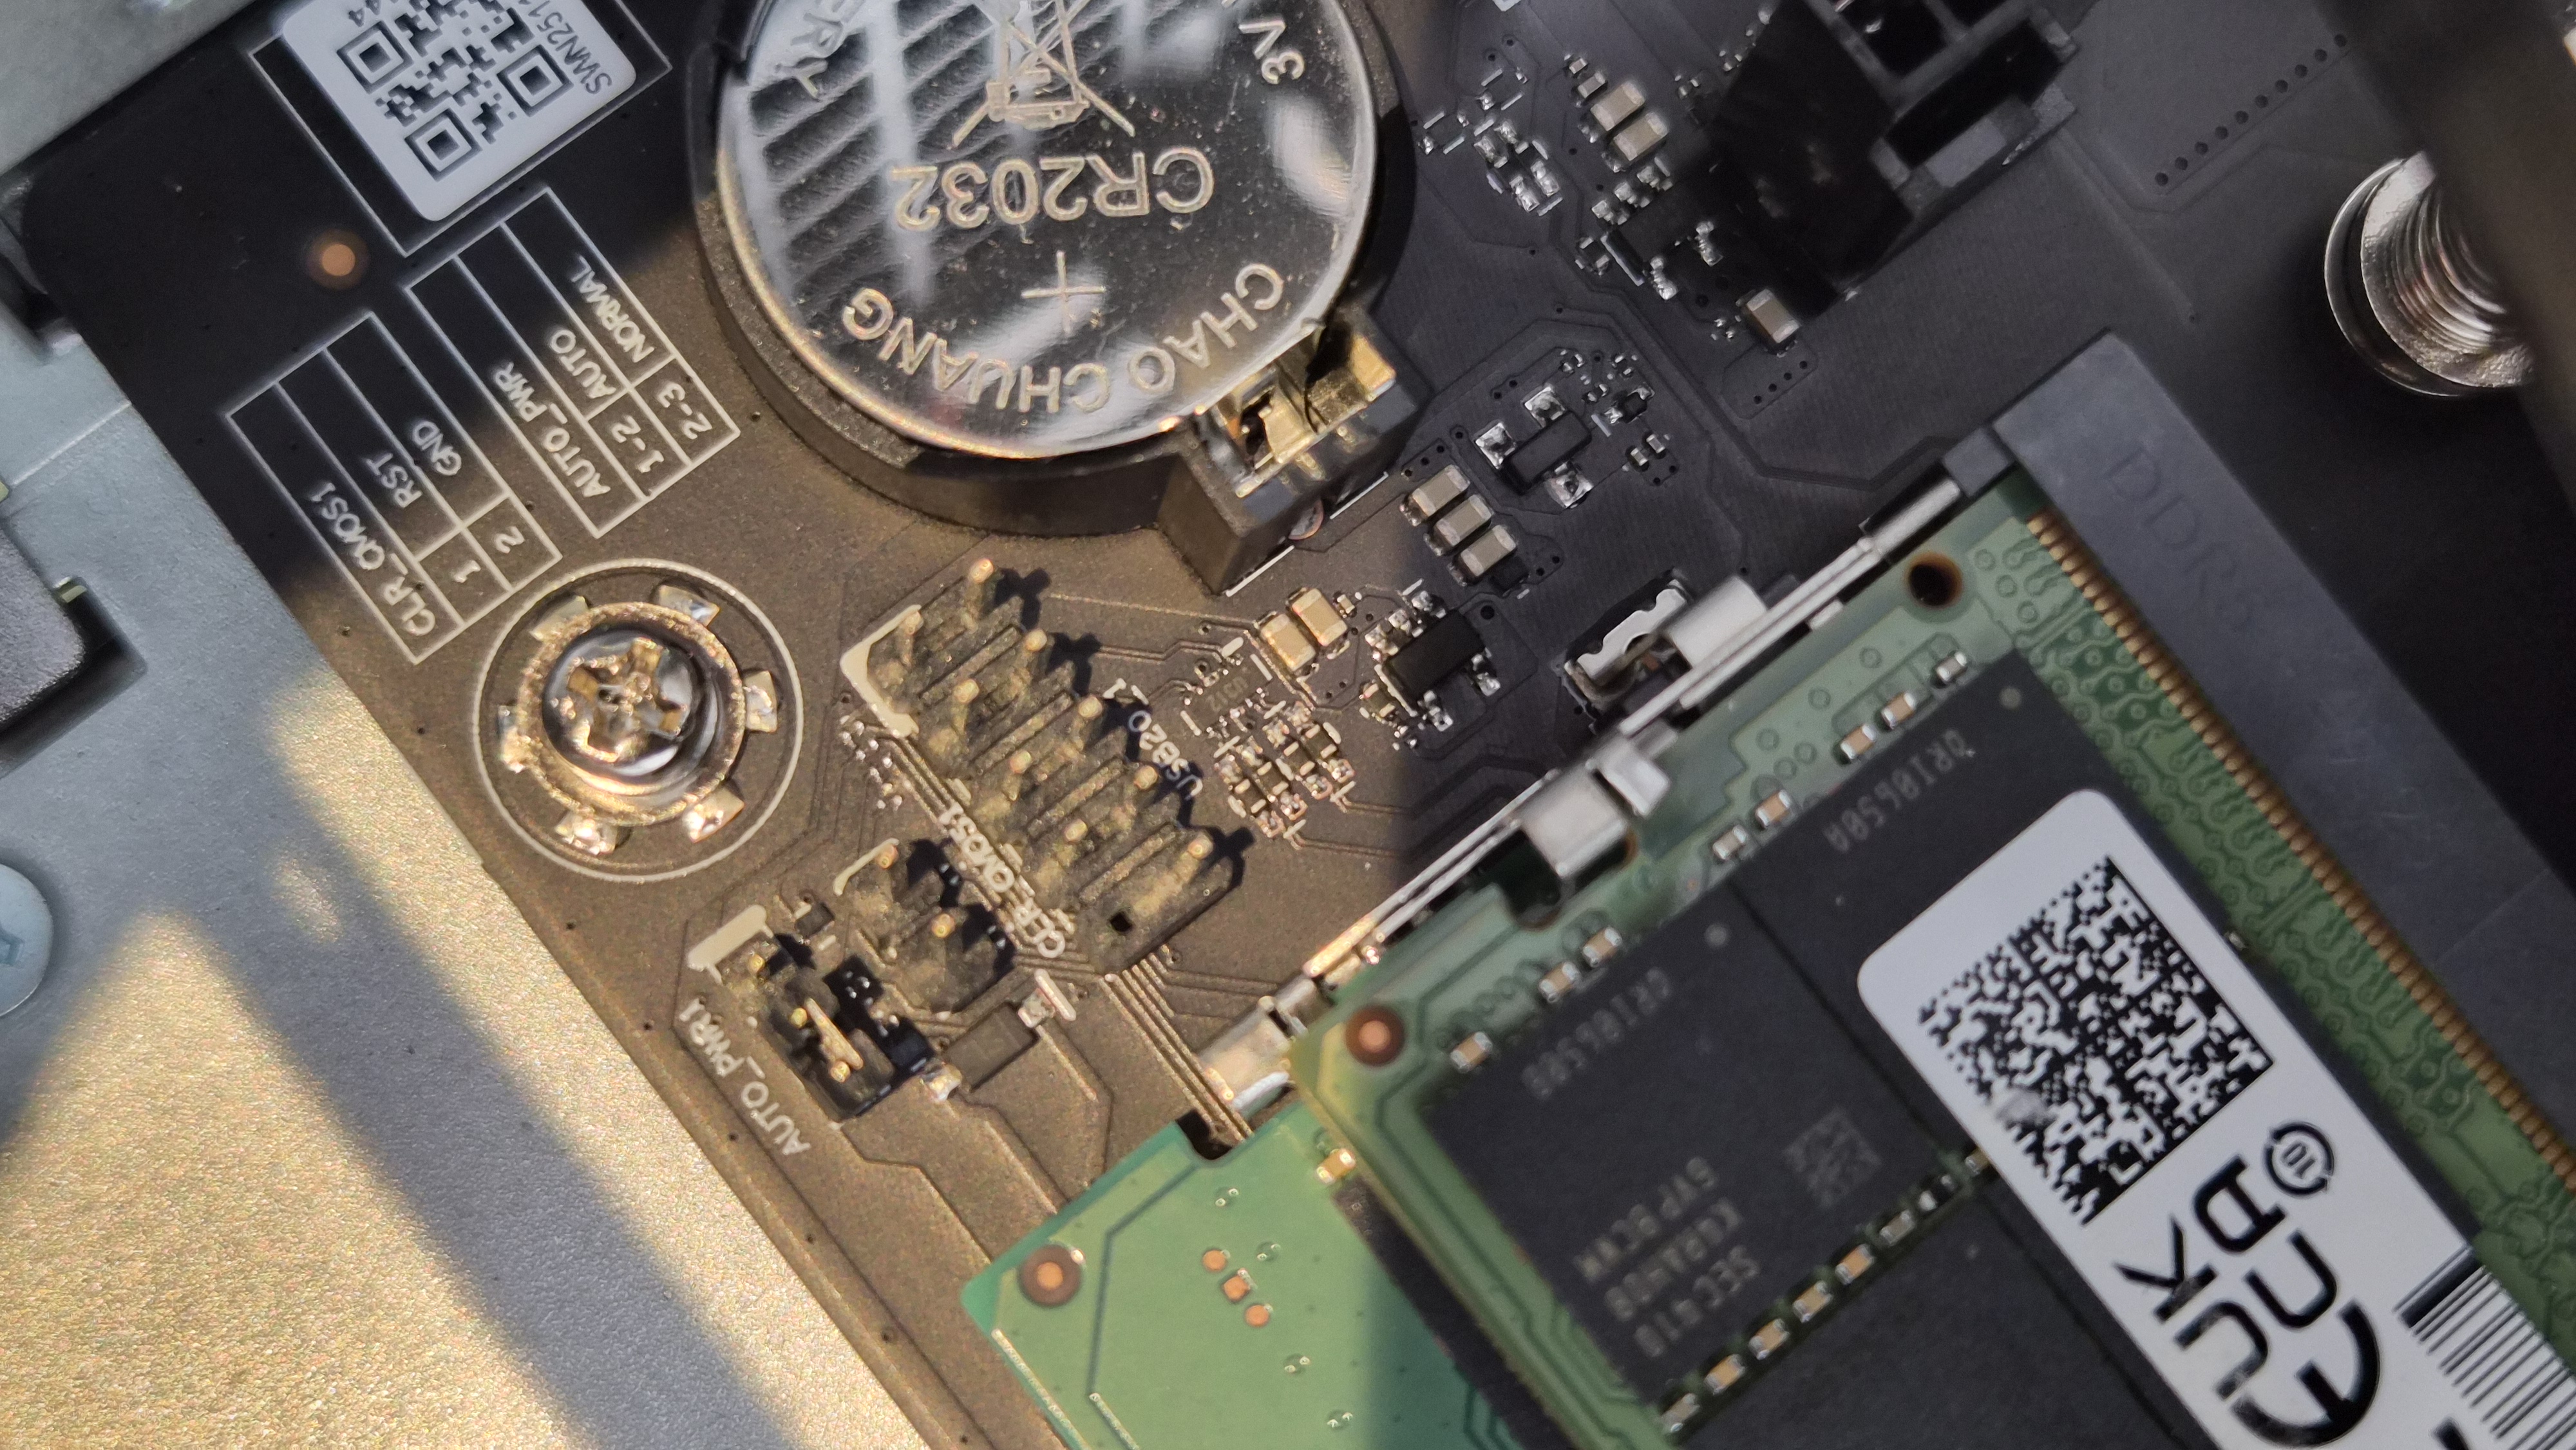
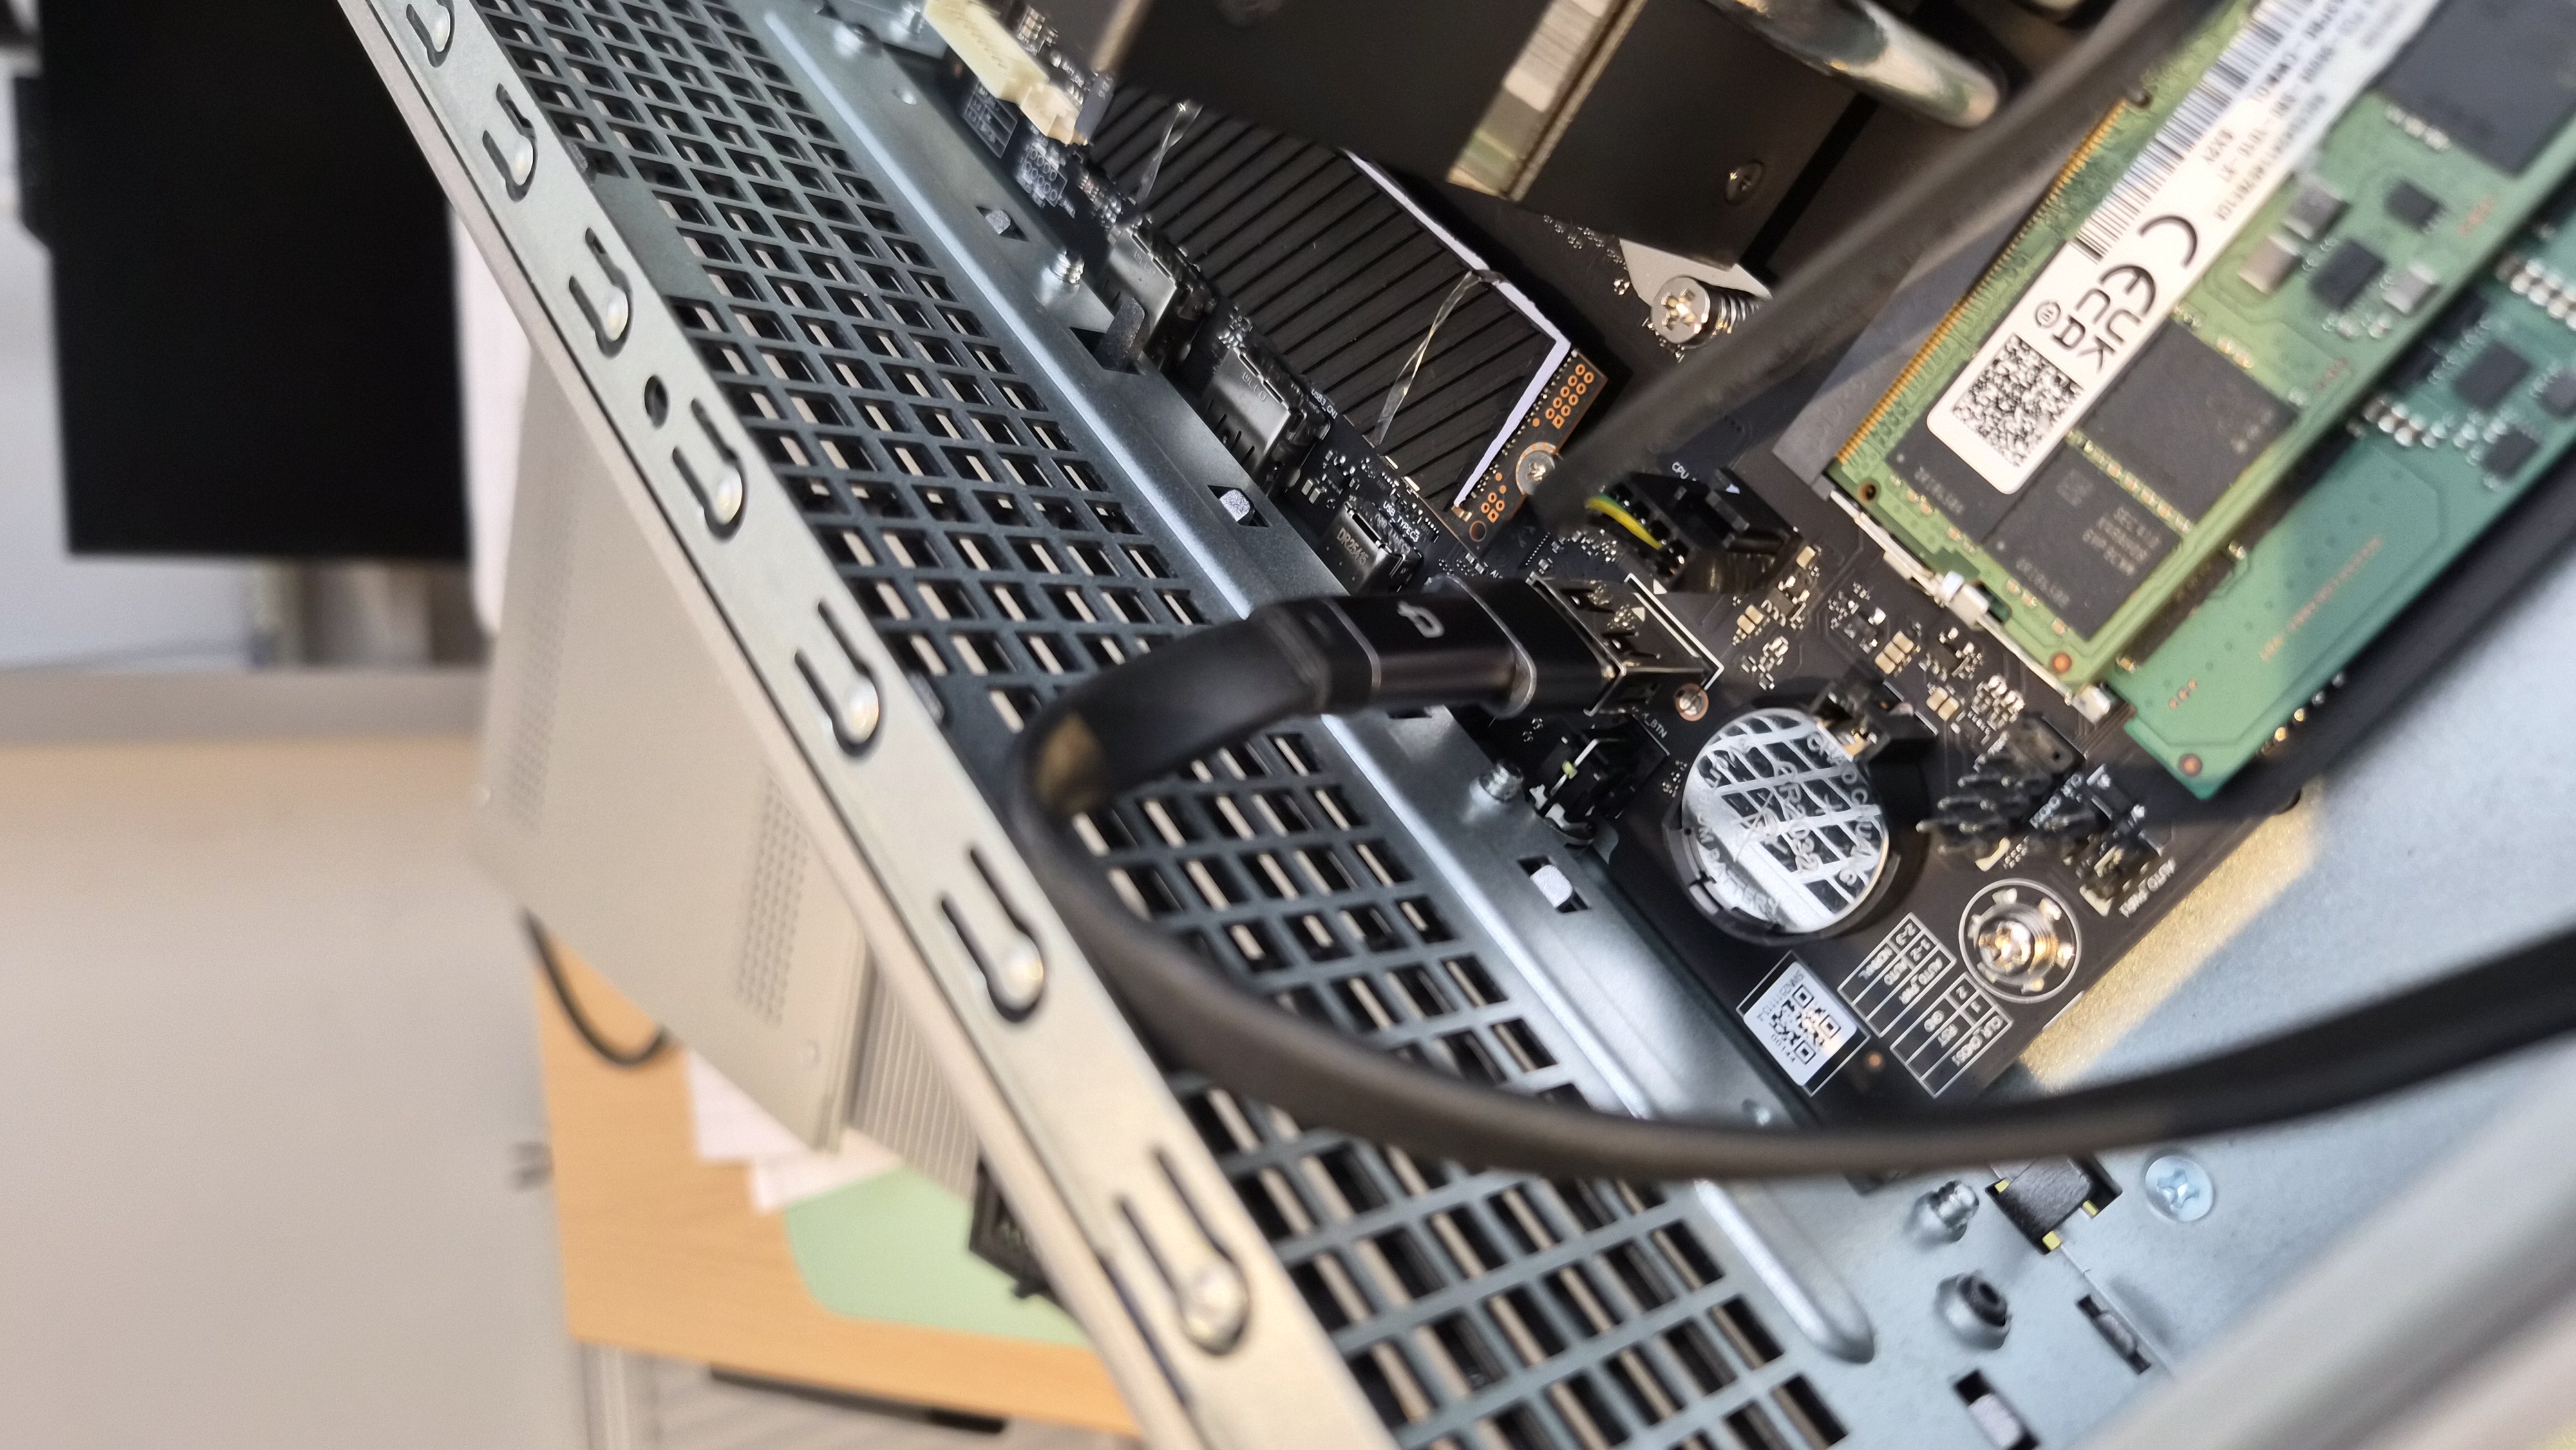
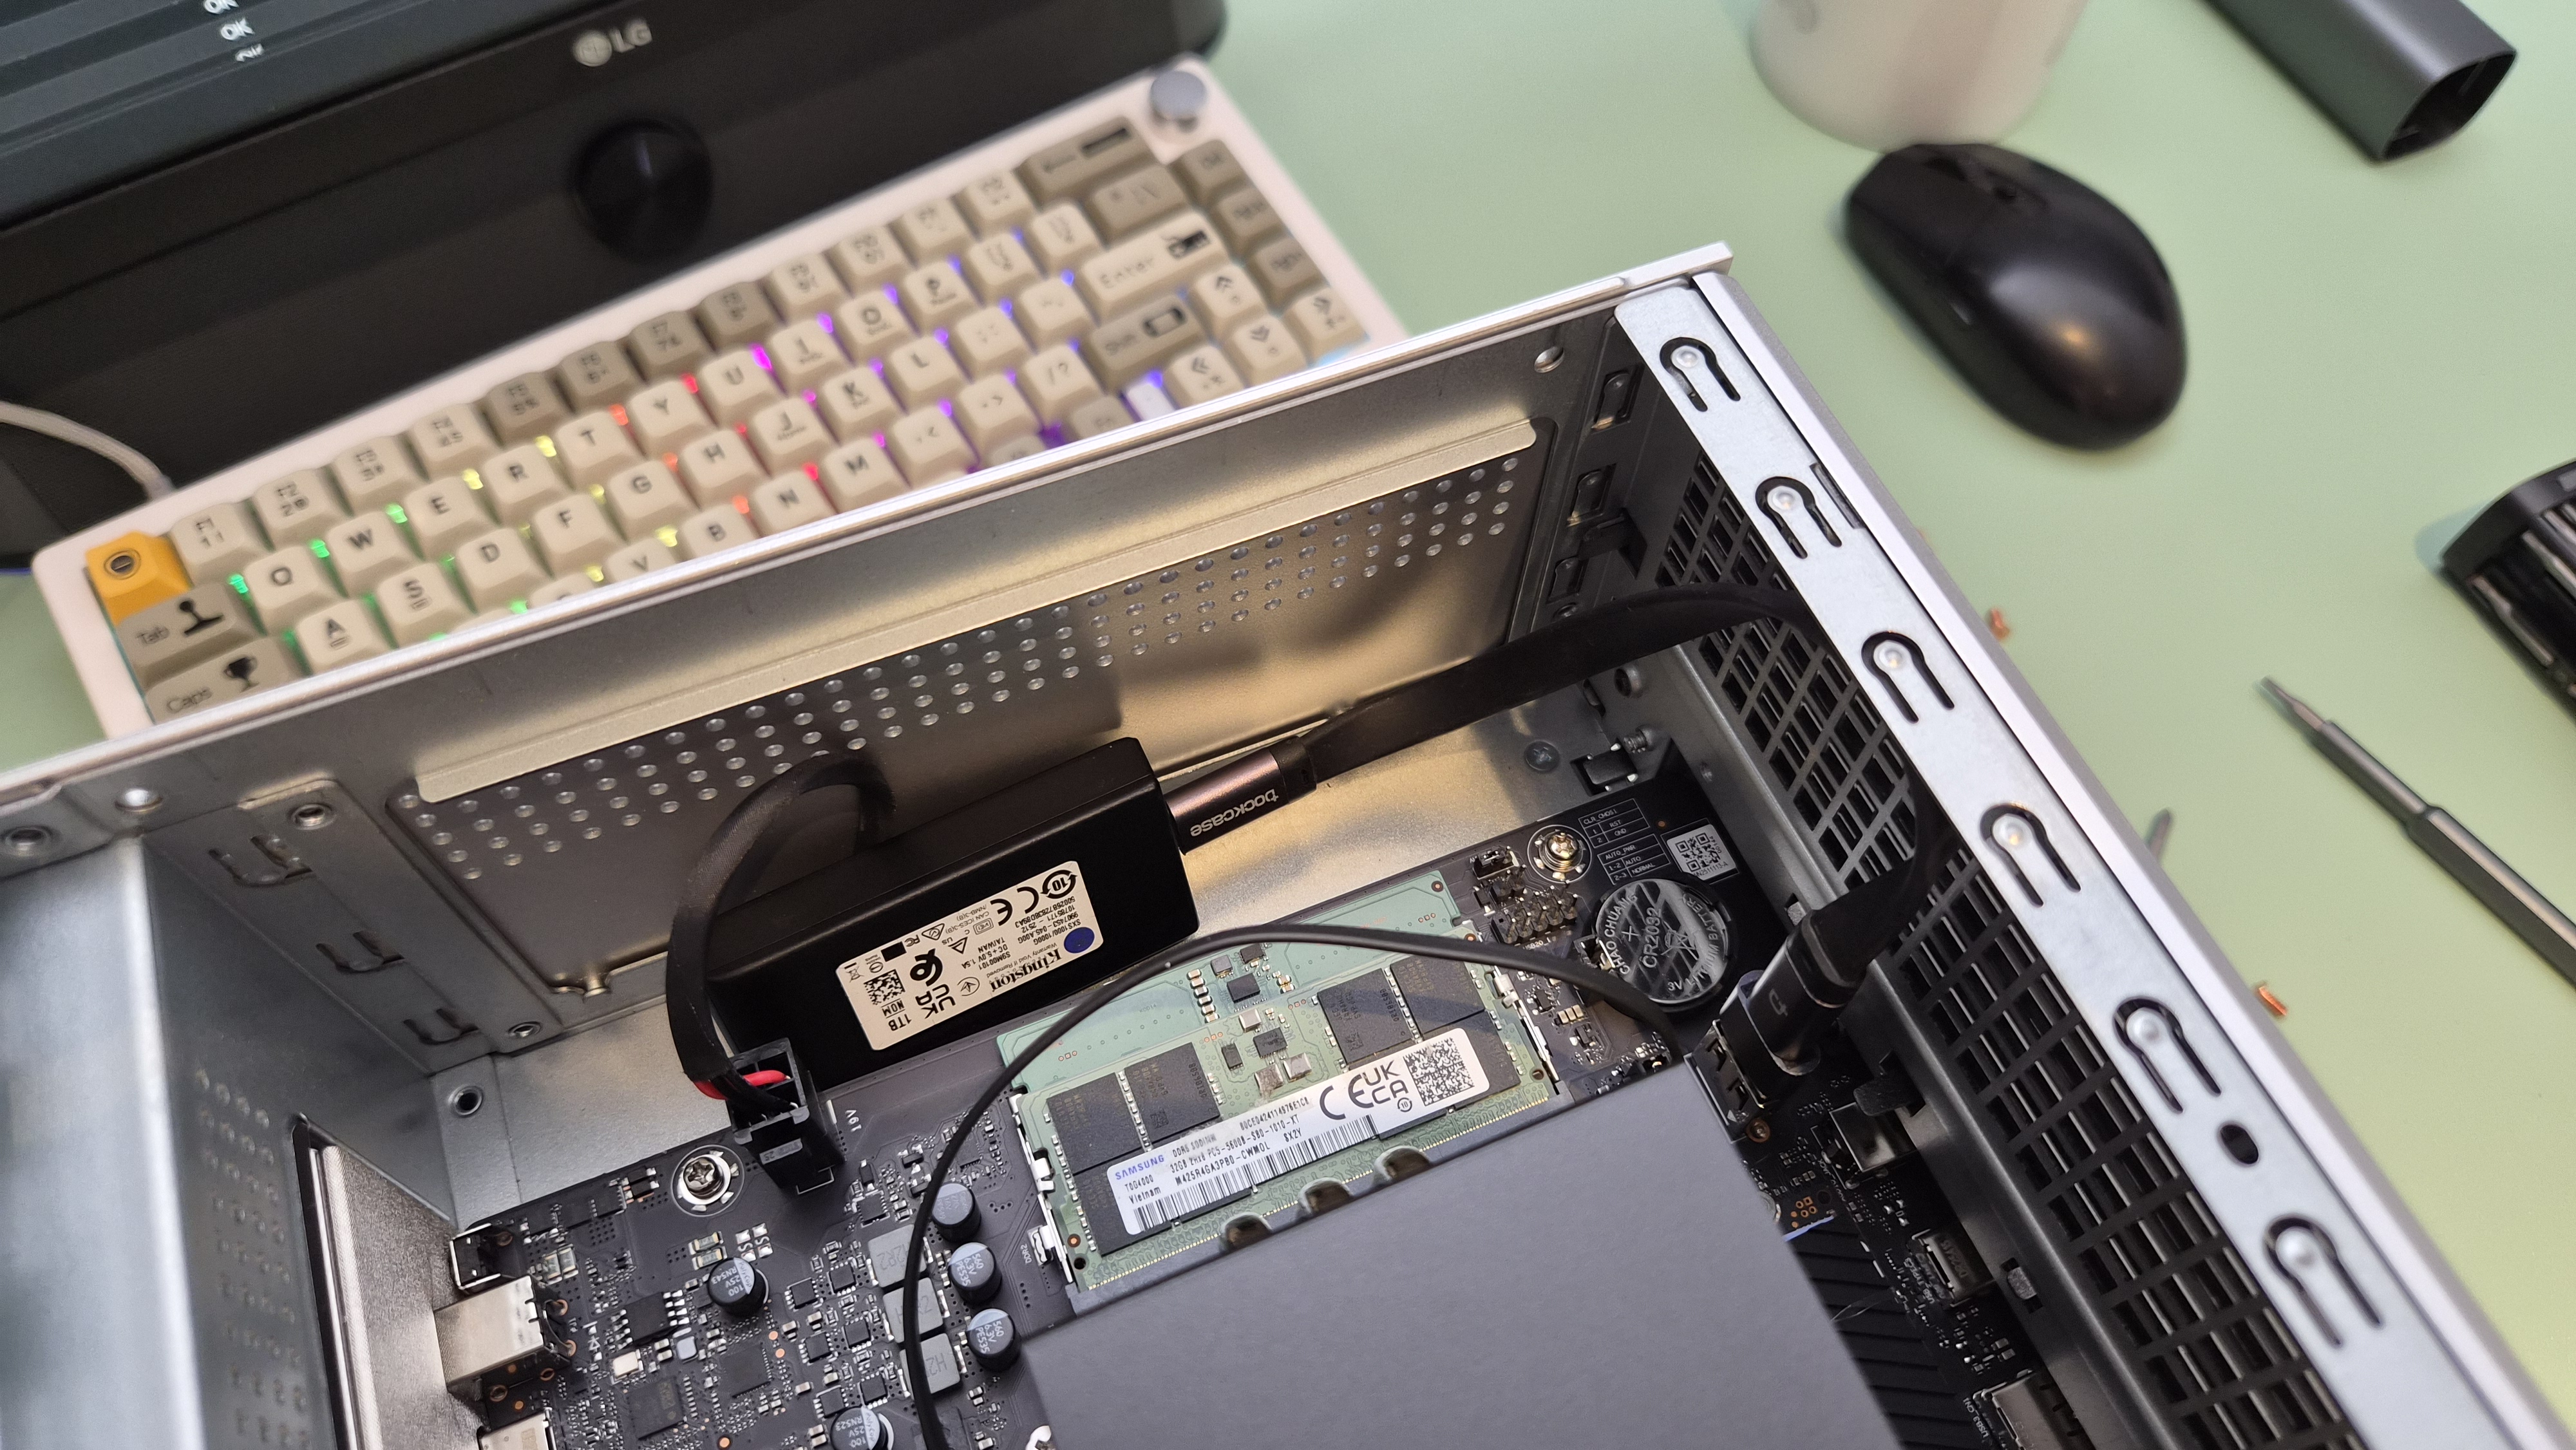
The Internal USB Header
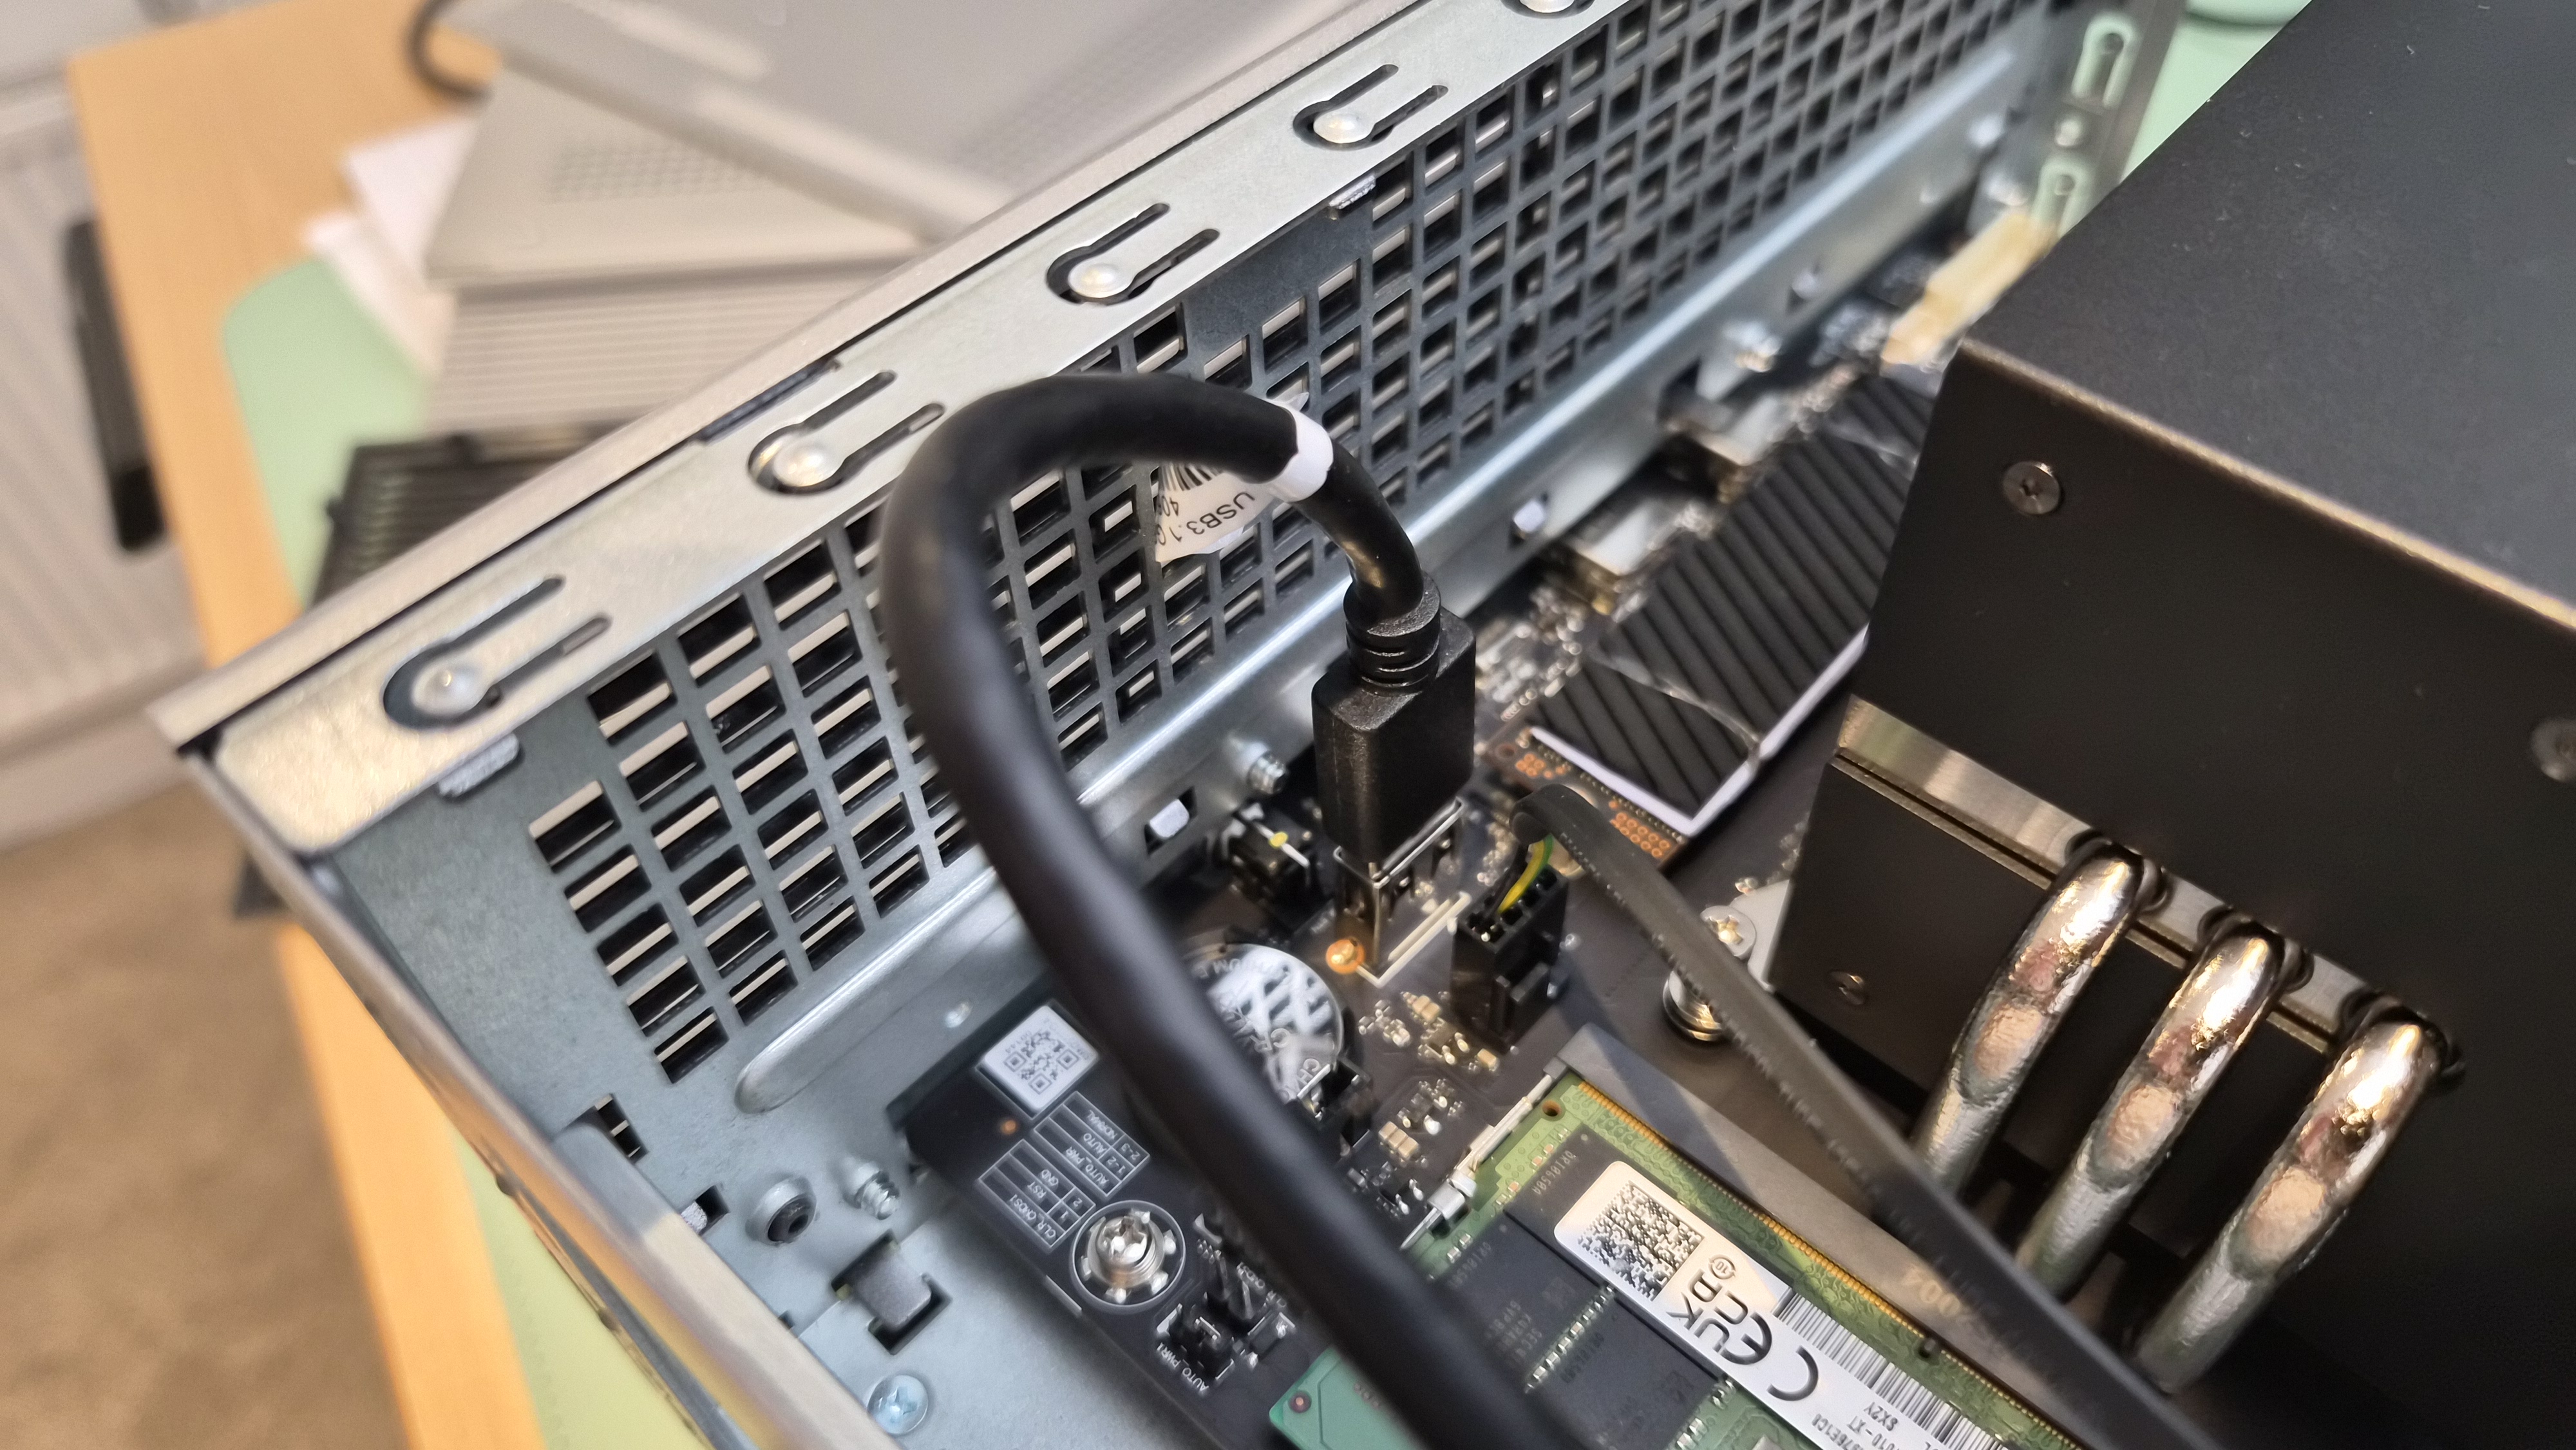
This was probably the biggest surprise inside. There's a standard internal USB 2.0 header on the motherboard — the kind you'd plug a front-panel USB cable into on a desktop PC.

The internal USB header — unexpected, but welcome.
I've connected a small drive to it and I'm testing it as internal storage. It works. Whether it's meant for something specific — a boot drive for Unraid, maybe, or a recovery USB that stays inside the case — I don't know. But it's there, it's powered, and it opens up possibilities I didn't expect to have.
PCIe and What's Next
Two PCIe slots. One Gen 4 x4 (physical x16), one Gen 3 x2 (physical x8). No external power connectors, so anything you put in there has to run off slot power alone.
The PCIe slots — two of them, which is generous for a NAS enclosure.
Another angle on the slots. Gen 4 x4 and Gen 3 x2.
Slot covers — standard, replaceable.
I'm looking at low-profile GPUs. Nothing crazy — just something with modern encoding support for Plex transcoding or OBS recording. The slot can handle it. The power budget is the limiting factor, not the physical space.
The fact that these slots exist at all in a NAS enclosure is worth appreciating. Most NAS boxes lock you into whatever hardware they shipped with. The ZimaCube doesn't.
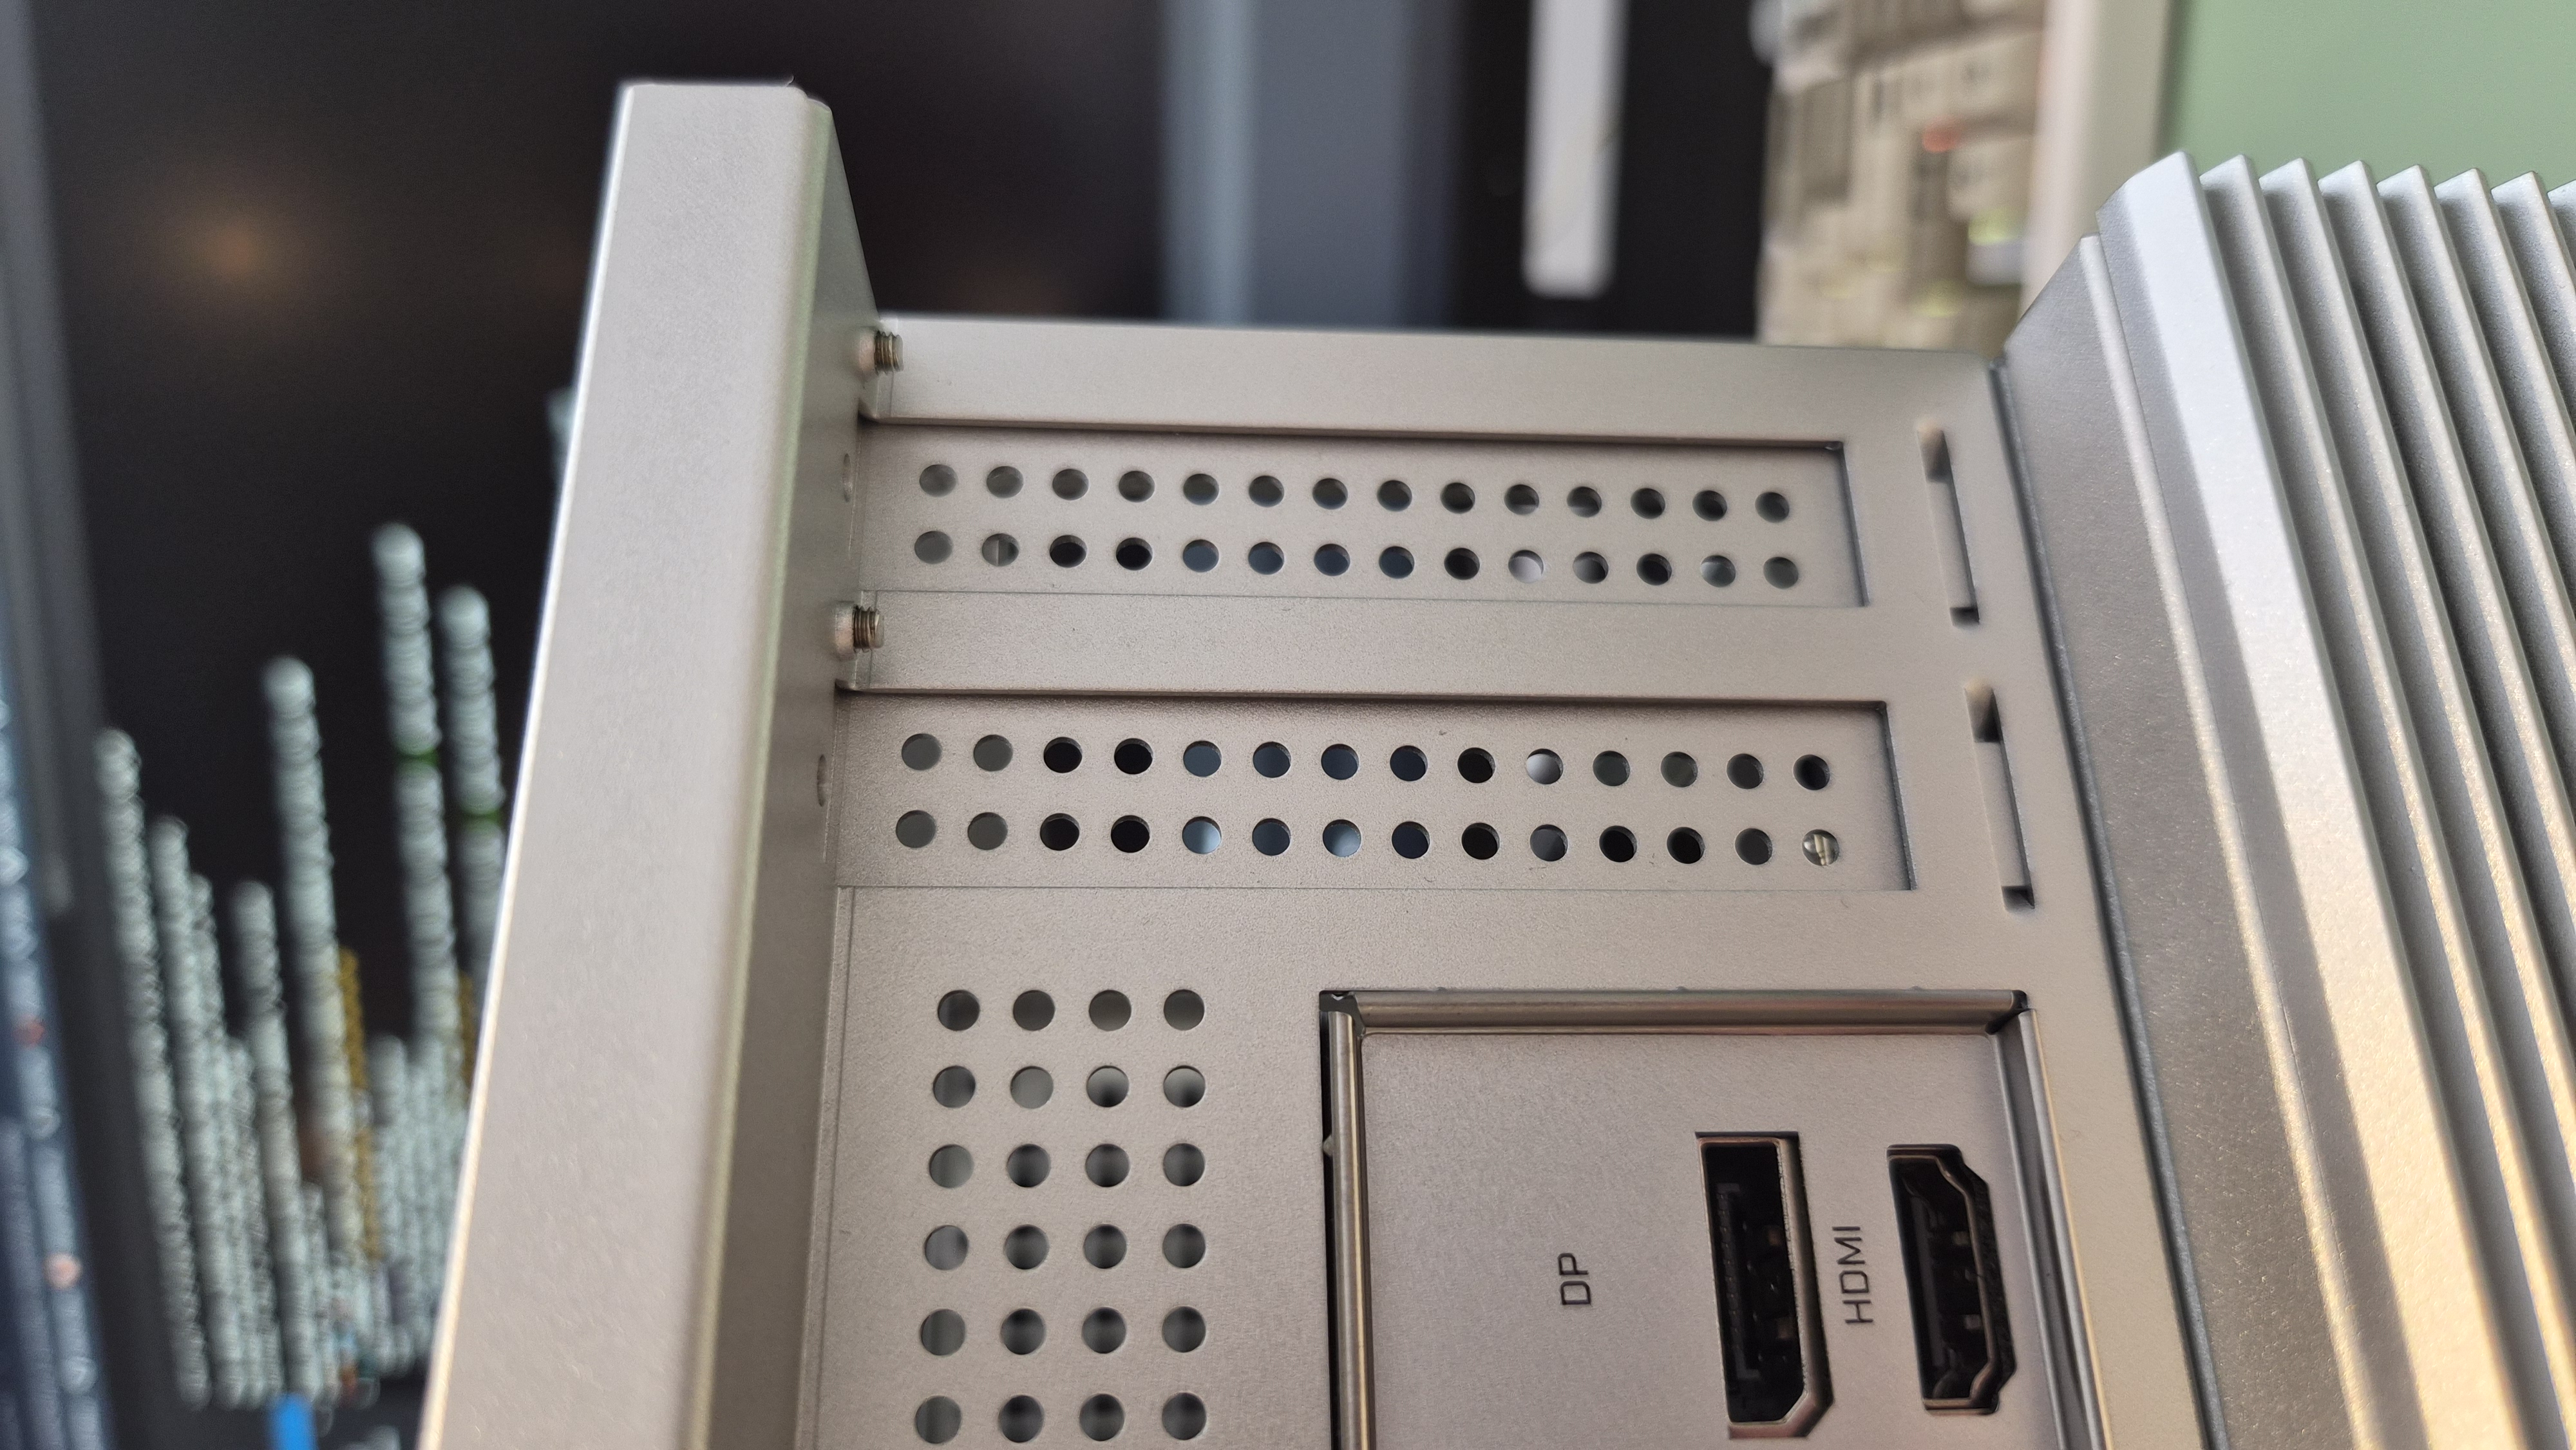
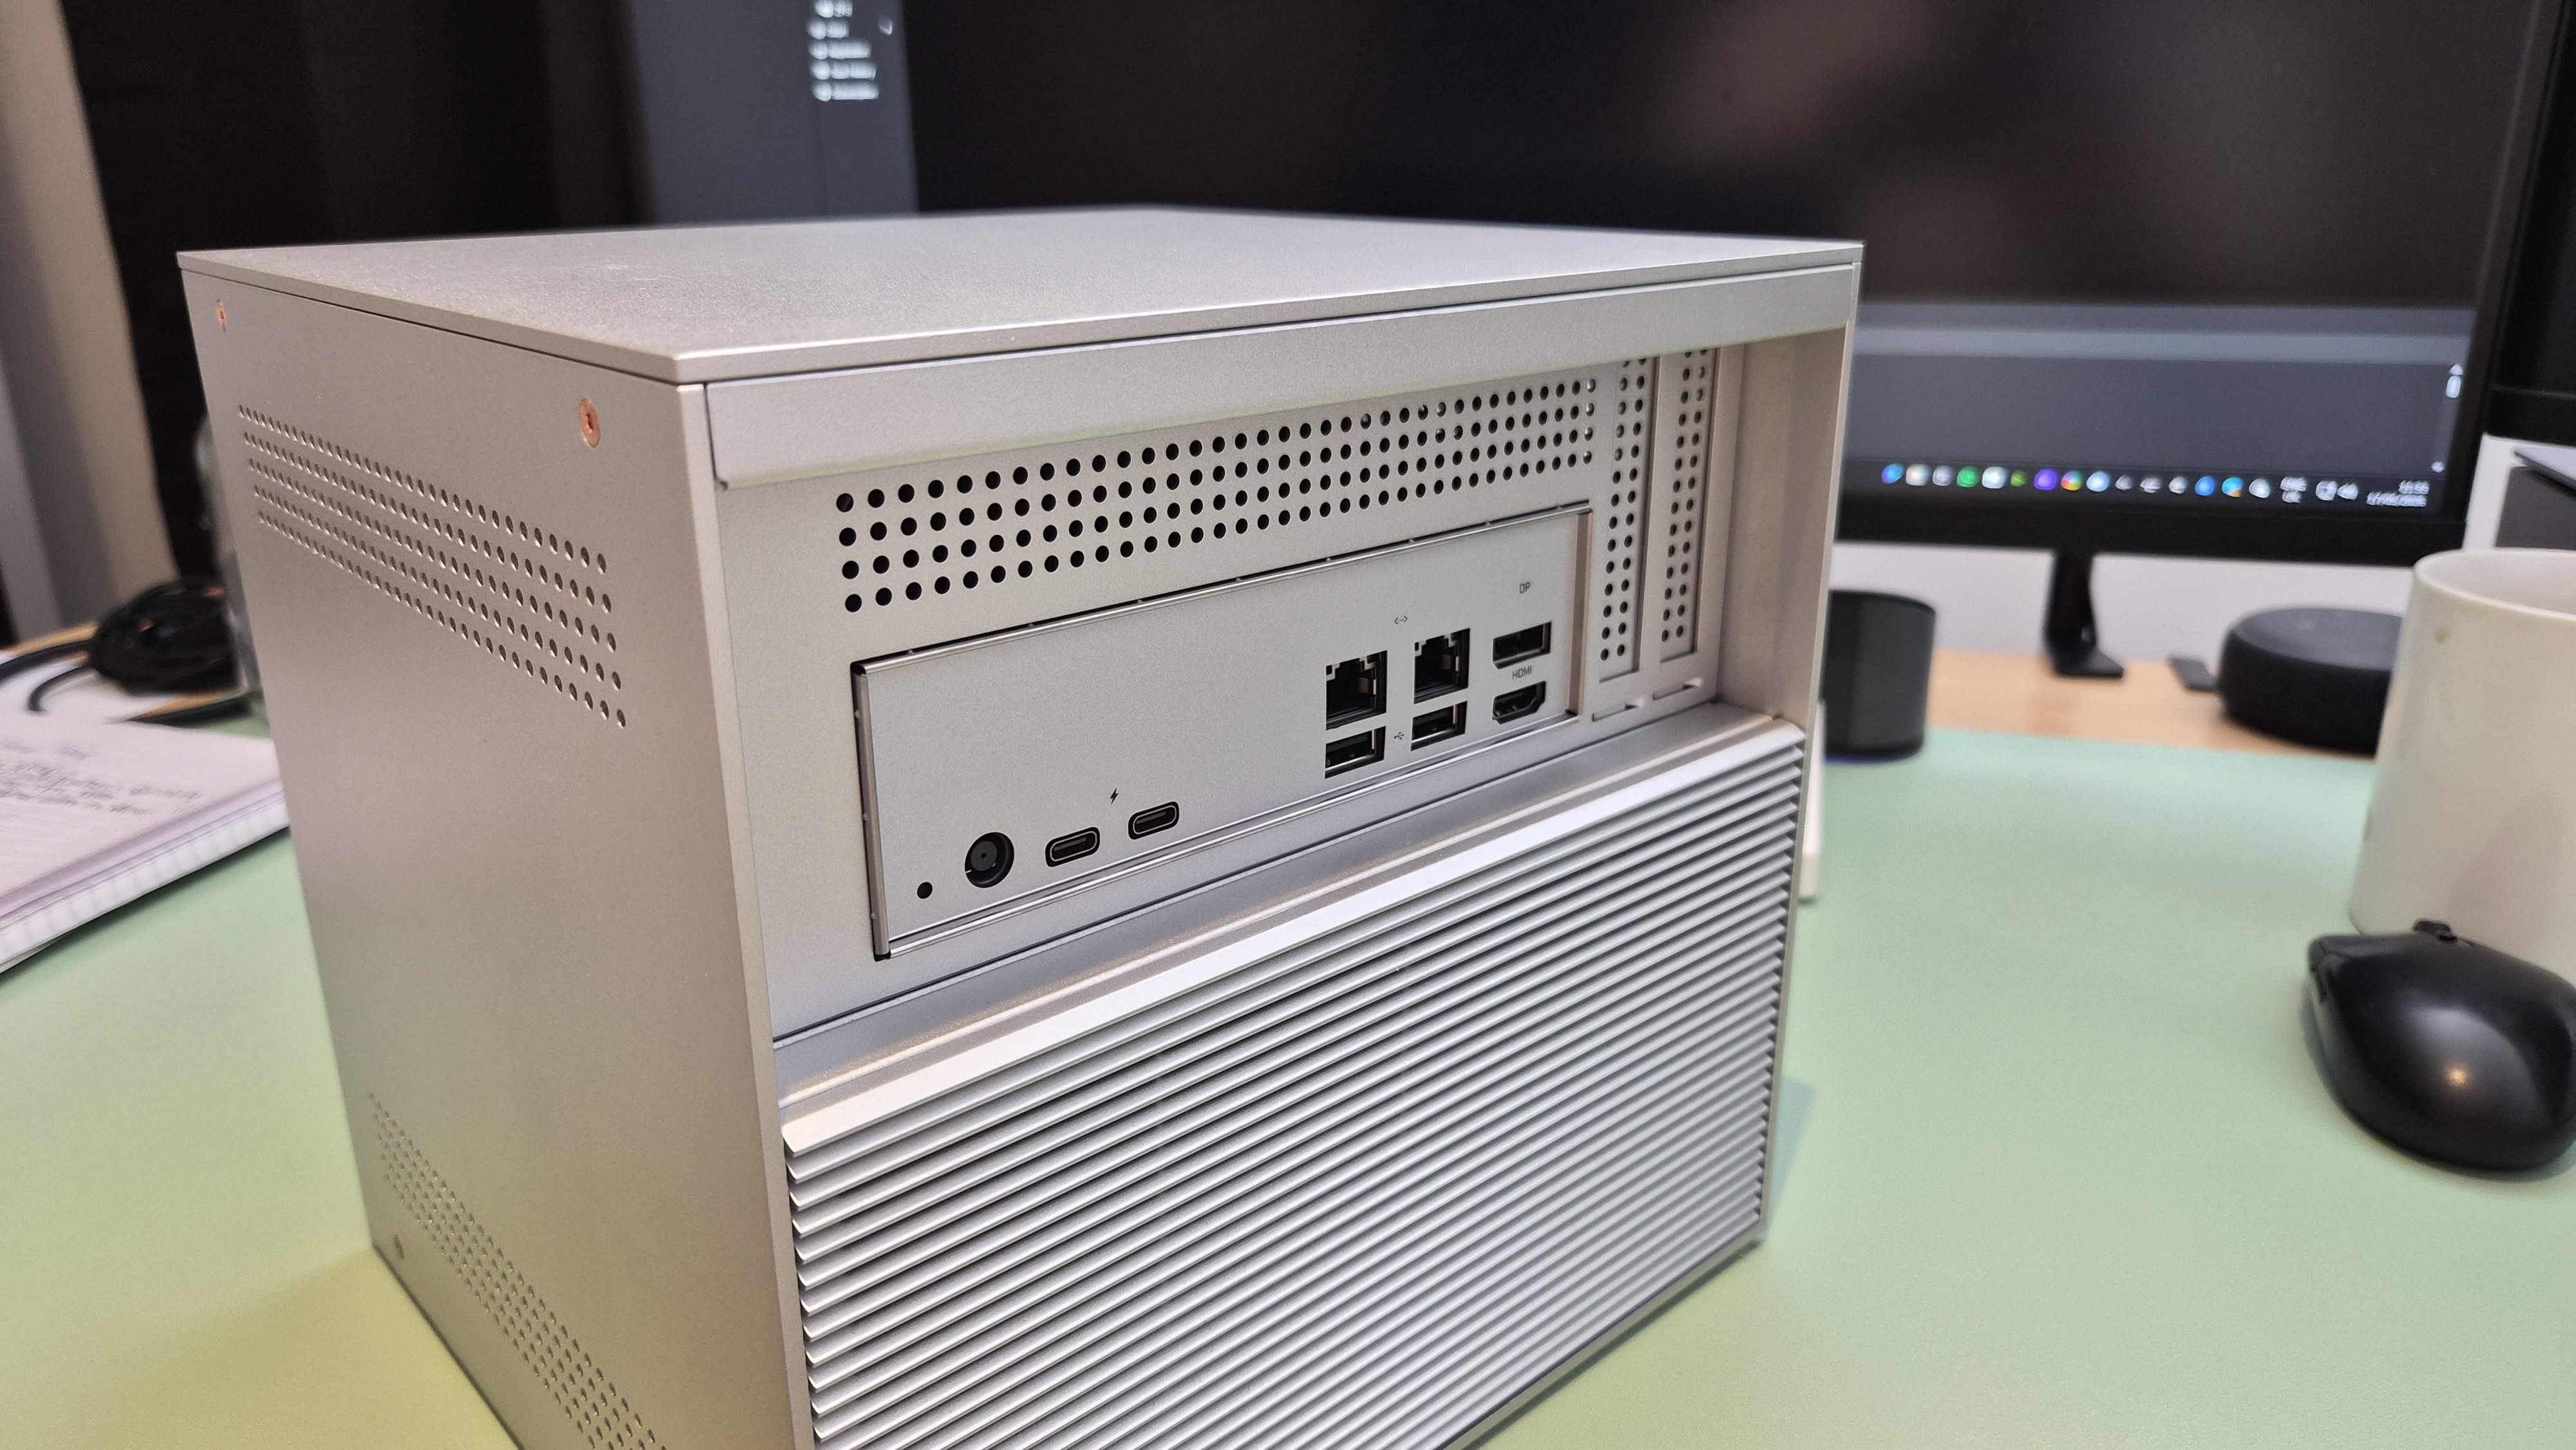
Rear IO
The back panel is a clean aluminium plate with all the ports you'd expect. Dual 2.5GbE, HDMI, DisplayPort, USB-A, and the two Thunderbolt 4 ports. The ports are recessed slightly, which protects the connectors and gives the back a tidy look.
Rear IO — everything you need, nothing you don't.
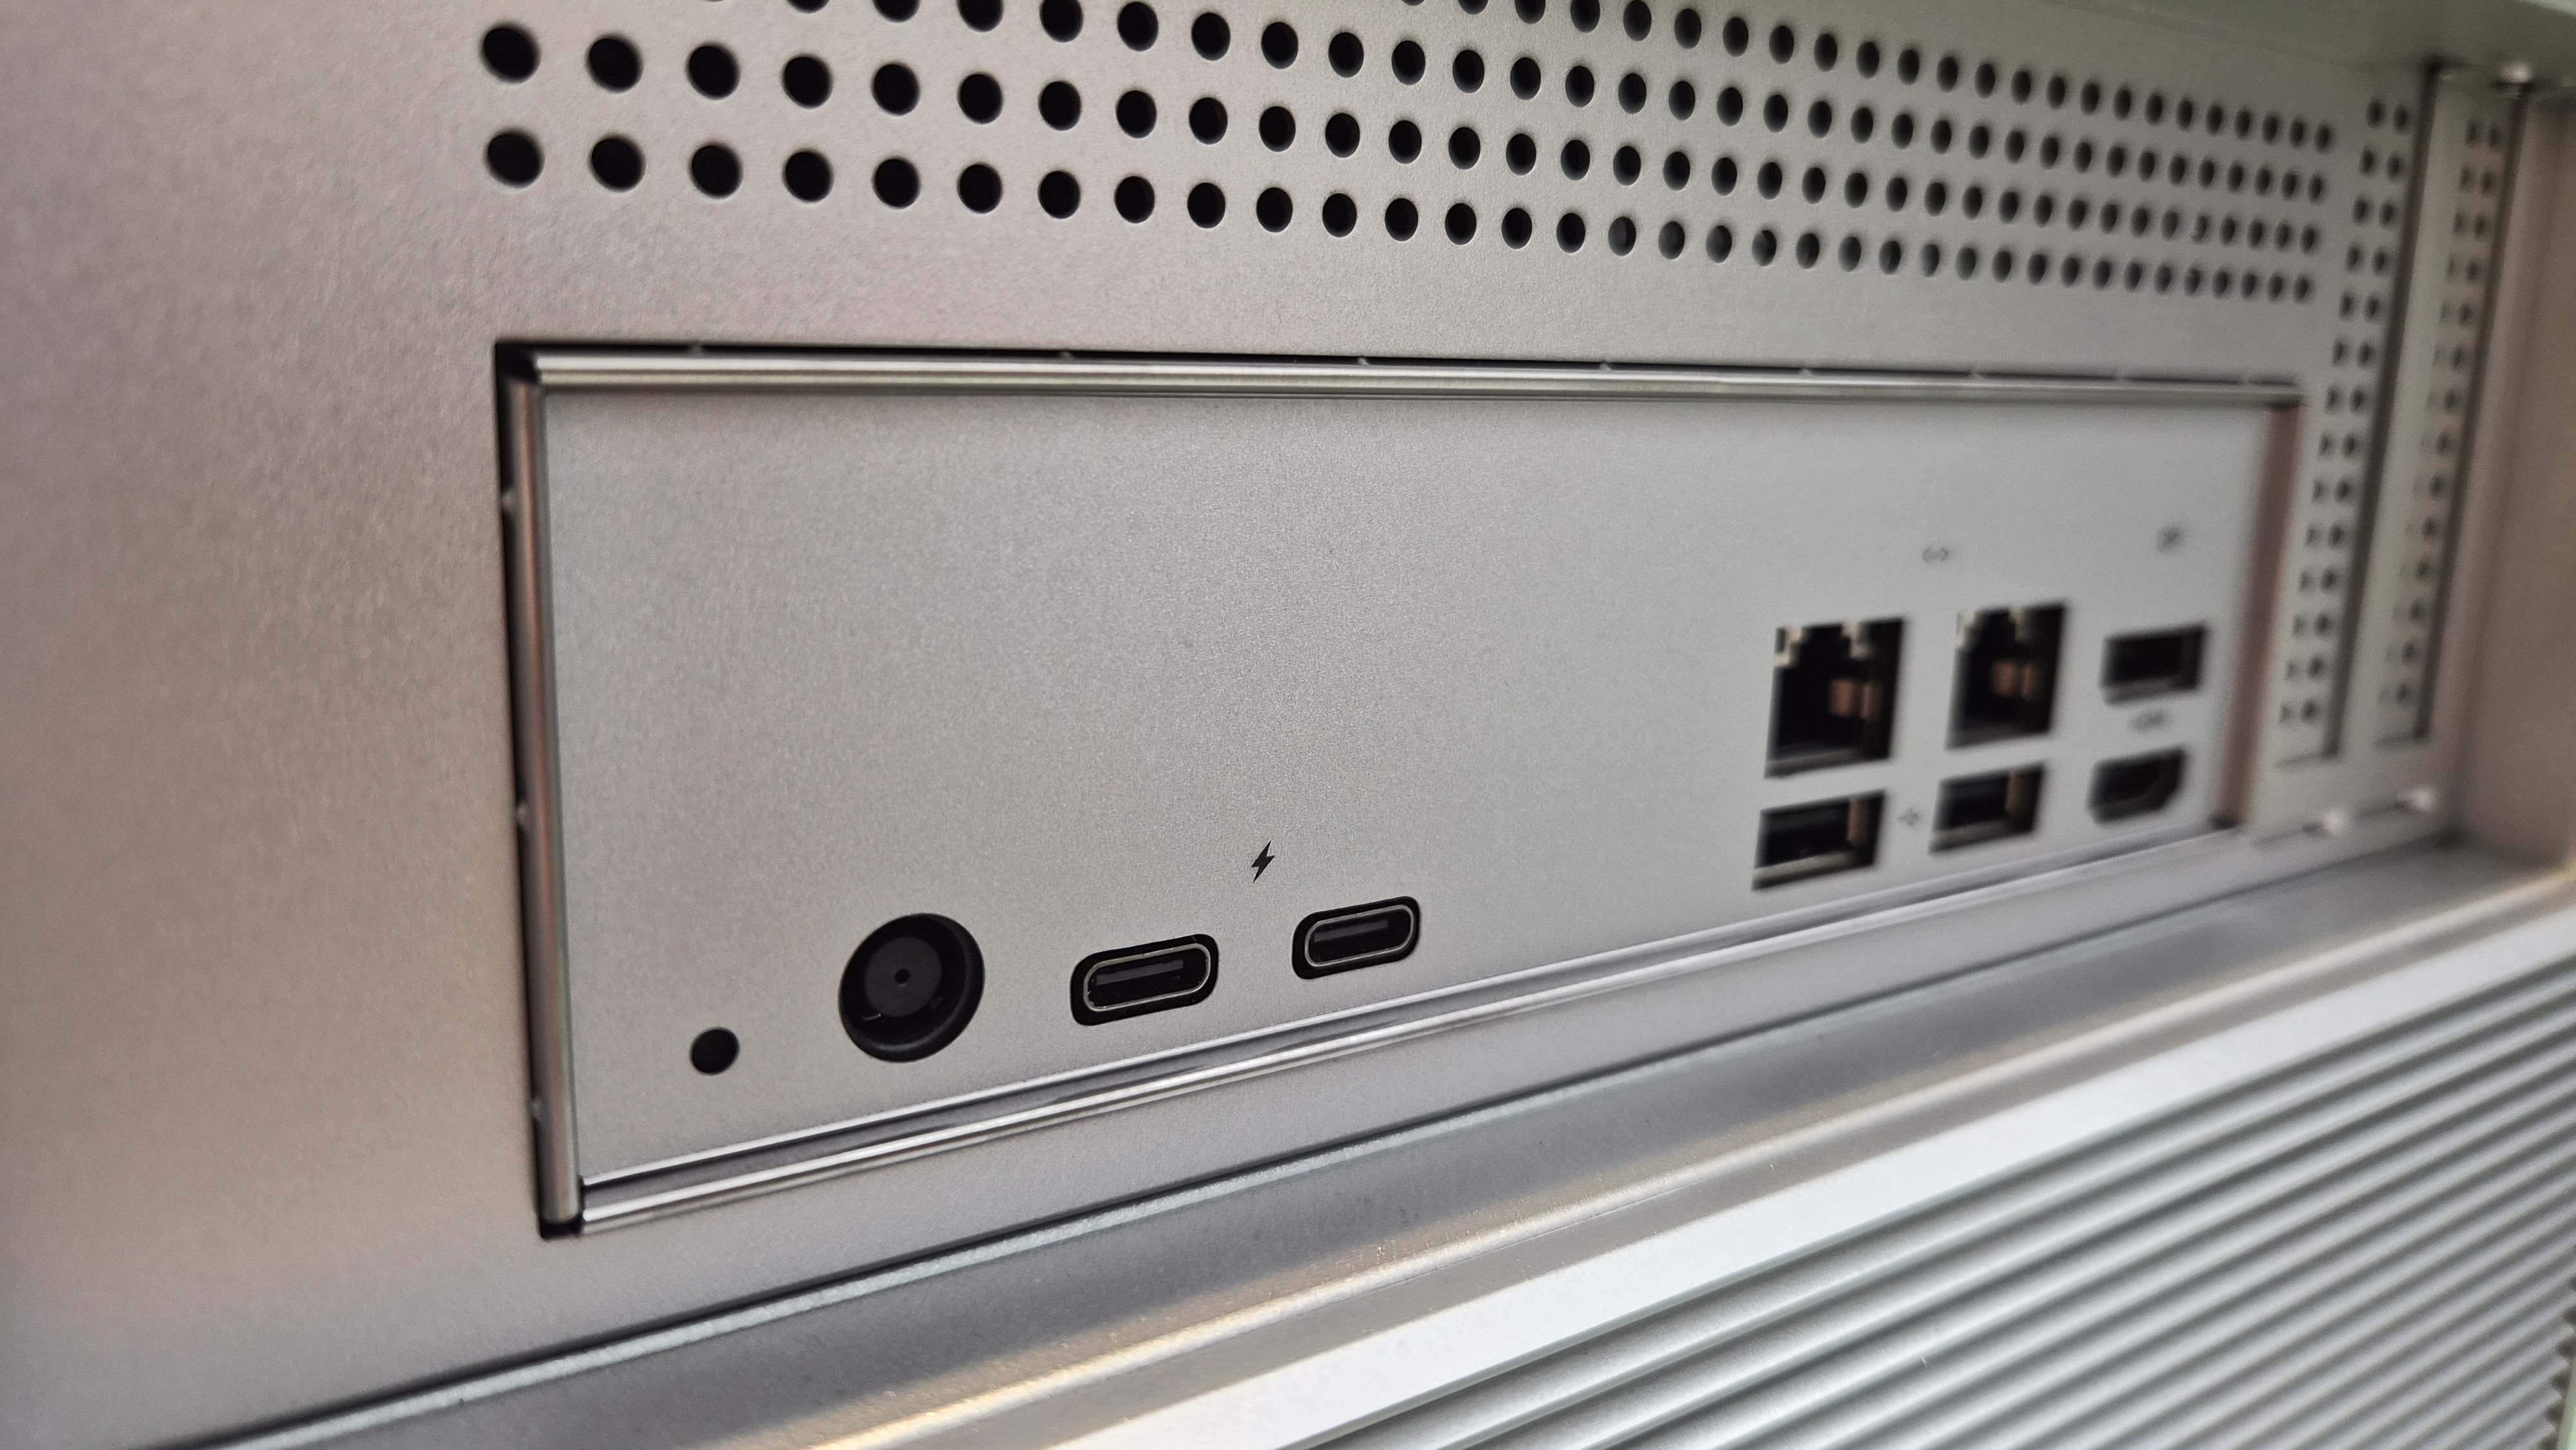
Close-up on the port layout.
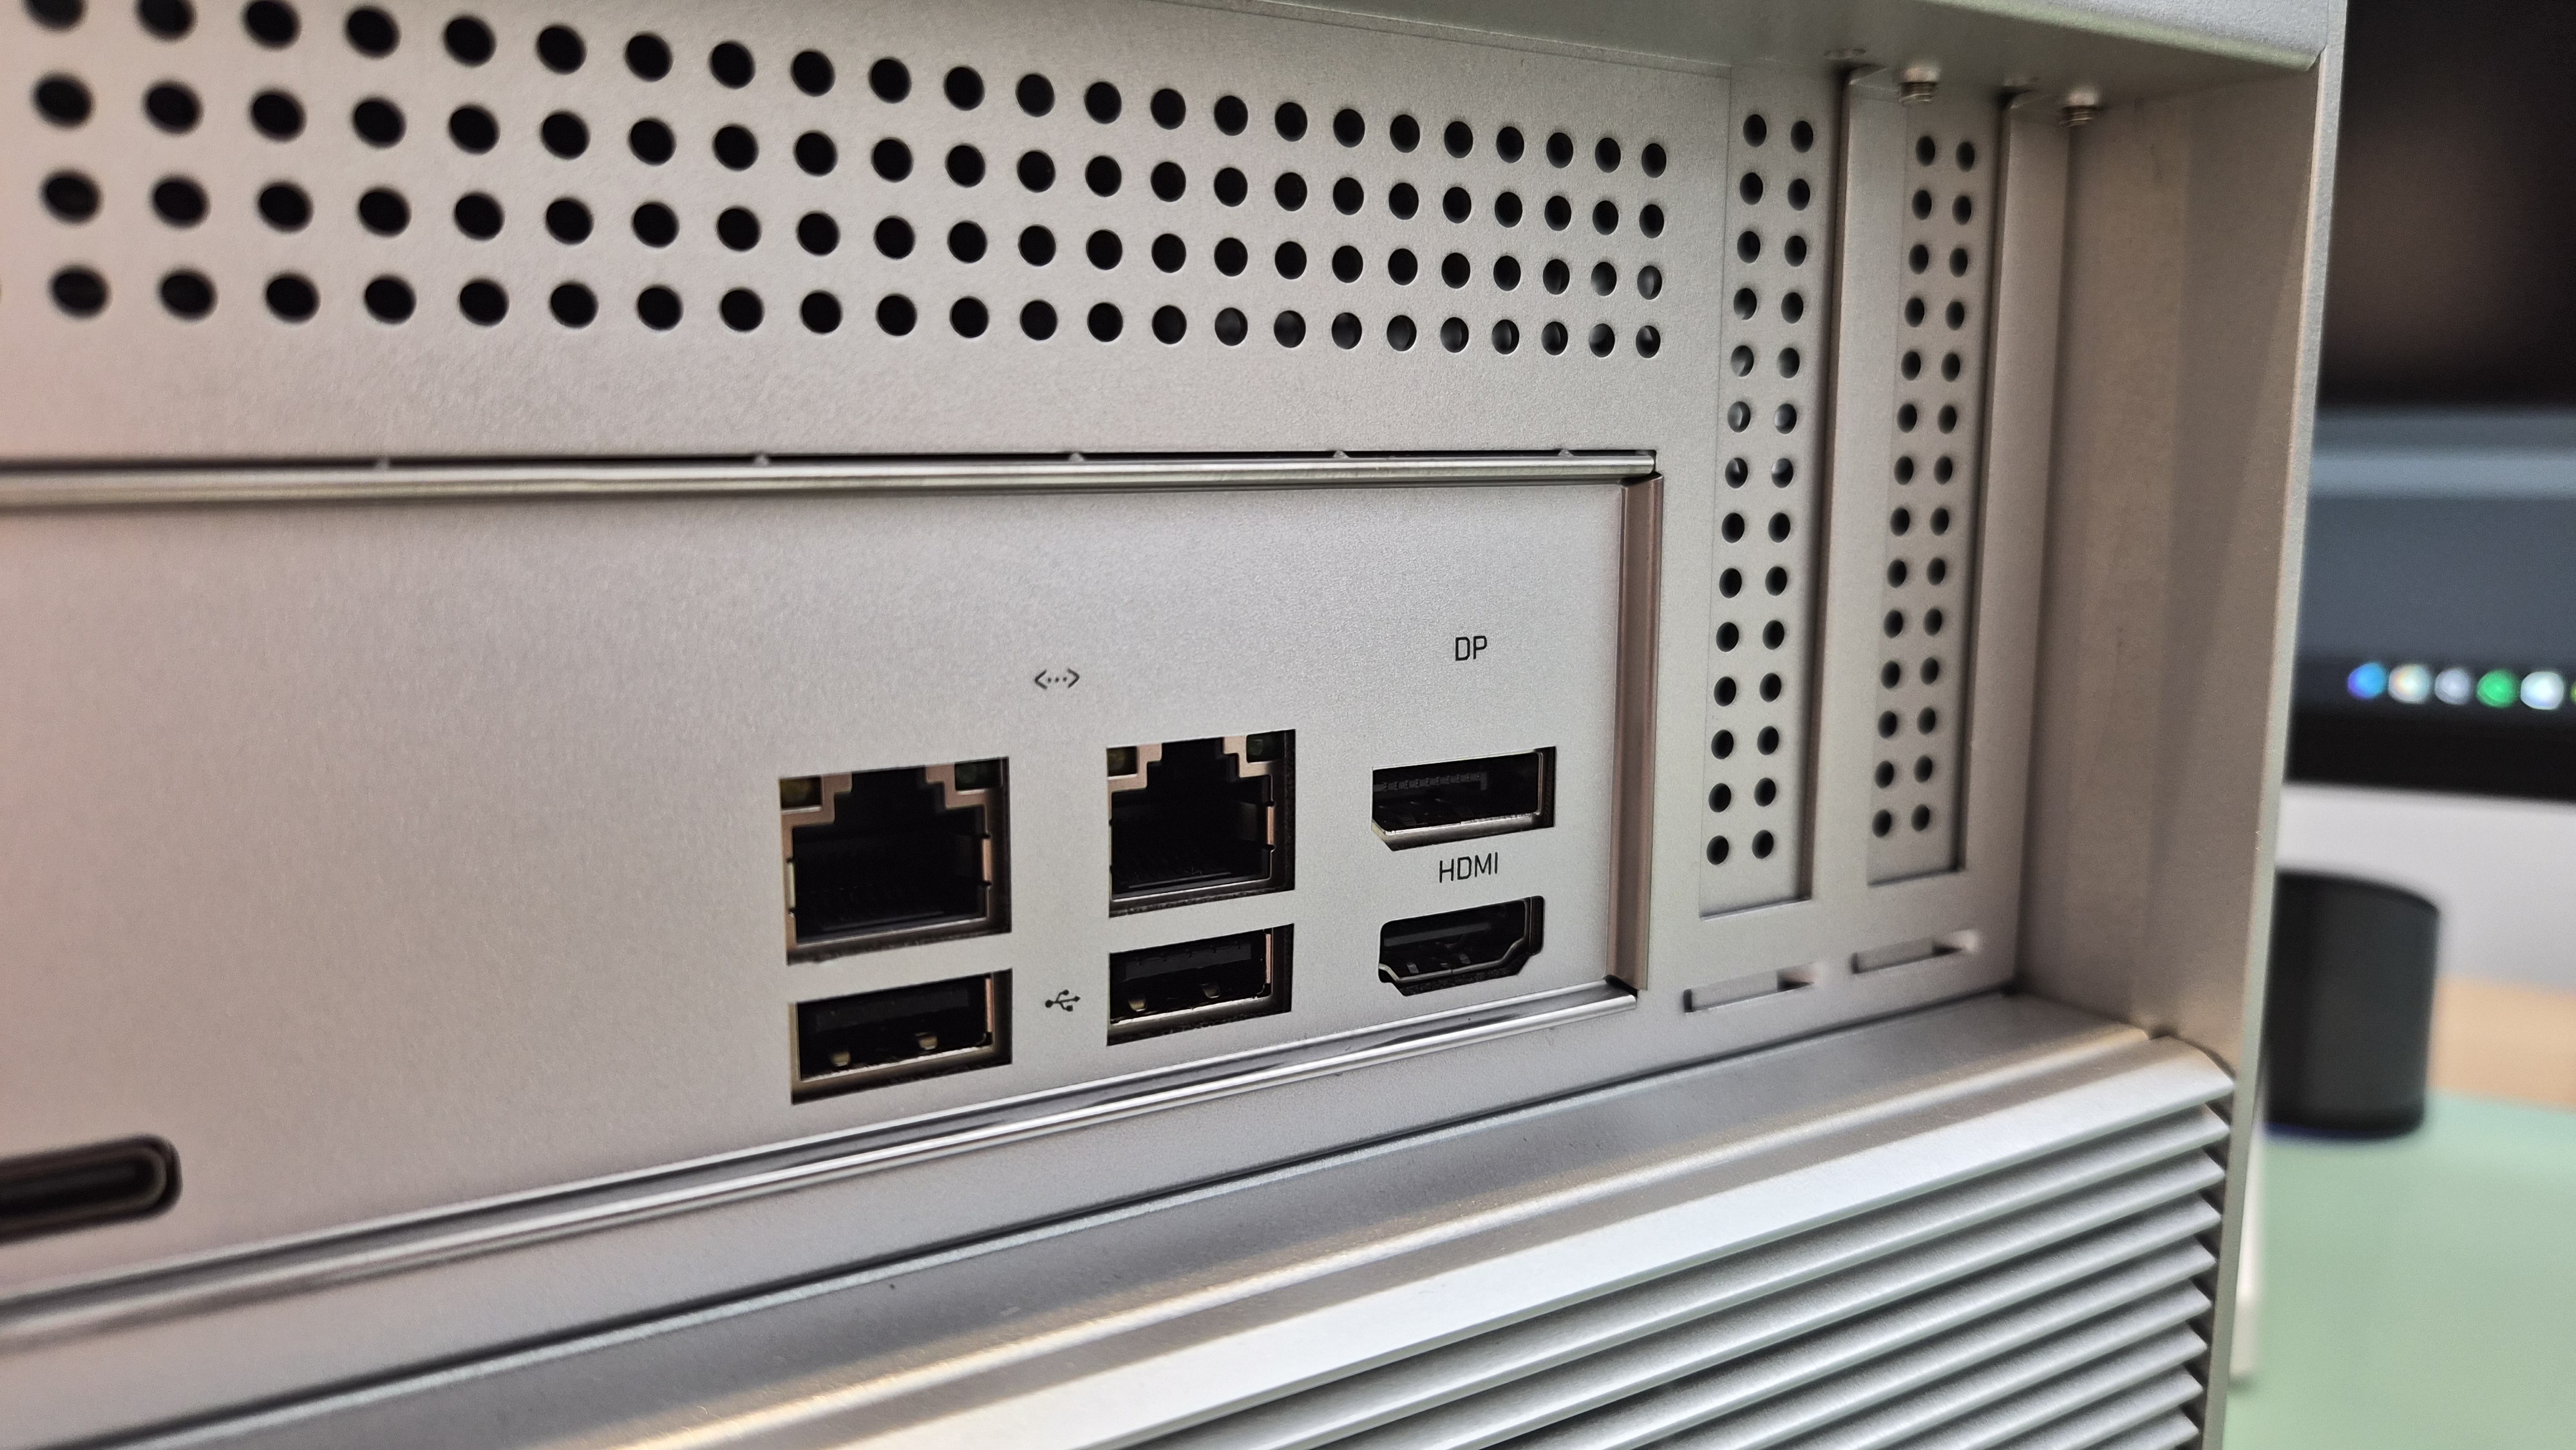
Dual 2.5GbE and the other back-panel ports.
The Mystery Standoffs
On one side of the case frame, there are four standoffs. They look intentional — not random, not leftover from manufacturing. They're spaced like they're meant for something specific.

Four standoffs on the case frame. Purpose unknown.
A fan bracket, maybe? An additional drive mount? Something Zima planned but didn't ship? I've stared at them from different angles and I genuinely don't know what they're for.
If anyone reading this has ideas, I'm listening.
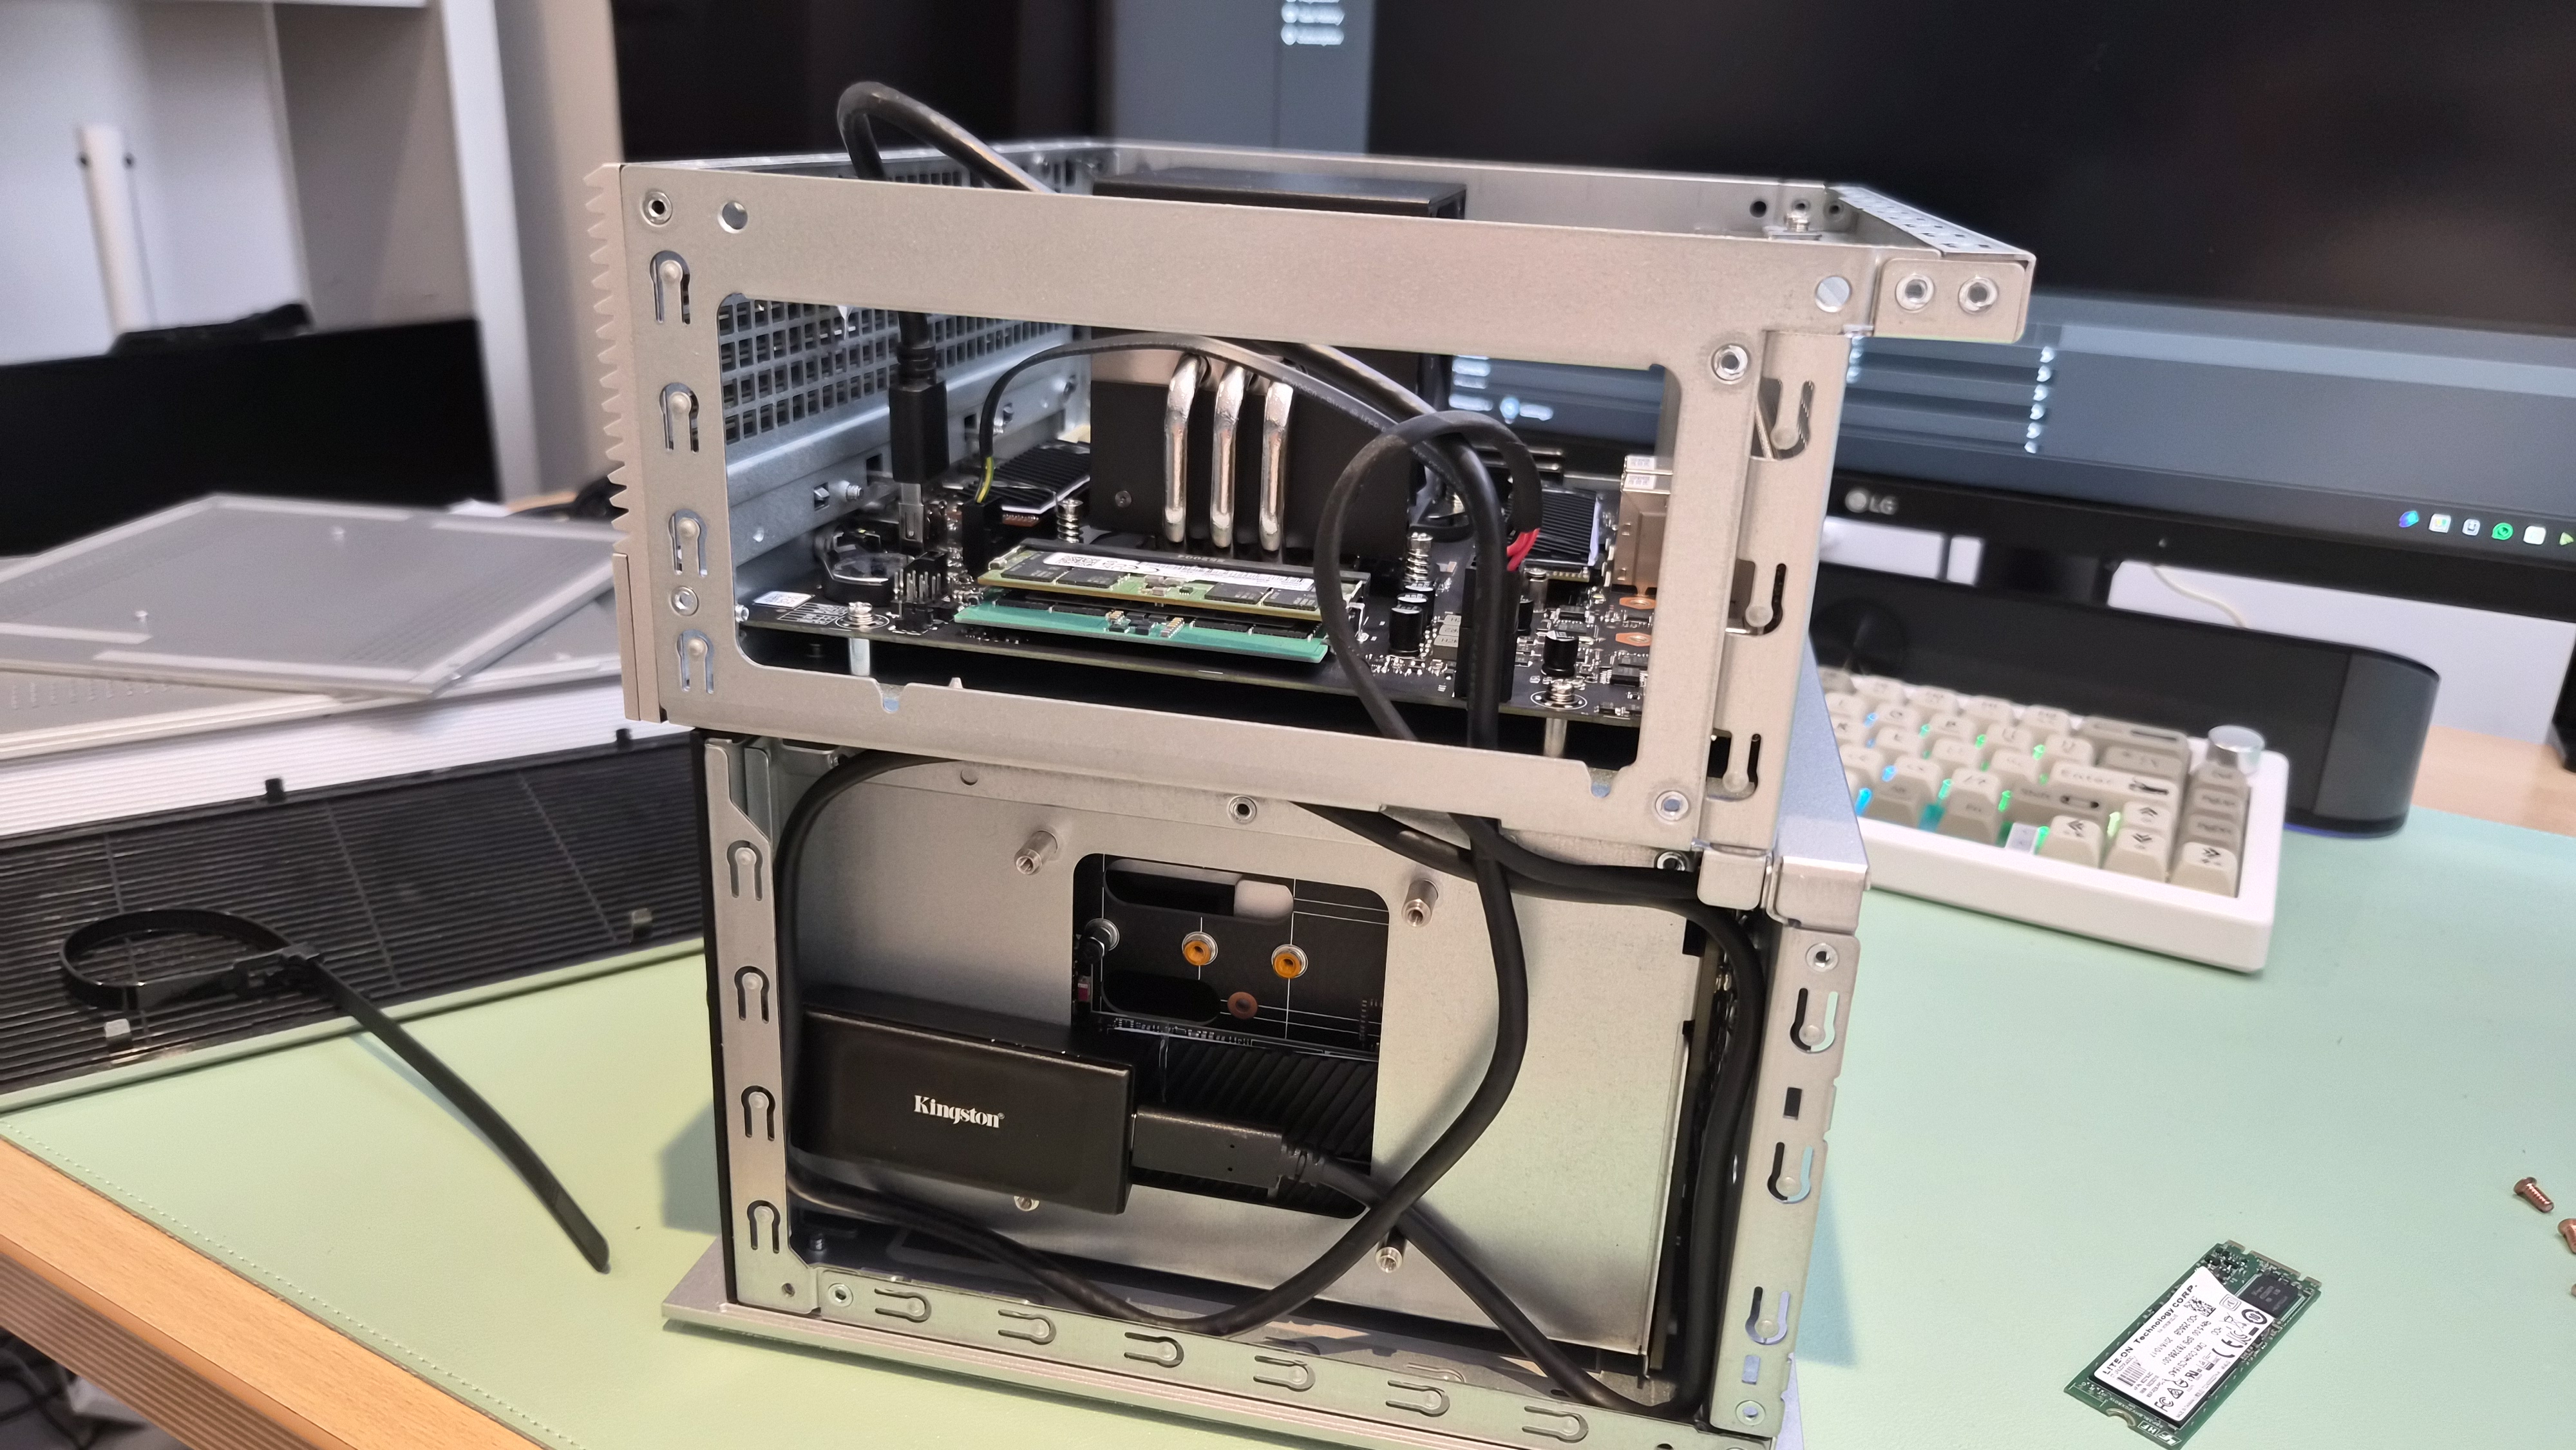
The Space
There's empty room inside this box. Not wasted space — the layout is clean and intentional — but enough that I keep wondering what a future revision could do with it.
The external power brick bothers me. Not functionally — it works fine. But when you look at the internal layout, you see the room. A small SFX power supply could fit. Something modular, something replaceable. It would open up GPU options with actual power delivery. It would let you swap in a quieter or more efficient unit if you wanted.
This isn't a complaint. The ZimaCube as it ships is well-built and well-designed. But it's also the kind of machine where you can see the next version in your head while you're looking at this one.
I've also seen people online swapping the CPU heatsink and fan for aftermarket options like the Noctua NH-L9i. The factory cooler is fine, but if you're chasing silence or planning to push the i3 harder, there's headroom to improve.
Extra Shots
A few more angles and details I captured during disassembly.


My Honest Take
This is a well-made machine with thoughtful details and a handful of genuinely puzzling decisions. The copper screws, the magnetic front, the interchangeable panels — those are the marks of people who care. The empty system fan header and the mystery standoffs feel like features that were designed for something and then left unused.
I keep coming back to that space inside. The ZimaCube is good. But you can see the outline of something better sitting just behind it — something with an internal power supply, proper fan control, and a couple more of those copper screws holding it all together.
Would I recommend taking yours apart? Absolutely. It's easy, it won't break anything, and you'll understand the machine better for it. You might also find your own mystery standoff.